Using 3D Cutaway
With Architect 3D’s 3D Cutaway tool, you peel away layers of your floor plan with ease. You can slice away layer after layer of your design from nearly any angle, making it easy to see room arrangements, furniture placement, and more. You can add as many cutaway lines as you’d like, but only one can be active at a time.
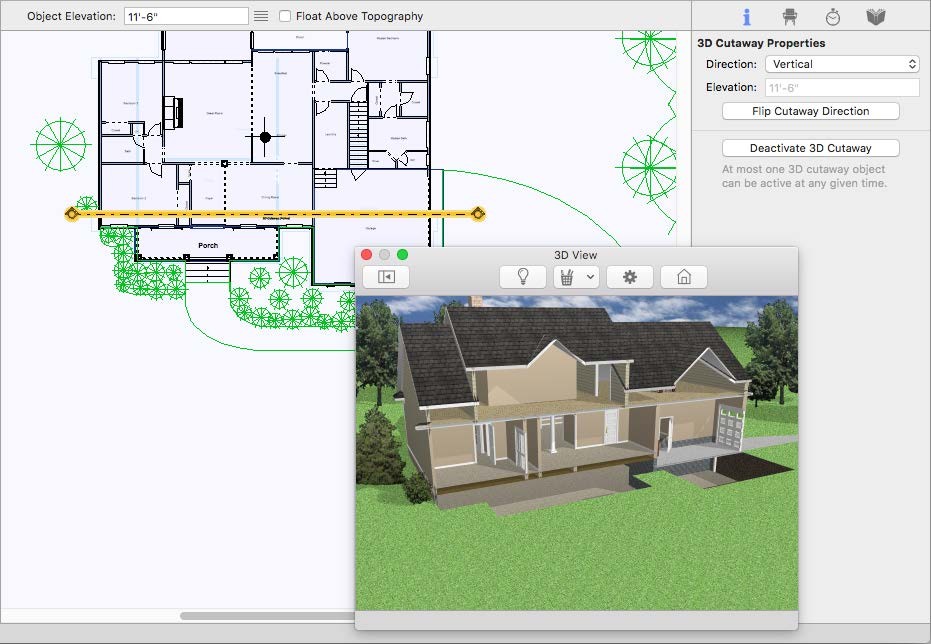
The 3D Cutaway button is available from the Editing Tools group and is placed in the design window where you define the length and angle of the cutaway line. There are three directions you can cutaway, which are available on the Properties pane when the cutaway line is selected.
 |
 |
 |
|---|---|---|
Vertical Horizontal From Top Horizontal From Bottom
Cutaway Vertically
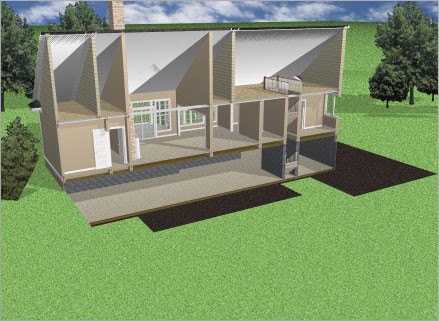
The vertical direction gives you a dollhouse view of your design, allowing you to see inside. When the vertical direction is active, arrows appear on the cutaway line showing you the direction you are cutting away. You can flip the direction easily on the Properties pane.
In this example the cutaway line is placed at the front of the house and is pointing towards the back
To place a vertical cutaway
1 Choose the 3D Cutaway button  from the Editing Tools group.
2 Use the Drag-to-Size drawing method to drag the cutaway line to the length and angle you want. Once placed, you can drag the line to a new position to adjust the cutaway.
3 On the Properties pane, choose Vertical from the Direction pop-up menu.
(optional) Click the Flip Cutaway Direction button to choose which direction is cutaway. The arrows on the endpoints of the cutaway line point towards the direction being cutaway.
4 Choose 3D Window View from the 3D View pop-up menu and set your 3D view
To control a cutaway display
1 Select the cutaway line you want to activate or deactivate.
2 On the Properties pane, click Deactivate 3D Cutaway to disable it or Activate 3D Cutaway to enable it.
(alternatively) Right-click the cutaway line and choose Deactivate 3D Cutaway to disable it or Activate 3D Cutaway to enable it.
Cutaway Horizontally
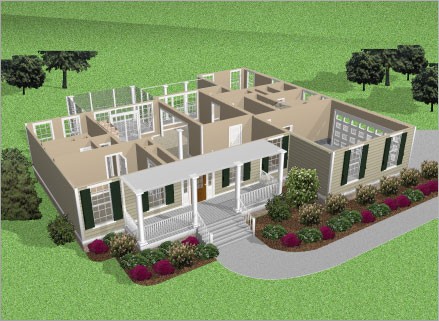
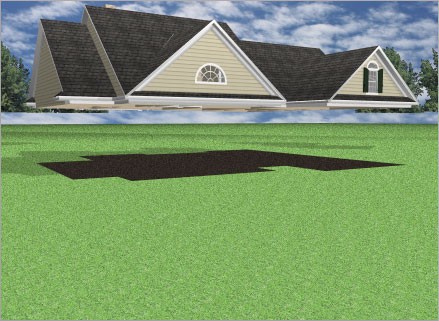
You can cutaway horizontally from the top or the bottom of your design. When one of the horizontal cutaway directions is selected, you can set the elevation for the cutaway line to control how much of your design is cutaway. The elevation is an absolute measurement from 0 rather than relative to the top or bottom of your design. For example, if your cutaway elevation is 8'-0", your design is cutaway from the top down to 8'-0", or from the bottom up to 8'-0".
When placing a cutaway line to cutaway the top or bottom of your design, the length and direction of the line are not important because the cutaway plane is based on the elevation of the line rather than the angle or length.
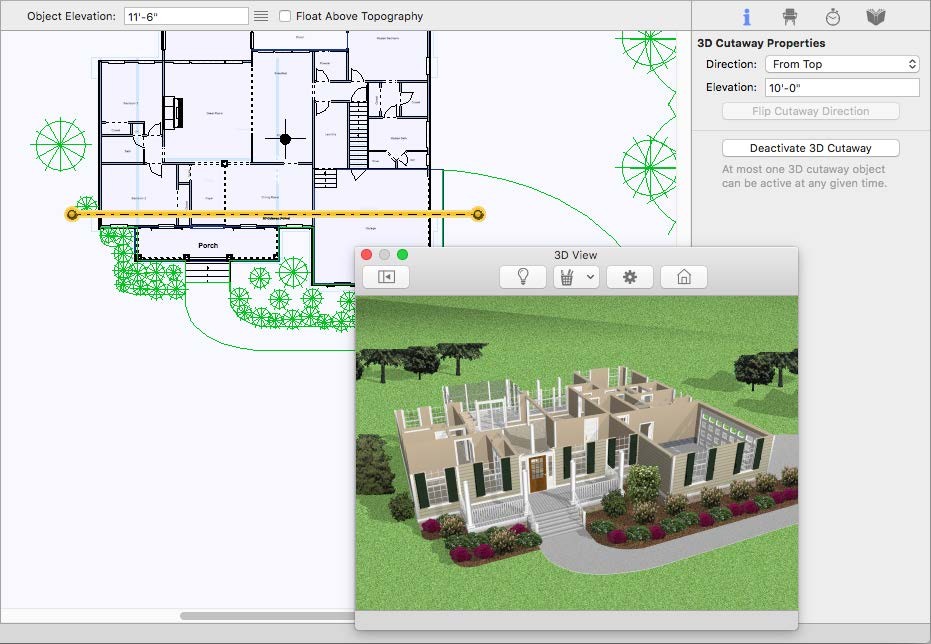
In this example the cutaway line is placed at an elevation of 10'-0" and cutting away from the top of the home
To place a horizontal cutaway
1 Choose the 3D Cutaway button from the Editing Tools group.
2 Use the Drag-to-Size drawing method to drag the cutaway line to the length and angle you want. Once placed, you can drag the line to a new position to adjust the cutaway.
3 On the Properties pane, choose From Top or From Bottom from the Direction pop-up menu. (optional) Enter the Elevation you want for the cutaway line and press the Return key.
4 Choose 3D Window View from the 3D View pop-up menu and set your 3D view.
To control a cutaway display
1 Select the cutaway line you want to activate or deactivate.
2 On the Properties pane, click Deactivate 3D Cutaway to disable it or Activate 3D Cutaway to enable it.
(alternatively) Right-click the cutaway line and choose Deactivate 3D Cutaway to disable it or Activate 3D Cutaway to enable it.