Customizing the Sun Position
Using the Sun Position and Lighting Assistant you can establish your site’s location, relative to the sun, virtually anywhere in the world. Then, adjust the lighting based on the month, day, even the hour. This ensures that your design will render with accurate sun angle and intensity any time, any day of the year. For example, if you want to see how shadows will look during the day while designing your landscape, or how the sunlight will look in a redesigned kitchen, you can use the Sun Position and Lighting Assistant to adjust the sunlight and see its effects in 3D.
Your Site Time and Location
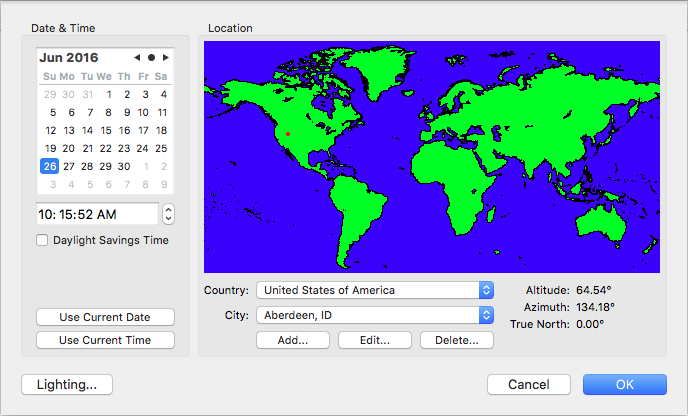
The position of the sun is determined based on the date, time, and location. When you choose the country and city for your location, the altitude and Azimuth coordinates are shown. You can even edit the details for existing locations or add a new location with detailed coordinates. When Daylight Savings Time is enabled, the time change is considered when positioning the sun.
To set the sun position to the current date and time
1 Open a 3D view and choose 3D > Sun Position and Lighting Assistant. A dialog appears.
2 Under Date & Time, click the Use Current Date button and then click the Use Current Time button. (optional) Select the “Daylight Savings Time” checkbox.
3 Click OK.
To set the sun position to a specific date and time
1 Open a 3D view and choose 3D > Sun Position and Lighting Assistant. A dialog appears.
2 Under Date & Time, click the arrow buttons to choose the month you want and select the date in the calendar.
3 Enter the time of day you want or select the hour, minutes, or seconds and use the stepper controls to increase or decrease the selection.
(optional) Select the “Daylight Savings Time” checkbox.
4 Click OK.
To specify your location
1 Open a 3D view and choose 3D > Sun Position and Lighting Assistant. A dialog appears.
2 Under Location, choose the country you want from the Country pop-up menu.
3 Choose the city you want from the City pop-up menu.
4 Click OK.
To add a location
1 Open a 3D view and choose 3D > Sun Position and Lighting Assistant. A dialog appears.
2 Choose the country in which you want to add a city.
3 Click the Add button  . A dialog appears.
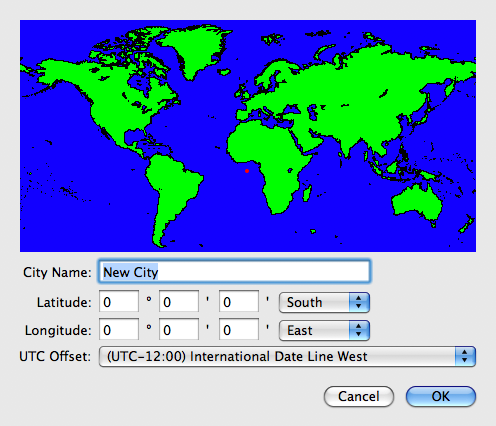
4 Enter the City Name in the corresponding field.
5 To specify the city’s location, click the map to set its coordinates.
(alternatively) Enter the city’s coordinates in the Latitude and Longitude fields. Be sure to choose North/South or East/West from the corresponding pop-up menu.
6 Choose the time zone from the UTC Offset pop-up menu.
7 Click OK.
To edit a location’s details
1 Open a 3D view and choose 3D > Sun Position and Lighting Assistant. A dialog appears.
2 Choose the country in which you want to edit a city from the Country pop-up menu.
3 Choose the city you want to edit from the City pop-up menu.
4 Click the Edit button  . A dialog appears.
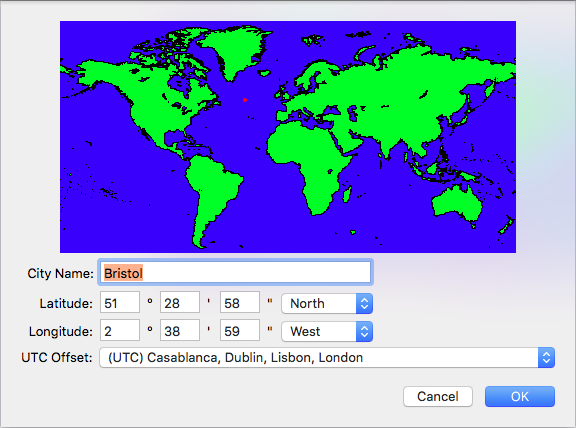
5 Enter the City Name in the corresponding field.
6 To specify the city’s location, click the map to set its coordinates.
(alternatively) Enter the city’s coordinates in the Latitude and Longitude fields. Be sure to choose North/South or East/West from the corresponding pop-up menu.
7 Choose the time zone from the UTC Offset pop-up menu.
8 Click OK.
To delete a city
1 Open a 3D view and choose 3D > Sun Position and Lighting Assistant. A dialog appears.
2 Choose the country from which you want to delete a city from the Country pop-up menu.
3 Click the Delete button  . A dialog appears.
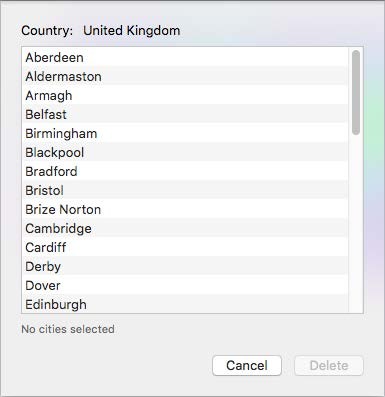
4 Select the city you want to delete.
Hold down the Shift key, as you click, to select more than one city.
5 Click Delete and then click Delete again, when asked to confirm the deletion.
6 Click OK.
Adjust Sun Lighting Settings
You can fine-tune the lighting settings so each hour is representative of your location at the time. Here you can control the amount of Scene Brightness, Shadow Contrast, and Shading Intensity to replicate the intensity of the sun and its effects at a particular time.
Note : To see the lighting changes in your current design, be sure the “Adjust your design’s lighting base on these values” checkbox is selected.

To adjust lighting settings
1 Open a 3D view and choose 3D > Sun Position and Lighting Assistant. A dialog appears.
2 Click the Lighting button and then choose the tab for the lighting you want to adjust.
3 Drag the sliders to adjust an hour’s brightness, contrast, or intensity.
(optional) Select the “Adjust your design’s lighting based on these values” checkbox to update your current drawing.
4 Click OK, then click OK again in the dialog that appears.