Auto-Roof Properties
Automatic roofs are built instantaneously, however can control the settings that are used and update the roof if you need to adjust it. Auto-roof properties are controlled in the Automatic Roof Options window.
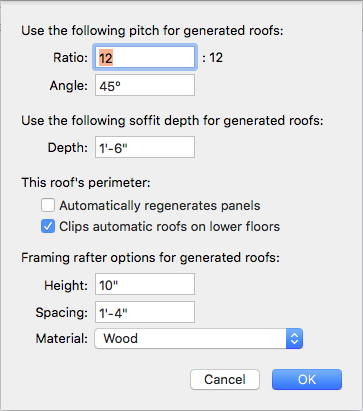
Roof Pitch Enter the Ratio or Angle to specify how you want to set the roof pitch and then type the pitch you want in the corresponding text field.
Soffit Depth Enter the depth you want in the Depth field.
Roof Perimeter
When the “Automatically regenerates panels” checkbox is selected, the roof panels are created automatically, and updated automatically if the perimeter walls are moved or resized. When deselected, you must click the Generate Roof button on the Properties pane to generate the panels manually.
When “Clips automatic roofs on lower floors” is selected, roof panels are removed from the interior of other levels so a roof is not built inside.
When the “Generates eaves” checkbox is selected, eaves are automatically generated with the roof.
Framing Options control the underlying roof framing. To see the roof framing you must use the Framing render style in the 3D view. For more information, see “Accessing the 3D Rendering Styles”
Rafter Height defines the height of the rather boards.
Rafter Spacing defines the distances between each rafter board.
Rafter Material pop-up menu specifies the rafter building material.
Note : For truss roof framing, you should create a roof using one of the roof shape tools or freehand roof tools.
To edit automatic roof properties
1 In the design window, click near the exterior walls perimeter. The entire perimeter appears highlighted.
2 Click the Properties tab in the right sidebar and, under Auto-Roof Properties, click the Roof
Options button.
3 Edit the options as needed and then click OK.