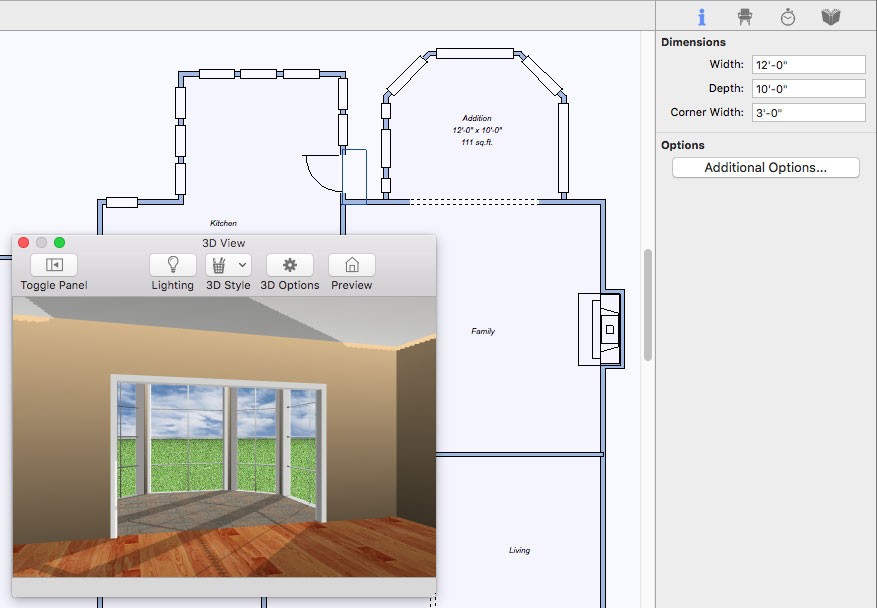
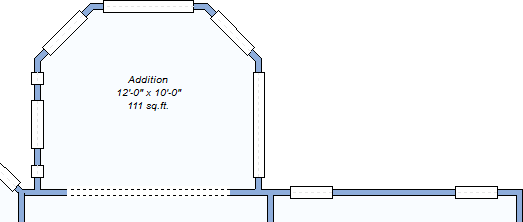
Placing a Room Addition
Using the Room Addition Tool, you can add space to your design with just two mouse clicks. Quickly add space then edit the room along with the rest of your design, or customize the room addition settings first, and then place a complete room that is ready for finishing touches. Room additions are wall attachments, so they must be placed along an existing wall.
Room Addition Settings
Before placing a room addition, you can customize the settings or edit the addition components like you would other components in your drawing by clicking the Additional Options button on the Properties pane. Below is an overview of the available options.
Walls tab
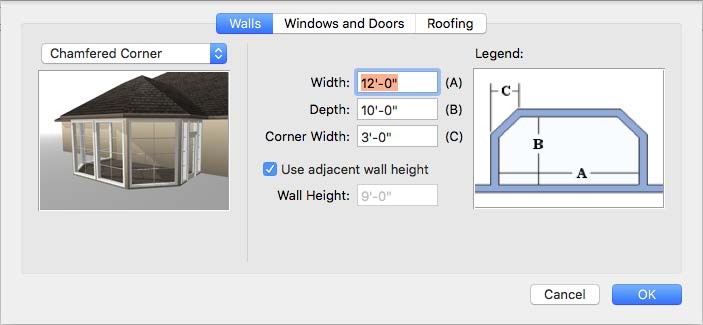
Room Shape Choose between rectangular or chamfered corner walls.
Room Sizing The fields correspond to the letters in the diagram. When the “Use Adjacent Wall Height” checkbox is selected, the room addition walls inherit the height of the wall where it is attached. To specify a different room addition wall height, deselect the checkbox.
Windows and Doors tab
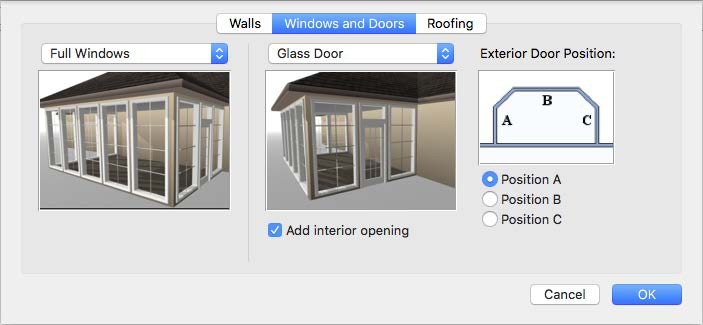
Window Style Choose which style windows are placed on the walls (none, full-size, 3/4, or fill the walls with windows).
Door Style Choose which style exterior door is included, if any.
Exterior Door Choose the location of the exterior door. The radio buttons correspond to the letters in the diagram. You can also choose to include an interior opening by selecting the “Add Interior Opening” checkbox. This creates a cased opening leading to the addition.
Roofing tab
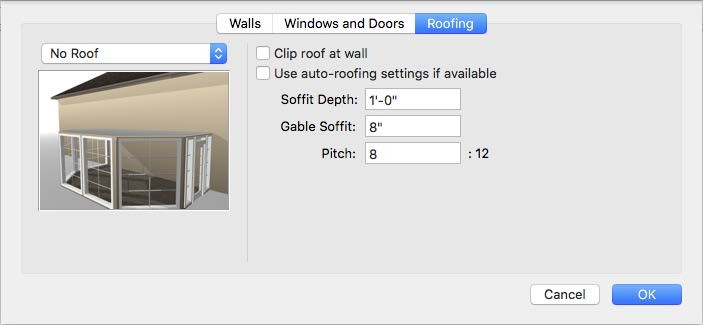
Roof Style Choose the roof style for the addition (none, flat, hip).
Roof Options The following options are available:
The “Clip Roof at Wall” checkbox allows you to stop the roof where the room addition attaches to the wall. This is useful when the anchoring wall is part of a multi-floor design where the roof is not at the same level as the addition’s roof. When this option is deselected, the addition’s roof extends into the roof like a hip connector.
Select the “Use auto roofing settings if available” checkbox to use the automatic roof settings that have been set. For information on auto-roofs, see “Auto-Roof Properties”
Type the Soffit Depth, Gable Soffit, and Pitch you want in the corresponding fields.
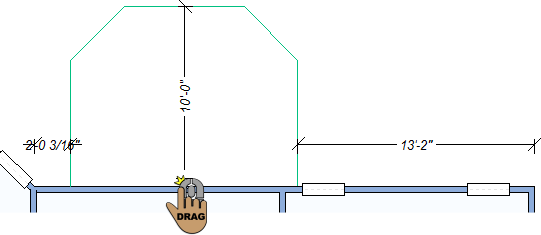
To place a room addition
1 Choose the Room Addition button  from the Floor Tools group. Its properties appear on the Properties pane.
(optional) Click the Additional Options button on the Properties pane to edit the room addition options. For more information, see “Room Addition Settings”
2 Using the Drag Along Wall drawing method, drag along a wall and release on the side of the wall where you want the addition placed.
Once placed, you can edit the walls, doors, windows, and roof just as any other part of your drawing.
 |
 |
|---|---|