Applying Building Materials
With Architect 3D, customizing the exterior of your home is a simple drag-and-drop procedure. Available materials include brick, stucco, gravel, roofing, and so on.
Available materials include backgrounds, brick, stucco, gravel, roofing, and many more.
You can even apply two different materials to a wall, using the Wainscoting feature. For more information, see “Applying Trims”
You can create and import your own custom materials and background images. When importing materials, the User Library is the location where materials are imported. If you do not have a User Library folder created for Materials, you can create a new folder when importing. For more information on working with the libraries, see “Organizing Library Content”
Materials are applied by dragging a material onto a surface in the 3D view, so you must have a 3D window open to access the materials. You can change a material by applying a new material right on top of an existing material.
Note : To increase the accuracy of applying materials, zoom in closer to the surface you are texturing.
If SmartWand is enabled, you can choose to apply to the individual surface or to all similar surfaces. For more information, see “Using the SmartWand”
To apply materials
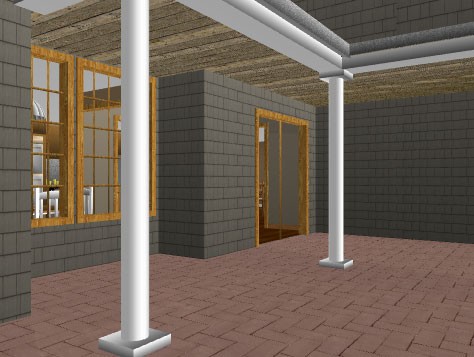
1 Open a 3D view and navigate so you can see the surface where you want to apply a material.
2 In the right sidebar, click the Content tab and choose Materials from the pop-up menu. The Materials libraries appear.
Some of the library categories are organized into sub-categories, contained within disclosure triangles, the Brick and Stone library, for example.
3 Choose the library you want and its contents appear in the Preview Bar.
4 Scroll through the material previews and drag the one you want onto a surface in the 3D view. The material is applied.
To apply a series of the same material
You can apply a series of one material to multiple surfaces using Auto-Click Placement. For more information, see "AutoClick Placement”
To import a material
1 Choose File > Import > Image to 3D Material Library. A dialog appears.
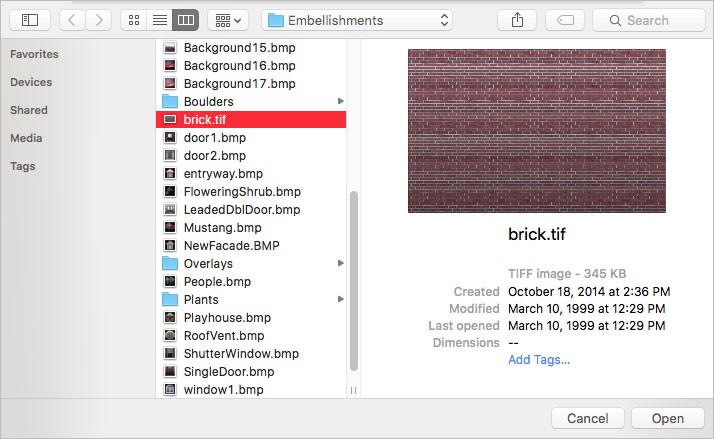
2 Select the file you want and click Open. The material appears in the Import Material to Library dialog.
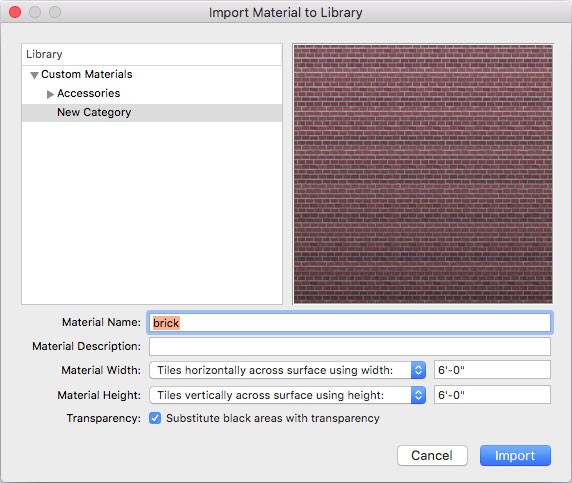
Library defines where the material is stored so you can access it. All imported materials are saved to the Materials User Library. Choose the Library where you want to save your new material.
Material Name Edit the name of the material.
Material Description Enter a description of the material. This is the text that appears in the Status Bar when the material is hovered over in the Preview Bar (up to 128 characters).
Material Width Choose to have the material tile horizontally across the surface where it is applied or stretch across the surface where it is applied. When a materials is tiled across the surface, you can specify the size of the tiles.
Material Height Choose to have the material tile vertically across the surface where it is applied or stretch across the surface where it is applied. When a materials is tiled across the surface, you can specify the size of the tiles.
Transparency checkbox, when selected, designates all black areas (RGB=0,0,0) of the material image as transparent. When deselected all black areas appear as part of the material.
3 Choose the Library where you want to save your new material and set the material options you want and then click Import.
Note : To edit a material’s details after it has been imported, see “User Library”
To import a 3D background
1 Choose File > Import > Background Image. A dialog appears.
2 Select the file you want and click Open. A dialog appears.
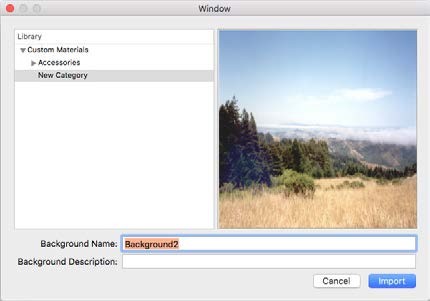
Library defines where the background is stored so you can access it. All imported materials are saved to the Materials User Library.
Background Name Edit the name of the background.
Background Description Enter a description of the background. This is the text that appears in the Status Bar when the background is hovered over in the Preview Bar (up to 128 characters).
3 Choose the Library where you want to save your new background and set the background options you want and then click Import.