Using the Grid
With Architect 3D you can set specific grid properties that aid in drawing your home plan. You can set points, based on the reference grid, which is useful when you want to make sure certain points are placed precisely.
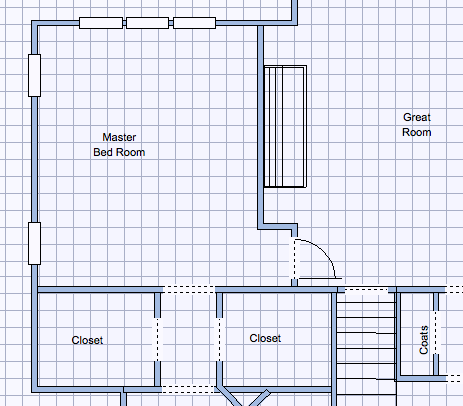
Grid settings have a direct impact on the ease of aligning objects, snapping objects to the grid. When using the Snap to Grid feature, items that are dragged and dropped on the design window are automatically snapped, or placed, to align with the current grid. By default, Snap to Grid is on.
You can customize grid settings by selecting grid spacing, grid style, and hiding or displaying the minor grid lines.
To display the grid
- While nothing is selected in the design window, click the Properties tab and select the “Display Grid” checkbox.
To hide the grid, deselect the checkbox.
(alternatively) Choose 2D > Show Grid. To hide the grid, choose Hide Grid from the menu.
To move objects/features along the grid
1 Choose the Select Objects button from the Editing Tools group.
2 Click to select the object you want to move.
3 Press the arrow keys on your keyboard to move the object into position.
Note : Each time you press an arrow key, the selection moves one increment that you have set in he Snap Grid settings.
To enable or disable Snap to Grid
When snap to grid is enabled, you can use the grid lines (and minor grid lines) as a reference to move selections based on those lines. Selections move based on the Snap Grid settings, which you can control by editing the grid settings (see “To configure grid settings”).
- While nothing is selected in the design window, click the Properties tab and select the “Snap objects to grid” checkbox.
To disable snap to grid, deselect the checkbox.
- Choose 2D > Snap to Grid. The feature is enabled when a checkmark is visible and disabled when a checkmark is not visible.
To configure grid settings
1 Choose 2D > Grid Properties.
(alternatively) Right-click the design window and choose Grid Properties from the shortcut menu.
2 Edit the grid settings and then click OK.
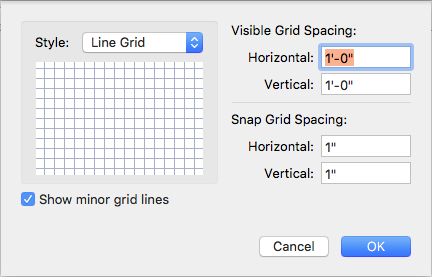
Style specifies whether the grid uses lines or dots.
Note : Grid Dots/Lines can be set to as low as 1 inch (English), 0.02 m (Metric), and still be viewable. Grid Dots/Lines can be set as high as 500 inches (English), 12.70 m (Metric).
Visible Grid Spacing defines the horizontal and vertical measurements for the grid. This is the distance between each grid line/dot.
Note : Initially, the grid is set at 12" for English and .03m for Metric, making it easy to visualize each plan square as exactly one square foot, but can be customized to meet your particular design needs.
Show minor grid lines checkbox controls the display of the snap grid.
Snap Grid Spacing defines the horizontal and vertical measurements for the minor grid lines. Items you draw or drag into the design window snap to the measurements you’ve defined here.
Note : Snap settings can be set as low as 0.0625 (1/16 inch) English, 0.01 meter (1 cm) Metric, and still show visible movement along the grid. Snap settings can be set as high as 500 inches (English), 12.70 meter (Metric).