Design Colors
When creating a design, organization is not only important, but extremely helpful. To enhance organization and efficiency, many of the features in Architect 3D are color-coded so they are easily noticeable in the design window. For example, each of the floor plans appear in a different color in the design window. The Foundation plan appears in red, while the Floor plan is black, and Electrical components appear in orange. So, at a glance you can distinguish one floor plan from another. Each of these colors can be customized.
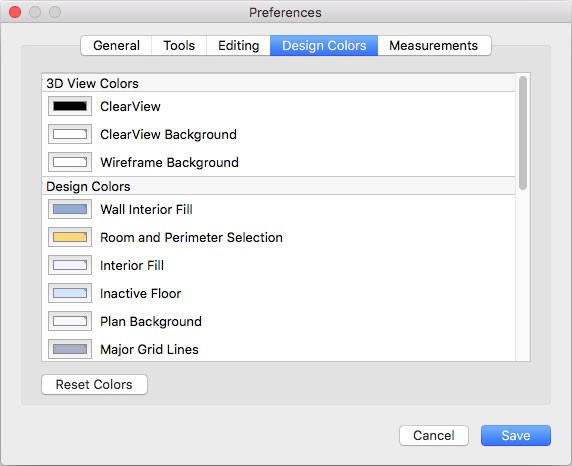
Along with the plans, the plan background, inactive floors, interior fill, topography lines, ClearView, Wireframe Background, and grid colors can be customized.
To change a design color
1 Choose Architect 3D > Preferences. The Preferences dialog appears.
2 Click the Design Colors tab and choose the thumbnail for the color you want to change. The Colors window appears.
For example, if you want to change the color that Plumbing components appear in the design window, click the color next to Plumbing Plan. The current color appears in the Colors window, as seen below. There are five panes of coloring options.
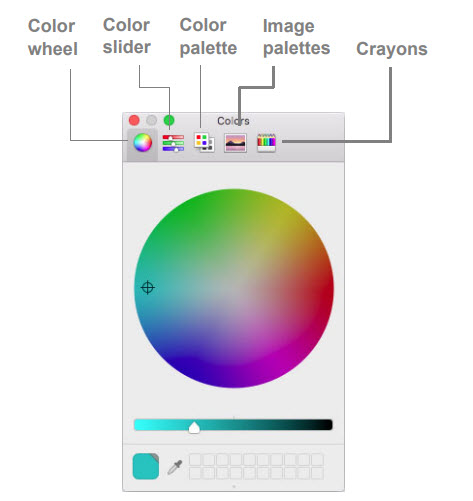
3 Select the pane you want to use and choose a color, then close the window.
4 Click Save to save your preferences.
To reset all colors
1 Choose Architect 3D > Preferences. The Preferences dialog appears.
2 Click the Design Colors tab, then click the Reset Colors button. Each feature’s color is reset to its default color.
3 Click Save to save your preferences.