AutoSnap and Alignment Options
Snap points are automatically enabled as you design. Snap points are designated points or “hot spots” where your cursor can lock-in, for help with accurate placement. Laser alignment is also available for easily aligning segments as you draw. Laser alignment and auto snaps can be enabled or disabled from the Preferences window.
Auto Snaps
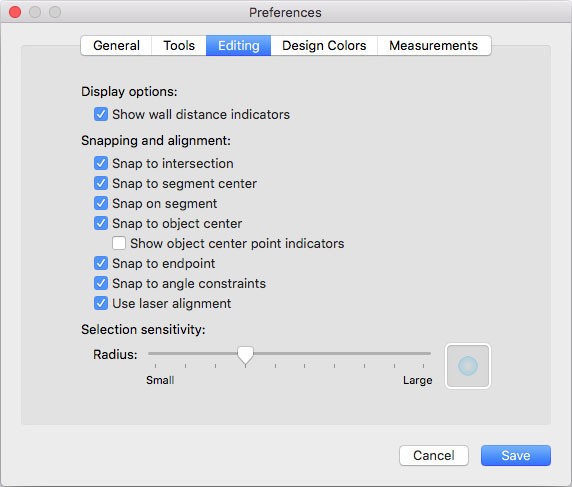
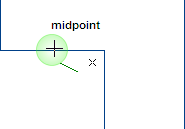
By default, when snap points are enabled, the midpoint and endpoints appear when your pointer reaches these points. You can control these, and other “hot spots” or points, to which your pointer snaps in the Preferences dialog, which is available in the Architect 3D menu.
To control automatic snaps
1 Choose Architect 3D > Preferences (or press Command-Comma (,)). The Preferences dialog appears.
2 Click the Editing tab to access the snap options.
3 Under Snapping and alignment, select or deselect the snap points you want and then click Save.
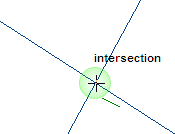
Intersections displays the intersection of two lines.
Segment Center displays the center point along a segment, as you drag.
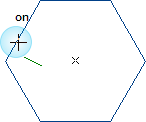
On segment displays when the crosshair is actively on a segment as you drag.
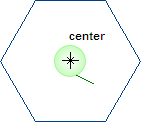
Object Center displays the center of an object as you drag to place within its bounds. A useful example would be centering a lamp on a table.
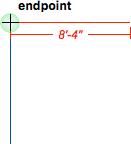
Endpoint displays the endpoint of an object as you drag to place within its bounds. A useful example would be drawing walls.
Snap to angle constraints snaps the cursor in 5-degree increments when drawing segments at an angle. While this snap constraint is enabled you can use keyboard shortcuts to override this constraint or lock a segment at an angle.
- Hold the Shift key while drawing to disable snap points and laser alignment
- Hold the Command key to lock a segment angle while dragging

Selection Sensitivity Snap detection radius controls the size of the snap point detection area. To configure the selection sensitivity radius, drag the slider to decrease or increase the radius.
Laser Alignment
In addition to snap points, you can control the laser alignment that appears when your pointer is in alignment with an existing point, as you are dragging. In the example below, the cursor is positioned at the bottom of the drawing, where two end points align. When the cursor is positioned at one of the end points and laser alignment is enabled, the alignment is displayed.
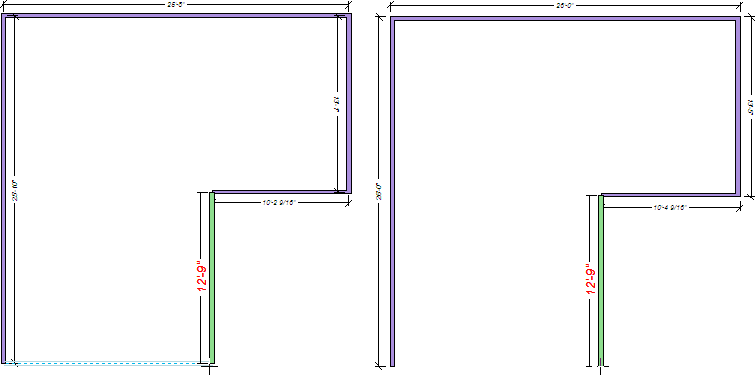
Alignment enabled Alignment disabled
To control laser alignment
1 Choose Architect 3D > Preferences (or press Command-Comma (,)). The Preferences dialog appears.
2 Click the Editing tab to access the snap options.
3 Select the “Use lase alignment” checkbox to enable the laser line, or deselect to disable, and then click Save.