Plants Libraries
Architect 3D includes thousands of plants to make designing the landscape easy and fun. The Standard Library offers many categories of plants to add to your design and tools are available to help you choose the ones that grow best in your region. Additionally, the Plants User Library allows you organize plants into your own categories and edit plant details. You can also import a plant image and a corresponding plant information file to add your own plant(s).
Plants can be dropped into the design window or dropped into a 3D view window. When dropped into a 3D view, the plant elevation is based on the location of your pointer. If dropped onto an elevated planter bed, for example, the plant is automatically placed at the planter’s top surface elevation.
Tip: If hover your cursor over the preview of the plant its name is displayed in the Status Bar.
Note : You can see all of the plants in your drawing by showing the Plant Inventory Bar. For more information, see “Plant Inventory”
| Below are some references that may be useful as you design |
|---|
| Elevating Objects Viewing Hardiness Zones Growing the Landscape Filling a Shape with Plants |
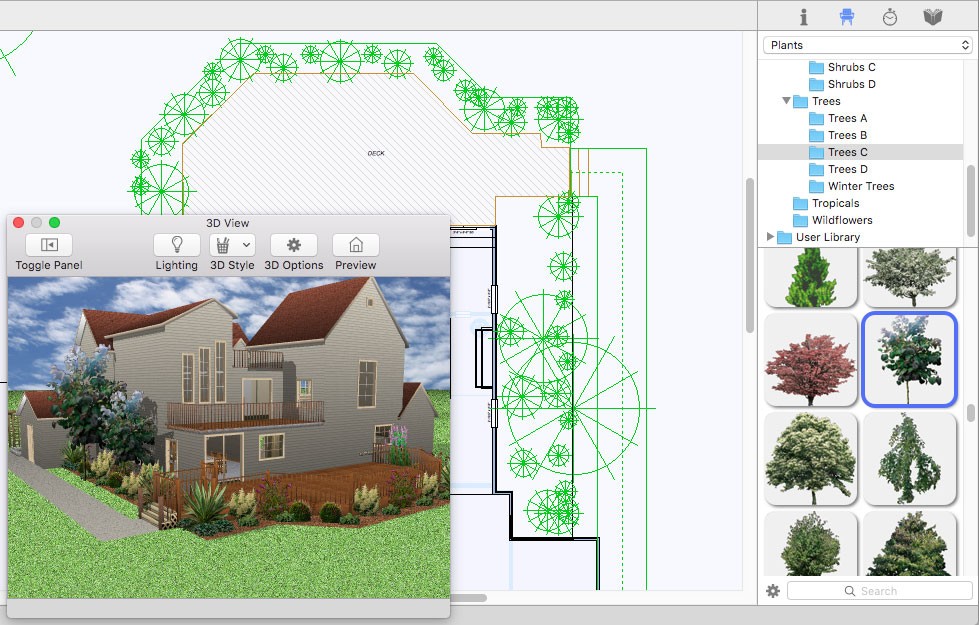
To add plants
1 In the right sidebar, click the Content tab. A pop-up menu is available in the pane that appears.
2 Choose Plants from the pop-up menu and then choose the library category you want.
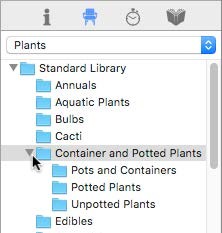
Most of the library categories are organized into sub-categories, contained within disclosure triangles, for example, the Container and Potted Plants library. To access those libraries, click the disclosure triangle.
3 Scroll through the previews in the Preview Bar and drag the plant you want into the design window. (optional) Drag the plant you just placed to move it to another location in the design.
Note : You can apply a series of one plant using Auto-Click Placement. For more information, see “AutoClick Placement”
To view plant description, requirements, and growth information
- Right-click the plant in the 2D plan view or in the Preview Bar and choose Plant Details on the shortcut menu.
To edit plant description, requirements, and growth information
1 Copy the plant to the Plants User Library. For information on working with the different libraries, see “Organizing Library Content”
2 Navigate to the plant in the Plants User Library Preview Bar, then right-click the plant and choose
Edit Plant Details. The Plant Details dialog appears.
3 Edit the details you want to change and then click OK.
To import a plant
1 Choose File > Import > Image to Plant Library. A dialog appears.
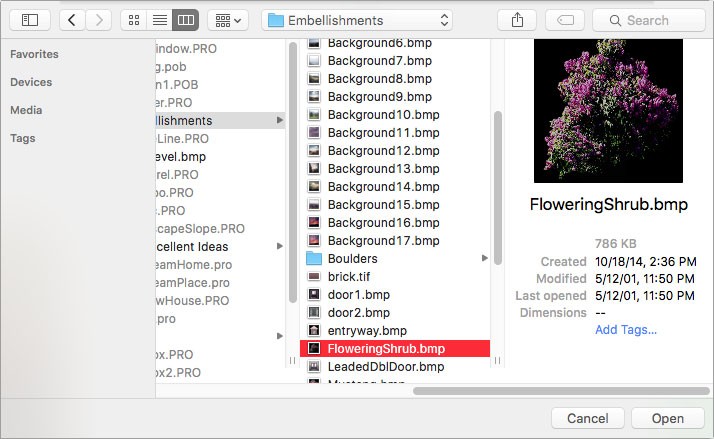
2 Select the file you want to open and click Open. The plant appears in the Import Plant to Library dialog.

3 All imported plants are saved to the Plants User Library. Choose the Library where you want to save your new plant.
For more information on accessing and organizing the User Library, see “Organizing Library Content"
4 By default, the Description tab is active. Enter the plant’s descriptive details in the corresponding fields.
5 Click the Requirements & Growth tab and enter details and choose options to specify the plant’s requirements and growth rate.
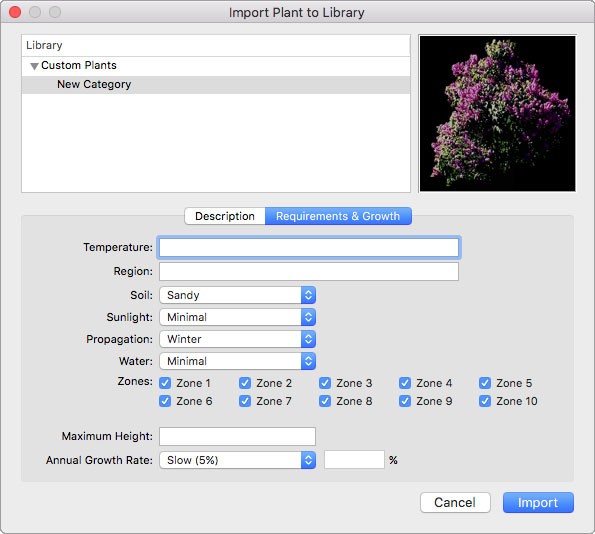
6 Click the Import button. The plant is imported and appears in the library you selected.