Editing Floor Properties
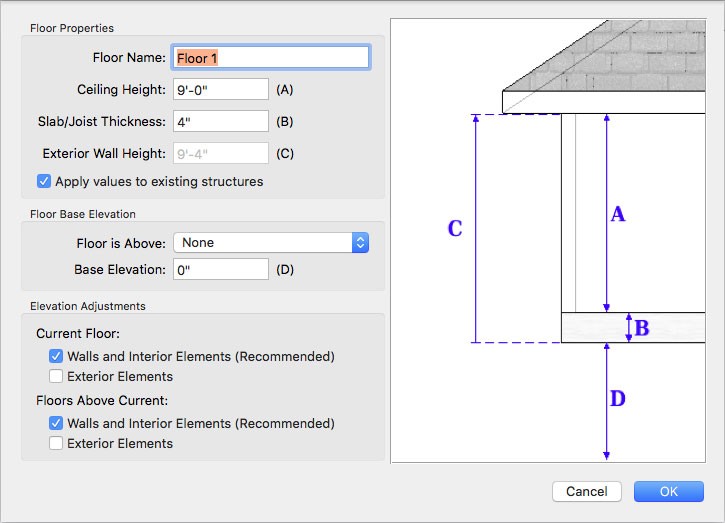
As you create your design, you may want to give a floor a unique name, change the ceiling height for an entire floor, or reorganize floors as you add more levels. You can edit a floor’s properties and maintain control over various floor levels at once or individually. The Edit Current Floor dialog box provides access to the floor properties, each corresponding to an area in the displayed diagram, so you can see what you are editing.
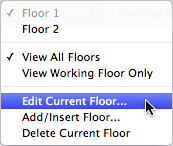
Note : When editing a floor you must be working on that floor. For information on moving between floors, see “Work on Floor”
Floor Properties
The Floor Properties control the overall wall height for the current floor, including the following settings that you can edit:
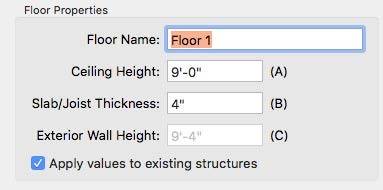
Floor Name type a unique name for the floor. This is displayed in the Floors pop-up menu.
Ceiling Height type the height you want in the Ceiling Height field. Notice, the ceiling height affects the Exterior Wall Height value, which is the overall height of the wall.
Slab/Joist Thickness type the slab or joist thickness you want in the corresponding field. Notice, the value affects the Exterior Wall Height value, which is the overall height of the wall.
Apply to existing structures checkbox applies the new ceiling height to the existing structures on this floor; deselecting this option applies the new ceiling height to subsequent structures only.
Floor Elevation
The Floor Base Elevation settings control the elevation of the floors. You can also control how existing elements are affected by elevation adjustments in the Elevation Adjustments section.
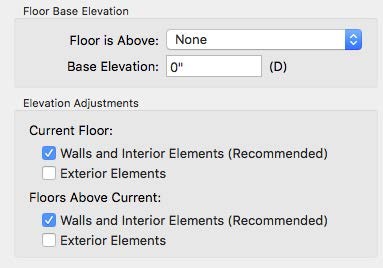
Floor is above pop-up menu specifies the current floor’s vertical position in relation to other floors. To adjust a floor’s Base Elevation, the Floor is above setting must be None.
Base Elevation defines the elevation of the floor base. A negative value results in below grade.
Elevation Adjustments options specify whether or not you want the elevation adjustments to affect existing walls and interior elements, and exterior elements on the current floor and the floors above. When selected, the option is enabled.
Note : It is recommended that existing walls and interior elements are elevated automatically so they maintain the same elevation as the floor they are on.
To edit floor properties
1 Move to the floor you want to edit and then choose Edit Current Floor from the Floors pop-up menu. The Floor Properties appear.
2 Edit the floor properties as needed and then click OK.