Organizing Library Content
The Content pop-up menu provides access to the Standard Library and User Library for each of the available content libraries. Content libraries include 2D Symbols, 3D Objects, Materials, Paint Colors, Plants, Templates, and Trim. The available content depends on the view that is visible. For example, Materials is only available when a 3D view is open.
Each of the content libraries includes a Standard Library of content and a customizable User Library.
Standard Library
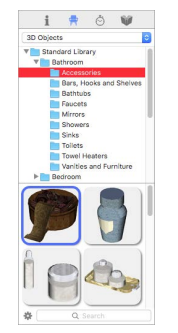
The Standard Library includes content that is delivered with the initial installation of the software. This content cannot be edited directly, however you can copy these items to a User Library for editing. The library categories and sub- categories that appear change when you switch content libraries. In the example below, the 3D Objects content library is active.
User Library
The User Library is populated when you copy items from a Standard Library to the User Library. This is useful when you want to edit object or component details, or to organize content based on the room where it will be used, for example.
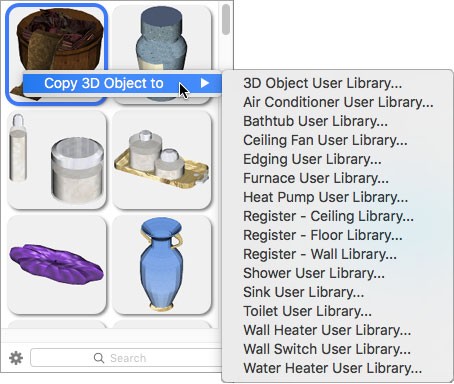
Each of the Content libraries has an associated User Library that you can copy to. When copying an item from the 3D Objects library, you can choose the 3D Objects User Library, or choose a component User Library.
For example, when copying an object from the Bathroom Accessories category, you have the option of copying to the 3D Objects User Library, or one of the component User Libraries.
User Library content is organized by category, so when you copy an item to the User Library you must choose a category. You can choose to have one category for all of your User Library content or create multiple categories, and sub-categories, to organize your content; this is based on your personal preferences.
Organizing the User Library
You can create categories and customize lists of furnishings, accessories, receptacles and so on, to make Architect 3D more personal. In this example we will use the 3D Object Organizer, but all Organizers work the same way.
By default, the New Category library exists. You can add content to this library, or add new sub-categories under this library. You can also rename the New Category library.

To create a new category
1 Open the content library or component library where you want to create a new User Library category.
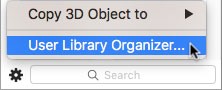
2 At the bottom of the Content pane, click the gear button and choose User Library Organizer from the pop-up menu. The organizer window appears.
3 Select the category where you want to create a new category; new folders are created within the selected category.
4 Click the New button and enter the category name you want, then click Create.
To copy an item to a user library
1 Select the content you want to copy and then click the gear button at the bottom of the pane and choose Copy Material Object to User Library. (The exact name depends on the library you are copying from). The Copy Item dialog appears.
(alternatively) Right-click the content you want to copy and choose Copy Material to User Library.
Note : In some cases you can choose from more than one User Library. If presented with a submenu of options, choose the User Library where you want the selection copied.
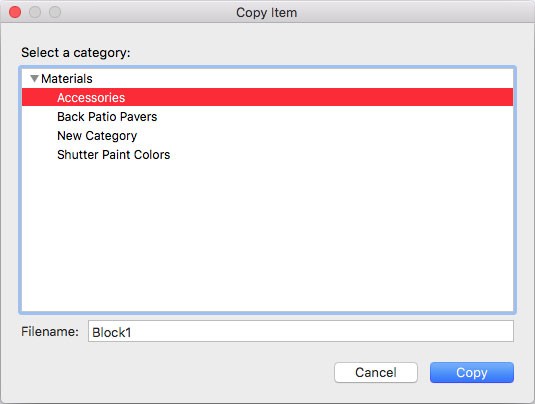
2 Choose the category where you want the content copied. (optional) Enter a name in the Filename field.
3 Click Copy.
To rename a category
1 Open the content library or component library where you want to edit a User Library category.
2 Choose the Category you want to rename and click the Rename button. A dialog appears.
3 Enter the name you want and click Rename.
4 Close the organizer.
To delete a category
1 Open the content library or component library where you want to delete a User Library category.
2 Choose the Category you want to delete and click the Delete button. A warning dialog appears.
3 Click Delete to delete the category and all of its contents.
4 Close the organizer.
To delete an item from the User Library
1 Open the content library or component library where you want to delete and item.
2 Choose the category with the item you want to delete. The category’s contents appear on the right.
3 Select the object you want to delete and click the Delete button. A warning dialog appears.
4 Click Delete to permanently delete the object from the User Library.
5 Close the organizer.
To find User Library source folder
You can find the source folder location for User Library content and for User Library categories.
- Right-click the User Library category or content and choose Show in Finder. The Finder opens to the location.