- To see which folders will appear in the Library palette, look in the Symbol Libraries page of the Program Setup.

Folders that do not appear here can be added by clicking New, or you can load a file from within the Library palette.
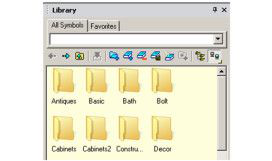
- Open the Library palette to see the folders it contains.
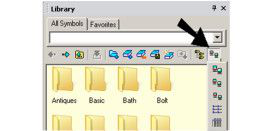
- If you want to change how the folders are displayed (icon size, or detailed list), click this icon:
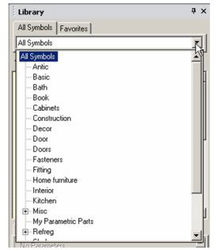
- You can also view the folder structure in tree form by clicking the drop-down arrow for All Symbols.
Note: The other tab is Favorites, where you can store symbols and parts you use often. See Favorites
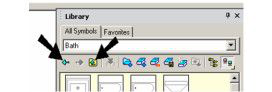
- The library contains symbols as well as parametric parts. Symbols can be 2D or 3D, and are objects saved as their own *.TCW file. For examples of symbols, open the "Bath" folder. (Your thumbnails may look different, or you may not see thumbnails at all.)
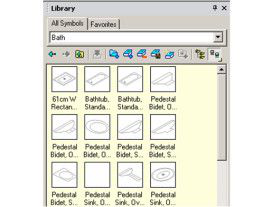
Note: If a symbol is not in *.TCW format, its thumbnail will be a generic icon.
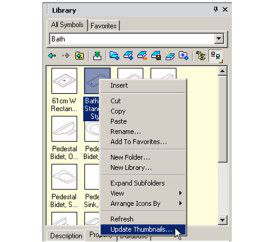
- To change the way thumbnails are displayed, right-click on one them and select .
- The top right field defines the standard view (Plan, ISO, etc.). The bottom left field determines if the thumbnail properties will be applied to only the current thumbnail, all items in the current folder, or all items in the entire library.
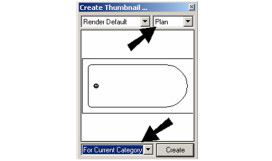
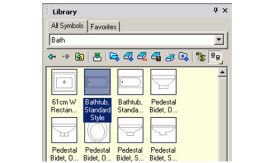
In this example, all thumbnails in "Bath" now are now shown in plan view.
- To maneuver within the Library's folder structure, you can use the Back and Forward arrows, or the Up arrow. Go back to root library folder.
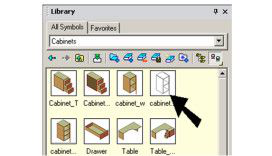
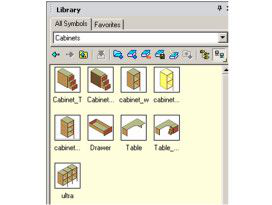
- Parametric parts and 3D symbols have more thumbnail options. Open the "Cabinets" folder - these are parametric parts created from scripts.
- Right-click on one of these thumbnails. On the top left field, you can choose Wireframe, Hidden Line, or Default, In addition, you can select one of the "Conceptual" renderings; three colors are available.
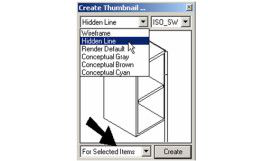
In this example, Hidden Line display is now applied only to the selected thumbnail.