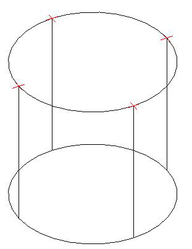
This option allows you to create a complex blend by using a series of point to specify radii. The Part Tree must be active for all of the features of Variable blending to work. but the points must be EXACTLY on the original edge (to 8 significant digits). Use the N SEKE (near) or Near snap to ensure correct placement. Do not use the Dot or AutoCAD point options as they are infinitely small and the Variable Blend option uses the size of the point to control the size of the fillet.
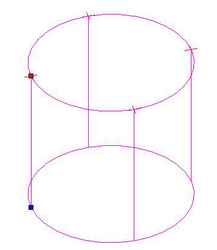
- Use the point tool to set points along the edge that is to be filleted.
-
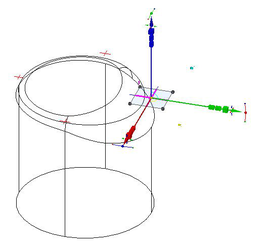
Select the 3D Fillet tool.
-
Select the Variable Blend option.
-
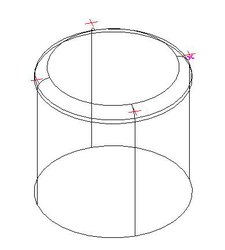
Select the object to be filleted.
- Select the Edge to be filleted.
-
Select Finish
-
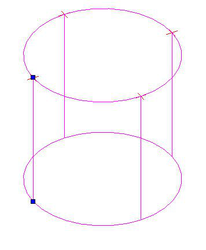
Select the points that will be used to control the variable blend.
-
Select Finish.
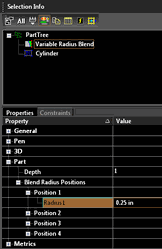
Changing the Fillet Radii
You can adjust the radii of the various fillet points by using the Blend Raduis Positions in the Part Tree.
-
Select the Variable Radius Blend in the Part Tree
-
Expand each position field to be edited.
-
Type in a new value for the Radius.
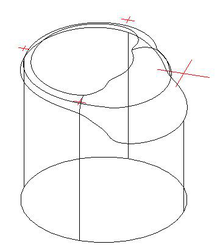 You can also adjust the value of each radii by changing the size of the controlling points.
-
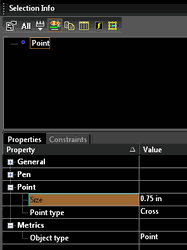
Select the point
-
Go to the Selection info palette.
-
Expand the Point section.
-
In the Size field enter a new value for the size of the point/radius.