Default UI Menu: Modify/Modify 3D Objects/Facet Editing/Deform to Point
Ribbon UI Menu:

Enables you to deform a face or surface by moving one or more points on the face. The result is a NURBS surface or solid.
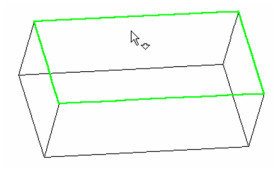
- Activate the Deform to Point function and select the face you want to deform - in this case, the top face of the box.
- The next step is to define deformation points and, if necessary, constraint points. You can click anywhere on the face to create points. If you created points in advance, use the Vertex snap to select them.
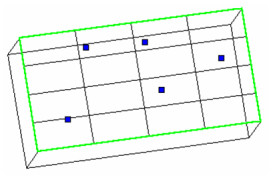
Any of these points that are not moved will be used as constraints; they will hold the face in place.
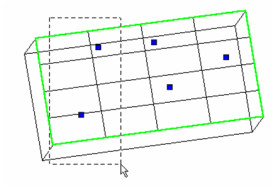
- Now select one or more points that will move. You can select points individually, or use a selection box.
- Once points are selected, you can move them manually by dragging their reference point, or enter delta values in the Inspector Bar. In this example, the two selected points will move up in the Z direction.

- Press Enter to move the points, and the face preview is updated. If necessary, you can now move other points. In this case, a single point is selected (rather than using a selection window).

- This point will move in both Y and Z.

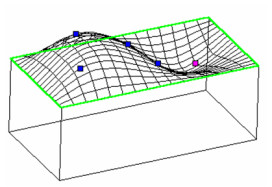
The preview now shows all three moved points. The two points that were not moved are used to hold the face in place. You can increase the number of isolines to better visualize the deformed face.
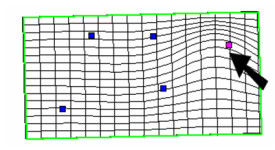
In this view, you can see the movement in Y of the single point shown.
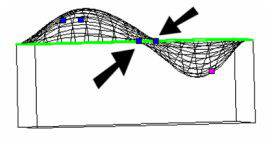
And in this view, you can see the effect of the constraint points, those not selected to move.
Local menu options:
Delete constraint: Deletes the selected point or points. The deformation or constraint effect on the face will also be removed.
One Step Back: Use this if you want to change delta values for the points just moved.
Move Along Normal: Moves the points in a direction normal to the surface. In this case, you only need to specify a single Direction value.