Default UI Menu: Tools/Palettes/Design Director/Camera
Ribbon UI Menu:
Enables you to manipulate all the cameras and camera sets in the drawing To create a new camera or camera set, select Create New in the Design Director toolbar or local menu. When Cameras or Camera Sets is selected in the upper pane of the Design Director, the lower pane has the following options:
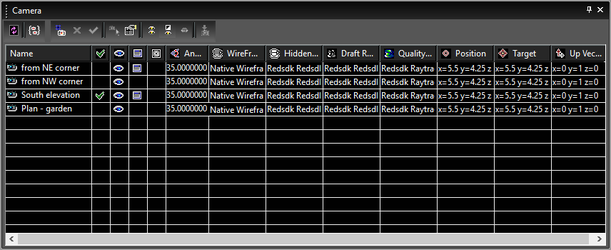
Active: Displays the view taken by the camera, and attaches the window to the camera. Visible: Displays or hides the camera symbol in the drawing. Attached: Creates a new window associated and synchronized with the camera. Draft Rendering: Sets the rendering type when the view is rendered in Draft rendering mode. Quality Rendering: Sets the rendering type when the view is rendered in Quality rendering mode. Perspective: Activates Perspective mode. Angle: The view angle for perspective mode. Position: The location of the camera position. Target: The location of the point the camera is facing. UP Vector: A point defining the up direction of the camera.
Camera Sets
A camera set is a group of cameras, which can be handy if you want to set rendering, perspective, and visibility parameters for multiple cameras.
- Select Cameras in the upper pane of the Design Director.
- On the lower pane, select the cameras you want to include in the camera set.
- Select Create Set in the Design Director toolbar or local menu.
- Select Camera Sets in the upper pane in order to see the defined camera sets in the lower pane.
- Select the properties (visibility, render type, etc.) of the camera set. When the camera set is made Active, these properties will be automatically applied to all cameras in the set.