(Available in Pro Platinum)
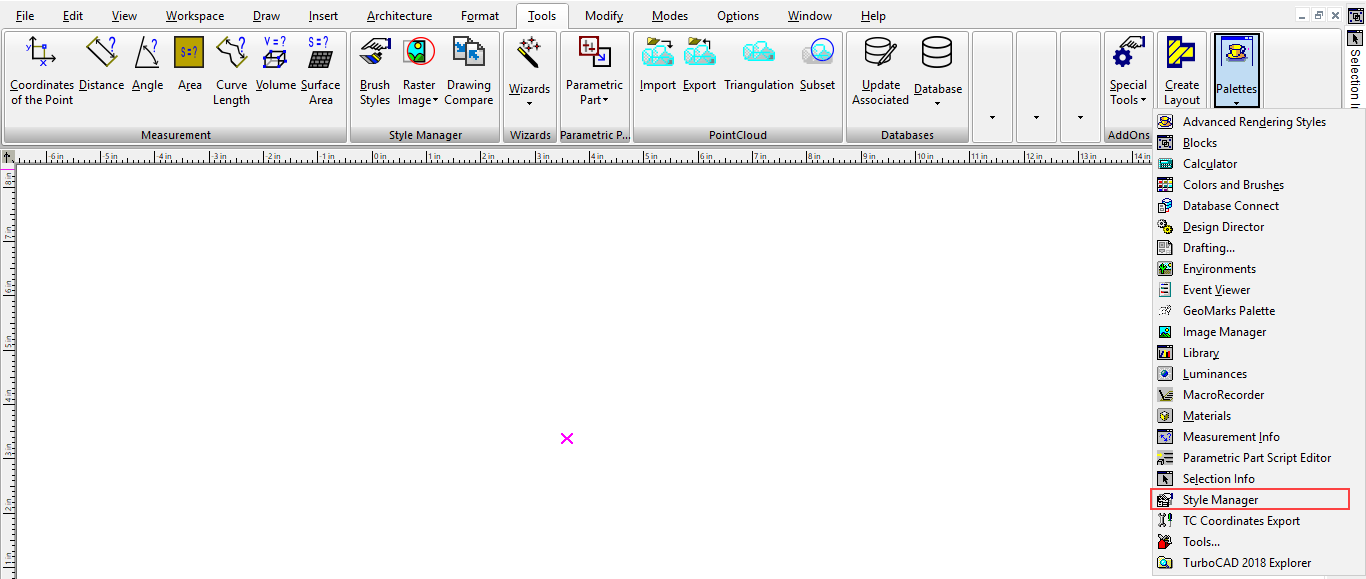
Default UI Menu: Tools/Palettes/Style Manager/Rail Styles
Ribbon UI Menu:
The Railing tool can be used to create a standalone, linear railing, or a railing along a staircase.
Note: If you want to save styles to a template,
Menu: Architecture / Stairs and Railings / Railing

In the Style Manager, there is one style, "Standard," listed under "Rail styles." A preview showing a layout of this rail style is below.
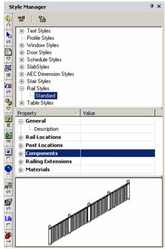
Note: In the Preview area, you can click to zoom part of the graphic. Double-click to fit the graphic in the window.
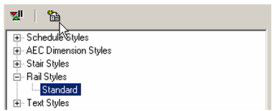
- You can change the "Standard" style, but if you want to preserve this style, make sure "Standard" is highlighted, then click Create New Style.
- Assign a name or accept the default.
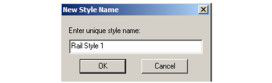
This creates a new style which is a copy of "Standard."
- To create the railing with the new style, open the tool's Properties to the General page.
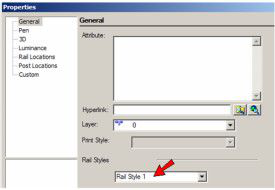
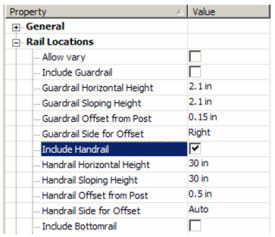
- Highlight the new rail style, and open the Rail Locations category. This category sets which rails are displayed, their heights along horizontal and sloped segments, and their offsets from the vertical posts. In this example, only a Handrail* is included.
- Open Balusters* are placed between dynamic posts. In this example, only balusters are included.
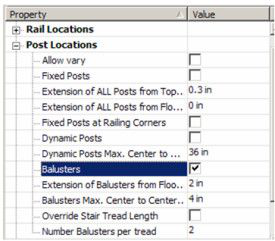
Note: You can either specify the number of balusters per tread, or baluster spacing. If the number per tread is entered, this will by default override the spacing. If you check Override, the spacing value will be used.
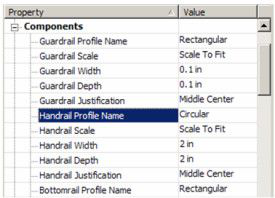
- Open Components, in which you specify the shapes and dimensions of rails and posts.
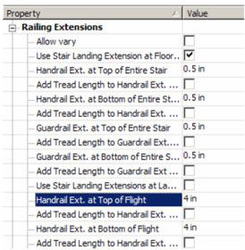
- Open Railing Extensions, in which you can specify horizontal extensions of rails, relative to posts and landings.
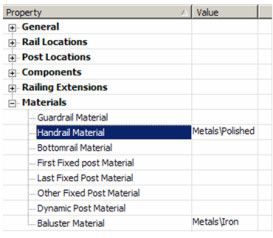
- Finally, open Materials, in which you can specify the material for each post and rail type.
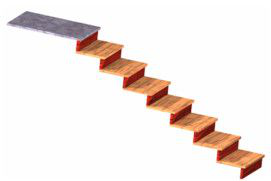
- This example is for a stair railing, so start by creating a staircase.
- Activate Railing. By default, Stair Railing is active

- To place rails on both sides of the stair use the Attach to Both Sides option.
- Select the staircase, and the railing is created. The other type of railing is standalone, defined by linear segments. To create this, make sure Stair Railing is not selected.

This railing is defined by one or more segments, similar to a polyline or wall. A preview of the railing appears while defining the segments. When finished, select Finish from the local menu or Inspector Bar.
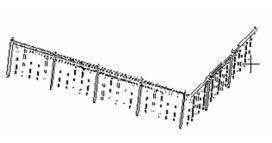
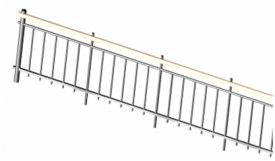
This example includes a handrail, guardrail, and bottom rail. The posts include a fixed post at the end, dynamic posts along the length, and balusters between bottom rail and guard rail.