Colors and Brushes
Default UI Menu: Tools/Palettes/Colors and Brushes
Ribbon UI Menu:
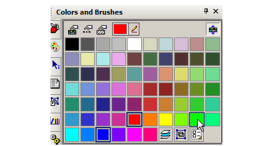
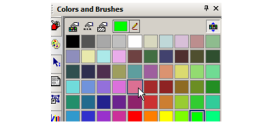
Displays all colors and brushes currently available. See Color Palette for details on adding or modifying colors. By default, the Colors and Brushes palette shows colors on the top and brushes (hatch patterns) on the bottom.
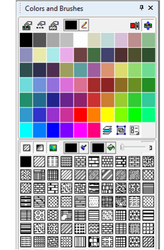 The color selected at the top and the brush pattern selected at the bottom appear in the Property toolbar. These properties become the default for the current tool and other tools in the tool group.
  For example, if Line is active and you set a color, this color will become the default for Rectangle, Polyline, etc. The icons at the top of the palette are as follows: Color Palette:
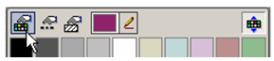
Opens the palette in which you can create new colors or modify existing ones.
Line Style Editor:

Opens the Line Styles page of the Drawing Setup. Brush Style Editor:

Opens the Brush Editor, in which you can create new brushes or modify existing ones.
Pen Color:

Click the color swatch to replace the color with one from the palette. If you click the pen icon, you can then click any TurboCAD object to select its color. To pick the color of any other object, i.e. objects in other applications, keep the left mouse button pressed and release it when hovering over the object whose color you want. Index Colors: Toggles on the display of indexed colors instead of RGB colors. Indexed colors correspond to the indexing of colors in AutoCAD.
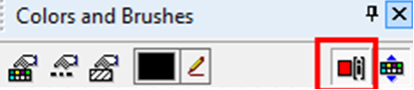
Expand Colors:

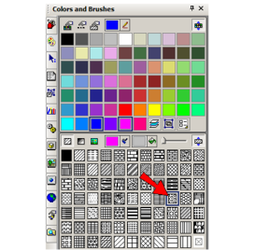
Toggle this icon off if you don't want the colors displayed. The icons at the bottom of the palette are as follows: Show hatches, gradients, or bitmaps:

Filters what types of brushes are displayed. Hatches are simple repeated line patterns. For details on gradient fills, see Brush Styles, and for bitmaps, see Brush Styles. Brush Color and Fill Color: 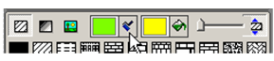

Sets the colors of the hatch pattern lines and the empty space between lines. If you click the brush or fill-can icons, you can select color on screen as described for Pen color above. Brush Transparency: 
Controls the transparency of the brush pattern and fill. Expand brushes:

Toggle this icon off if you don't want the colors displayed.
- To see how Colors and Brushes works, set a color, line weight and brush for the Circle tool group, and create a circle.

2. Select the circle, and click another color in the upper section of the palette.
The color of the circle updates.

3. Change the brush pattern the same way - first select the circle, then click a different pattern from the lower section of the palette.

4. To easily change the brush color, select the circle and right-click on the color you want for the brush.
The brush pattern (not fill color) updates to the new color.

Note: The above changes only affect the selected circle. If you create a new circle, or use any other tool in the Circle/Ellipse group, the properties you originally set will be used. You can change the default properties simply by activating a tool and setting new properties.
5. Activate Rectangle (or any other tool in the Line group), and set a new pen color, brush, and brush and fill colors.
6. Create a rectangle that overlaps the circle.
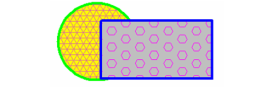
Any tool you use in this group will have these properties.
7. Select the rectangle and lower the Brush Transparency.

You can now see through the rectangle.

Note: The rectangle is in front of the circle because it was created after the circle. For details on stacking,