(Available only in Pro Platinum)
Default UI Menu: Draw/3D Object/3D Profile Based/Sweep
Ribbon UI Menu:
Creates a 3D object by driving a 2D profile along a path.
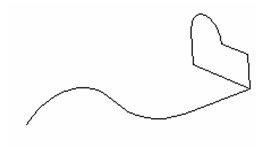
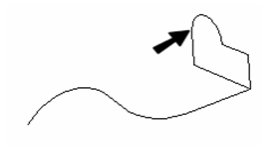
- Start with one or more 2D profiles. The profiles can be open or closed. Add a 2D or 3D path. Typically the path intersects the profile and is approximately perpendicular to it, but these conditions are not required.
- Activate Sweep. If the profiles consist of compound curves, make sure Use Compound Profile is active.

- Select the first 2D profile. If the profile is open, select Finish Selection of Path to end the selection. You can then select more profiles if necessary, by pressing the Shift key.
- Then select the 2D or 3D path over which you want to sweep the 2D profiles. If the sweep path consists of more than one curve, make sure Use Compound Path is active. When finished, click Finish Selection of Path.
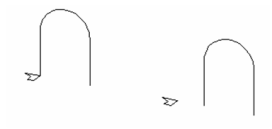
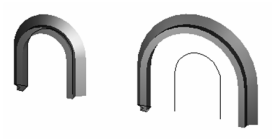
As stated before, the 2D profile and the sweep path do not have to intersect. However, the results will vary depending on how far apart the profiles are. Consider this comparison, in which the profiles on the left intersect and the profiles on the right do not.
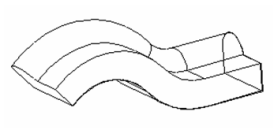
Here are the Sweep results: the solid on the right is swept over the offset of the sweep path, and is therefore larger.
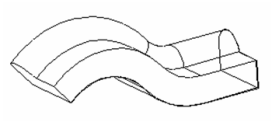
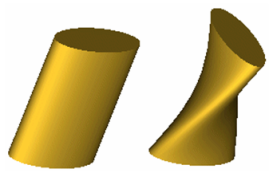
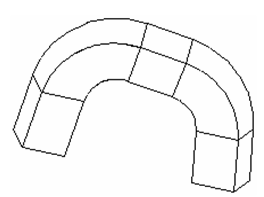
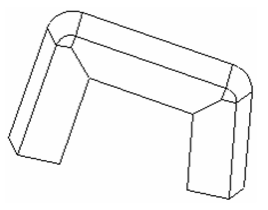
Local menu options Rigid Sweep: Use this option if you want the cross-sections of the solid to remain parallel to the original swept profile. This solid does not use Rigid Sweep; the cross-sections of the solid are always normal to the sweep path.
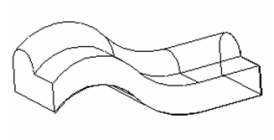
This is the same solid using Rigid Sweep; the sections are always parallel to one another, and to the original profile.
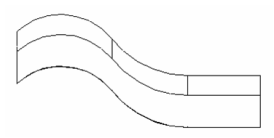
If you view the Rigid Sweep from this angle, you can see how the sections are parallel.
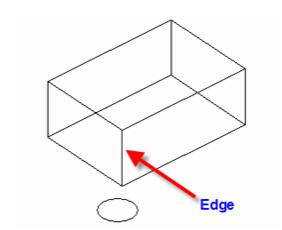
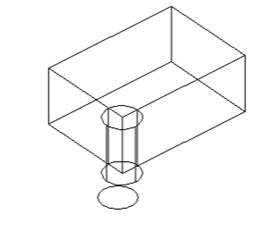
Use Edge as Path: When this option is on you can use the edge of a 3D object as a path. You cannot use this option with a compound profile.
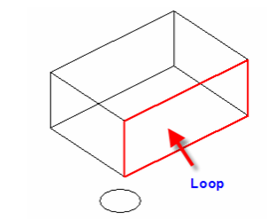
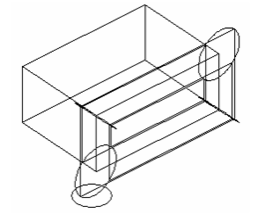
Use Loop as Path: When this option is on you can use the Loop of a 3D object as a path. A loop is all of the edges which enclose a single face of a 3D object You have to select the 3D object first, then its face. You cannot use this option with a compound profile.
Note: If you are trying to sweep by using a block as the path, you must have the Compound Path option turned on.
Sweep Shape Properties
The Properties window of an sweep object contains a Sweep Shape page, in which you can set geometric parameters.
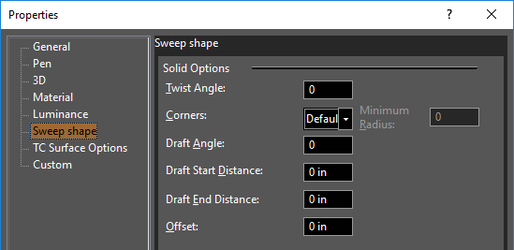
For these parameters to be accessible, the sweep must be created as a solid. Twist Angle: The angle by which the sweep is twisted along the path.
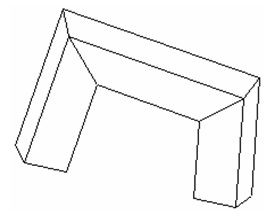
Corners: Defines how the joints of multi-segmented extrusions will be formed. Default: Sharp corners.
Bend: the rounding will be minimal.
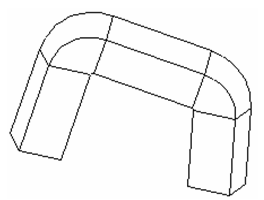
If you want a larger rounding radius, specify a Minimum Radius.
Crimp: Keeps internal corners sharp, performs a minimal rounding on external corners.
Draft Angle: Creates an extrusion of increasing or decreasing cross-section. Enter the angle of deviation from the extrusion path.
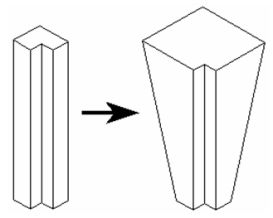
Draft Start / End Distance: If Draft Angle = 0, you can specify a draft angle by entering the offset distances. Sweep does not allow you to create a TC Surface.