(Available only in Pro Platinum)
Default UI Menu: Modify/Modify 3D Objects/Facet Editing/Facet Edit
Ribbon UI Menu:
Enables you to move or rotate individual facets of a solid (not surface) object.
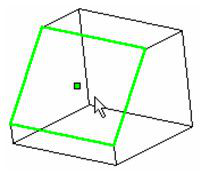
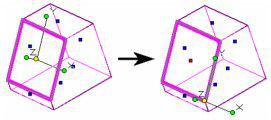
- Select the facet you want to edit. Before it is selected, the facet is highlighted in green and indicated by a green square at its center.
When the facet is selected, all its other facets are indicated by a blue square. You can select another facet for editing at any time while the tool is active. The selected facet appears similar to Select Edit mode, with rotation handles for the three axis (relative to the facet plane), and a yellow reference point for moving.
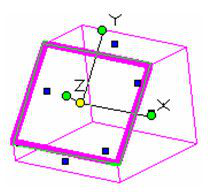
- Drag the facet by its reference point to move it normal to its current plane.

- You can also rotate about X or Y to change its angle relative to adjacent facets.
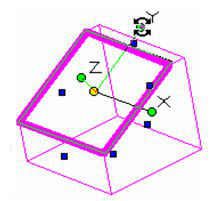
- You can rotate around Z to "tilt" the facet sideways.

- Lastly, you can delete a node by selecting it and pressing the Delete key. This is possible only when the ACIS object can be reconstructed without the facet.
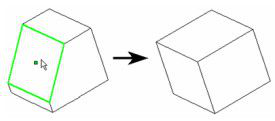
Note: If you want to delete a facet without reconstructing the object, you can convert the solid to a surface.
Local menu options:
Properties: Opens the Facet Editor Properties. The options here are the same as for the 3D Selector.
 Edit Reference Point: Moves the reference point of the facet, located by default at the facet center.
 Moving the reference point enables you to rotate the facet about different axes.
Note: You can also press the D key to select and move the reference point.
Default Reference Point: If the reference point was moved, this option moves it back to its default location at the center of the facet.
