(Available in Pro Platinum, Expert and Deluxe)
Default UI Menu: Draw/3D Object/3D Profile Based/Rail Sweep
Ribbon UI Menu:

Creates a 3D object by driving a 2D profile along a path. The profile and path do not have to touch or be in different workplanes; the profile section will be "brought" to the start of the path, made normal to the path, and swept along it.
Base Point
If you are going to use Compound profiles for both the path and the profile you will need a base point. The base point specifies the point though which the profile will follow the path. To create a base point, use the Point tool and place a point at the location adjacent to the profile that you wish to be used. For example, at the end of a line, or at the center of an arc or circle.
Creating a Rail Sweep
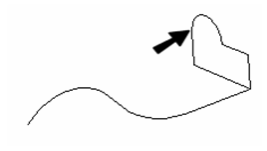
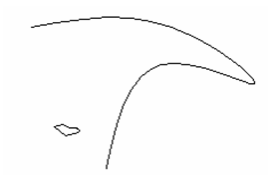
- Start with one 2D profile. The profile can be open or closed. Add a 2D or 3D path. The path can lie anywhere, and in any workplane. In this example, profile and path lie in the same workplane.

-
Activate Rail Sweep.
-
If the profiles consist of compound curves, make sure Use Compound Profile is active.

- Select the first 2D profile. If the profile is open, select Finish Selection of Path to end the selection. You can then select more profiles if necessary, by pressing the Shift key.
-
If you are using a Compound profile for the profile you must specify the base point to be used. at this step. Select the point you created for this purpose.
-
Then select the sweep path. If the sweep path consists of more than one curve, make sure Use Compound Profile is active.
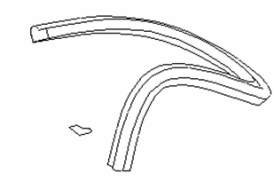
- The profile is brought to the path (at the base point if one is being used) and swept along it, normal to the path. The profile intersects the path at its reference point
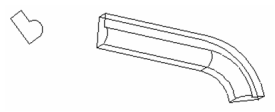
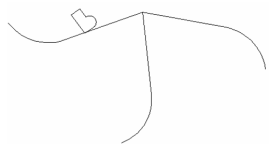
This tool is handy if you have a single profile that you want to sweep over multiple paths, or rails. In this example, there are three paths for the same profile:
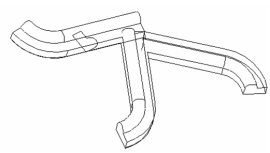
Here are the results:
If you used a Compound profile for the profile, you will be able to modify the resulting 3D object by modifying the original profile object, or by moving the base point object. If you used a Compound profile for the path, you will be able to modify the resulting 3D object by modifying the original path object/s. The sweep path does not have to be 2D. The path in this example was created using 3D Spline by Fit Points.
This is the result:
Local menu option Rigid Sweep: Keeps cross-sections of the solid parallel to one another along the entire path.
Compound Profiles as Paths
You can also use a compound profile as a path