(Available in Pro Platinum, Expert and Deluxe - 32-bit)
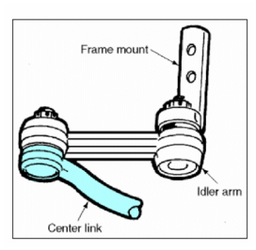
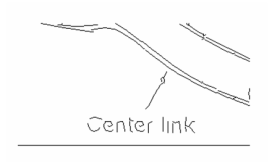
Creates a tracing of all objects within a selection rectangle. This example uses the following inserted picture:
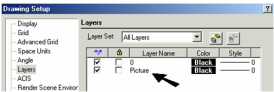
To easily see the results of the trace, it is good practice to place the inserted picture on its own layer which can then be blanked.
1Activate Trace by Rectangle and define the selection rectangle. (You can also use fields in the Inspector Bar to control the rectangle size.) If Preview Mode is on, the traced lines will appear in magenta.

2Select Finish from the Inspector Bar or the local menu.

3Move or delete the picture, or simply blank its layer, to see the tracing.
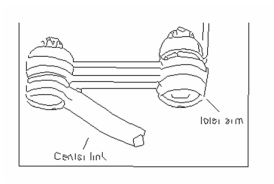
In the above example, the text lines did not trace completely. To improve trace quality, you can increase the zoom of the traced objects.
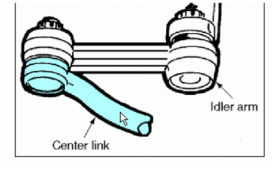
The previous example traced around all colors. If you only wanted to trace around the shaded area of the center link, you would use the Tracing Colors option, which must be set before starting the trace.
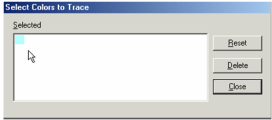
When the Select Colors to Trace window opens, click on the colors you want to include. The colors then appear as blocks in the window.
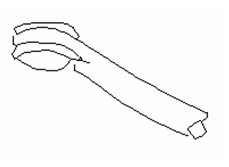
The result is a trace only around the center link.
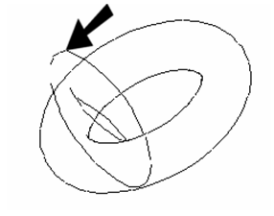
Note: Trace colors remain active for future traces, so it is important to click Reset (to zero colors) if necessary. In addition to pictures, you can also trace around geometric objects. This example is a solid torus, rotated and displayed in Hidden Line mode.
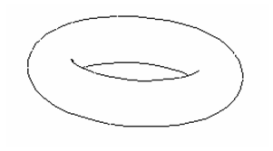
The trace is created in the current viewing plane. The result is shown below, rotated so that the 2D trace can be seen: