(Available in Pro Platinum)
Default UI Menu: Architecture/Walls/Add Top Wall Modifier
Ribbon UI Menu:

Enables you to change the top height of a wall by trimming or extending it to a single-line object. The object can be a line, arc, or polyline. It must be at least as long as the wall, and cannot extend below the bottom of the wall. In addition, it must lie in the same workplane as the wall.
Note: The way to assign height to a wall is to open its Properties to the 3D page and enter a Height.
- Set the workplane to the wall you want to modify. The easiest tool is By Facet.
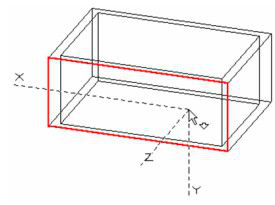
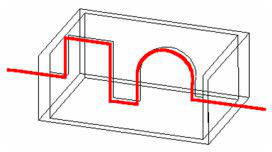
- Create the object you want to use as a modifier. Be sure that the object meets or extends past the wall ends.

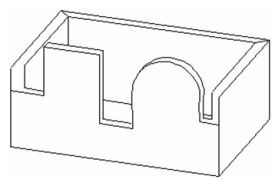
- Activate Add Top Wall Modifier, select the wall to modify, and select the 2D modifier. The wall is trimmed or extended to meet the modifier.
The results may be easier to see in Hidden Line mode.
Note: If the modifier length is insufficient, you can edit it. The modifier will be applied once it reaches the required length.
If you add another Top modifier, it will cancel the effect of the previous one.