Customizing the UI
Default UI Menu: Tools/WorkSpace/Customize
Ribbon UI Menu:

You can customize toolbars, menus, keyboard, and your IntelliMouse (if you use one). You can invoke the Customize window at any time by right-clicking in any blank toolbar area.
Note: If you prefer an older interface for customizing toolbars and menus, select UI Themes, and select the classic interface.
Whenever you make changes to the UI settings it is best to save the Workspace file (under the Options tab accessed via Tools|Customize) in order to accurately retain your changes.
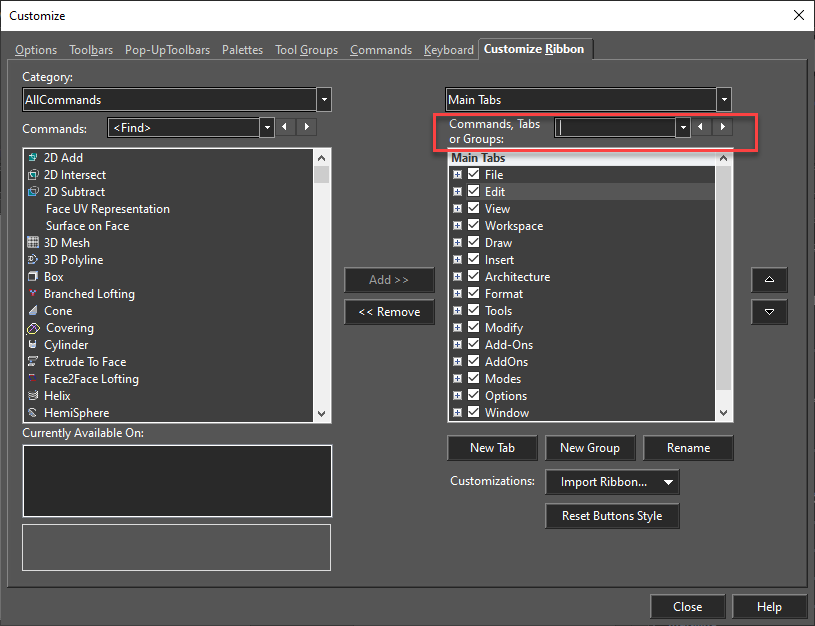
Customize Ribbon
TurboCAD (All variants)
Enables you to create Ribbon for any desirable and familiar configuration.
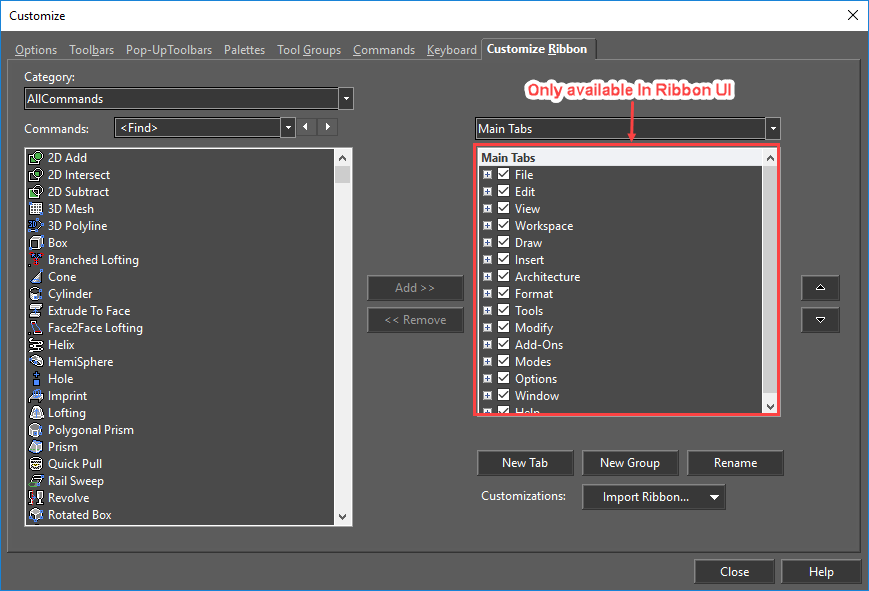
In Customize Ribbon, the following options are available
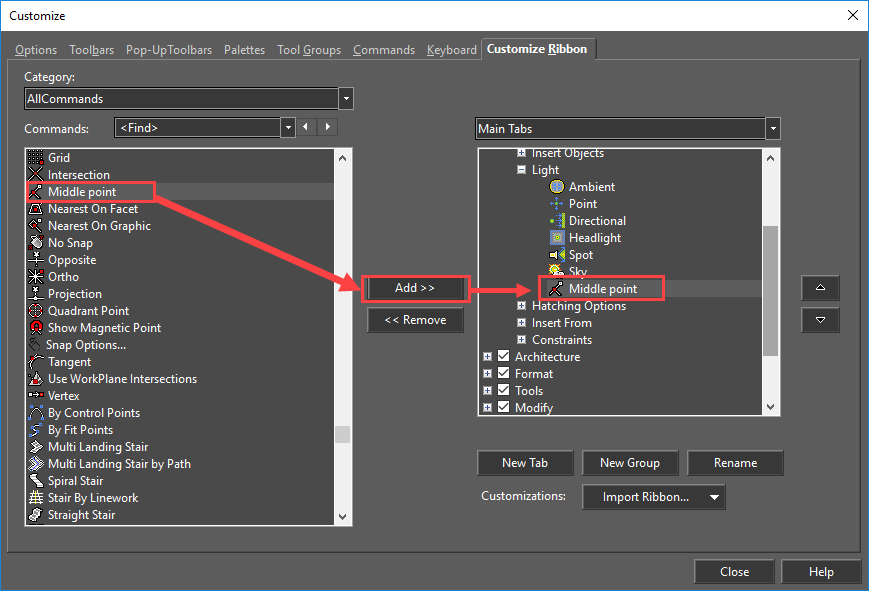
Add: Adds a selected tool into the tab that has been selected.
Remove: Removes a selected tool from a tab.
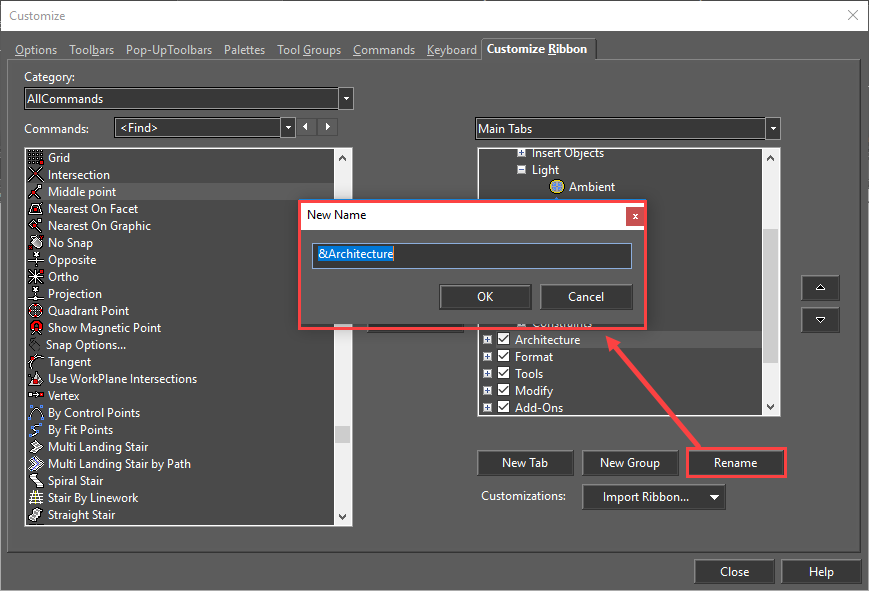
Rename: Rename a selected menu tab using this button.
New Tab: This button adds a new Menu tab.
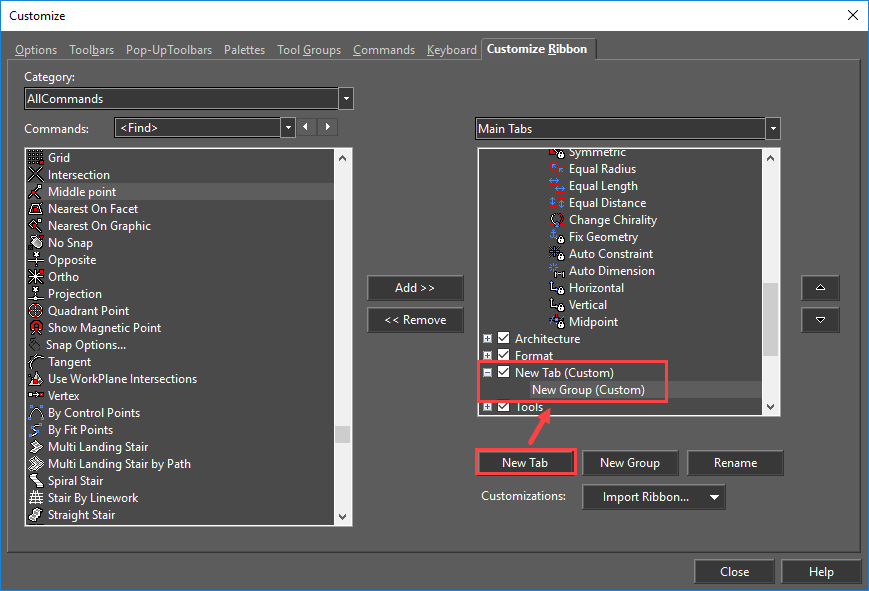
New Group: Creates a new group in a selected menu tab.
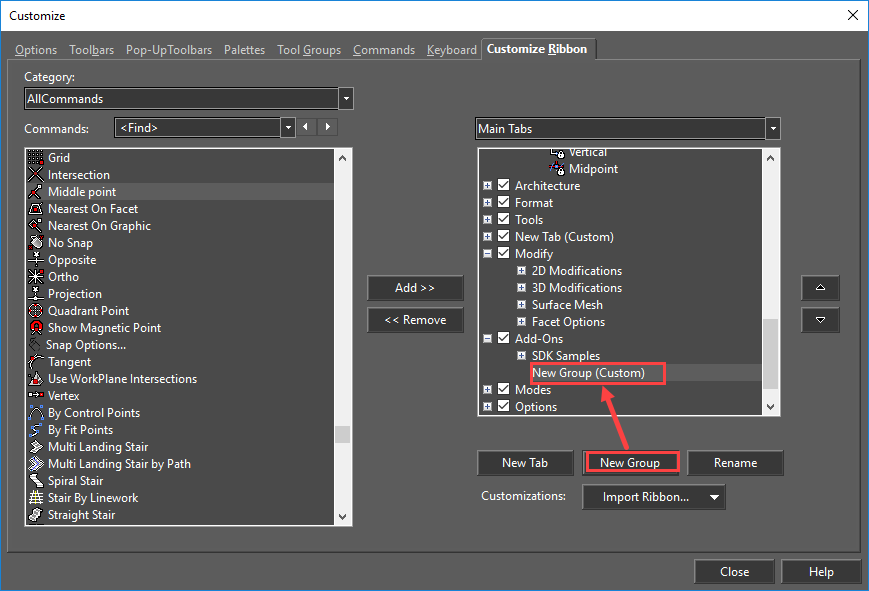
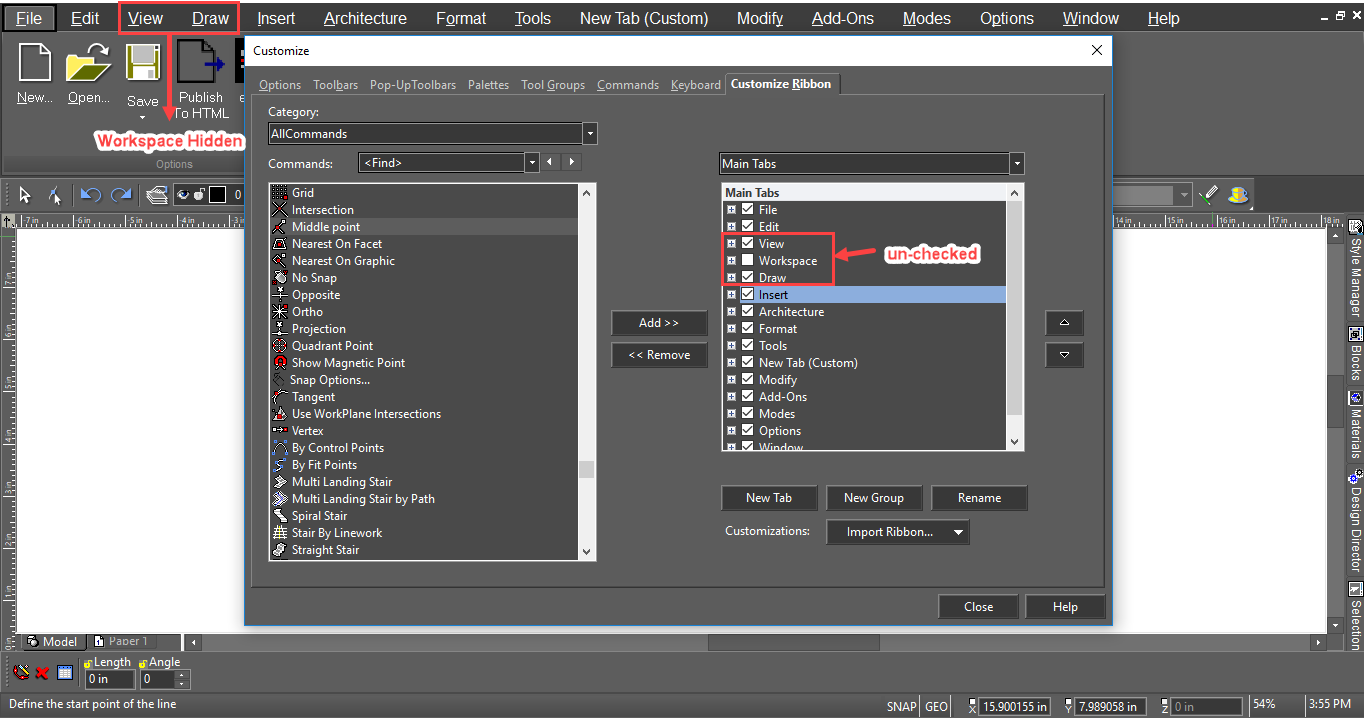
Hide Tab: Unchecking the tab will hide tab from the Ribbon.
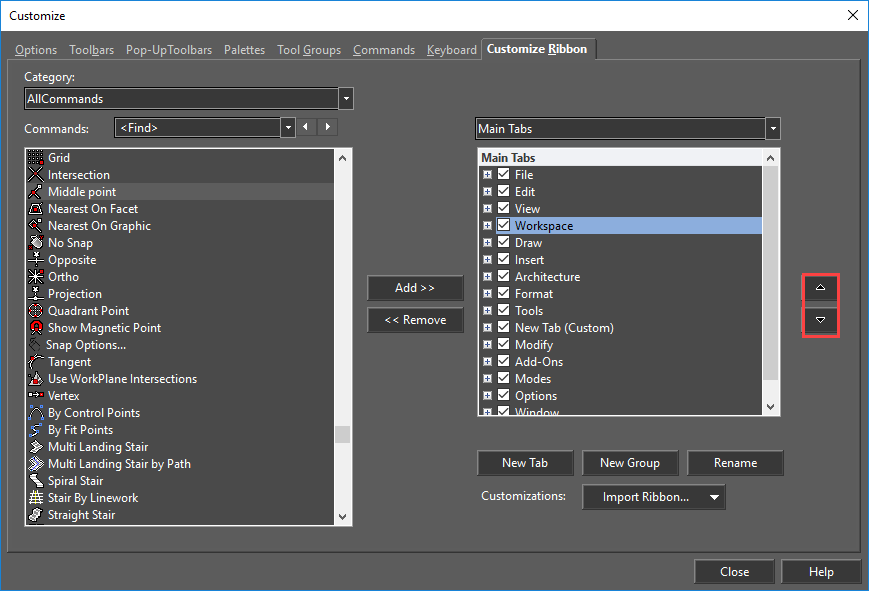
Move Tabs: Tabs can be repositioned using up/down arrow buttons.
Drop-Down List: To add a drop-down list to a menu, toolbar, or ribbon, you can use the “New Popup Menu” or “New Popup Toolbar” items
on the “Commands” page of the Customize dialog box.
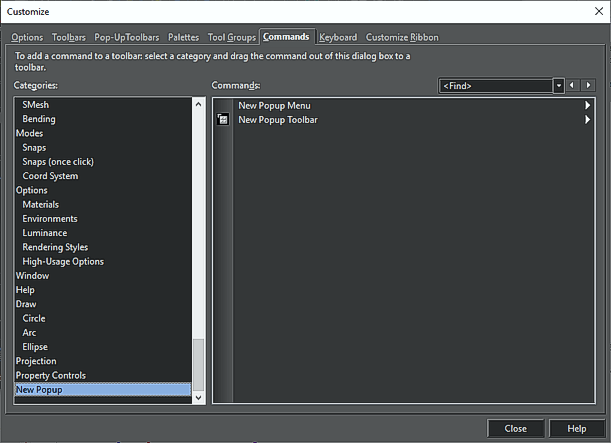
Then drag the required tools Icons from the “Commands” list. If you hold the mouse over a popup control, a list of its sub elements will open.

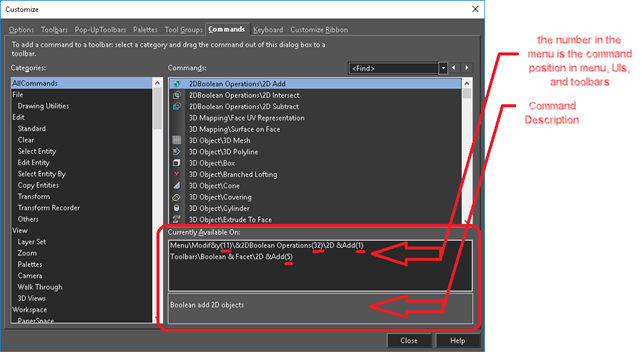
Currently Available On: Allows the user to see the position of a particular command available in the menu, UIs and toolbars.
Import Ribbon: Manually created custom(.xml) configuration files can be imported and used in TC 2021 Ribbon UI
Find Control in Custom Ribbon Page
The Find feature allows users to search or find Command/Group/Pop-ups/Tabs in the Ribbon tree.
Ribbon Theme Support
TurboCAD (All variants)
Ribbon UI of TurboCAD supports TurboCAD theme e.g. Classic, Default or Custom Themes
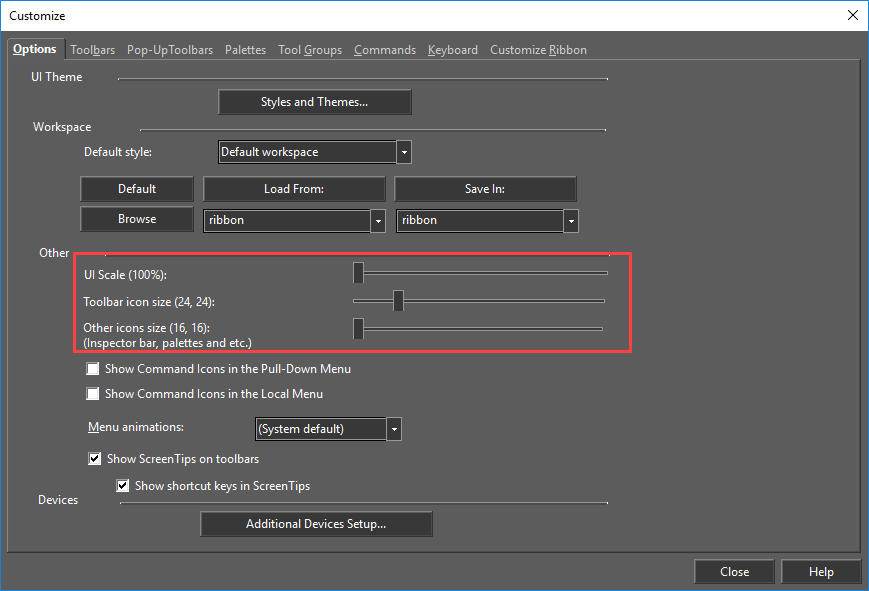
Customize Options
Enables you to manage the configuration (Config) files, control the look of the TurboCAD window, and specify external devices. 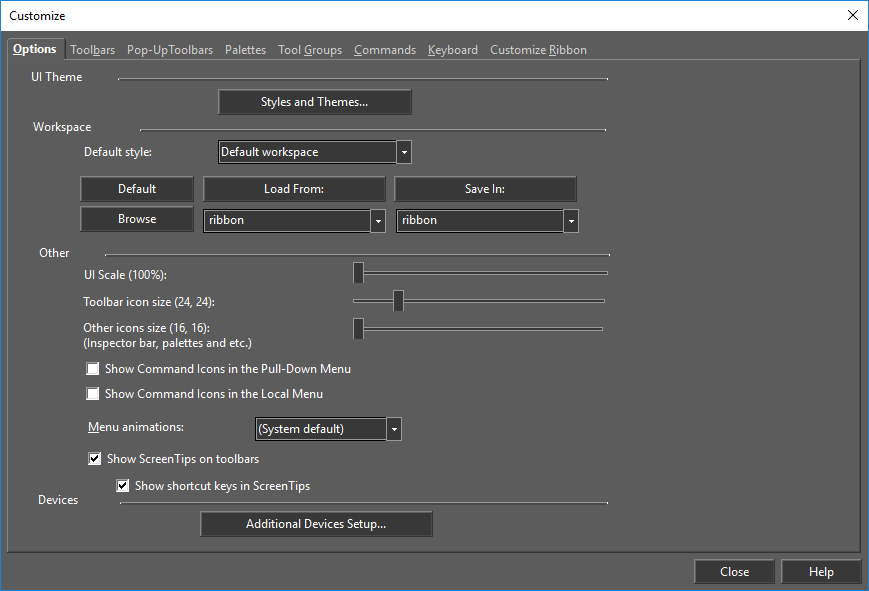
Available Space Icon Sizing
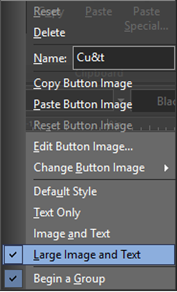
Users can change tool icon size/icon text and the icon image along with many other customizations. To open this menu, right-click on any tool icon. To access this menu, Customize Window should be open.
Changing the Styles of Ribbon Icons with lack of free space
When using the Ribbon Interface, as you change either the UI Scale or Icon size through the Options/Toolbars and Menus /Options menu, the Size and Style (with or without text) of the icon will dynamically change.
Default Scale and Tool Icon Size Settings with Ribbon Display:
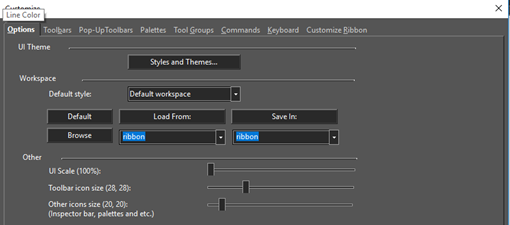

After: UI Scale changed to 150% and Toolbar Icon size increased:

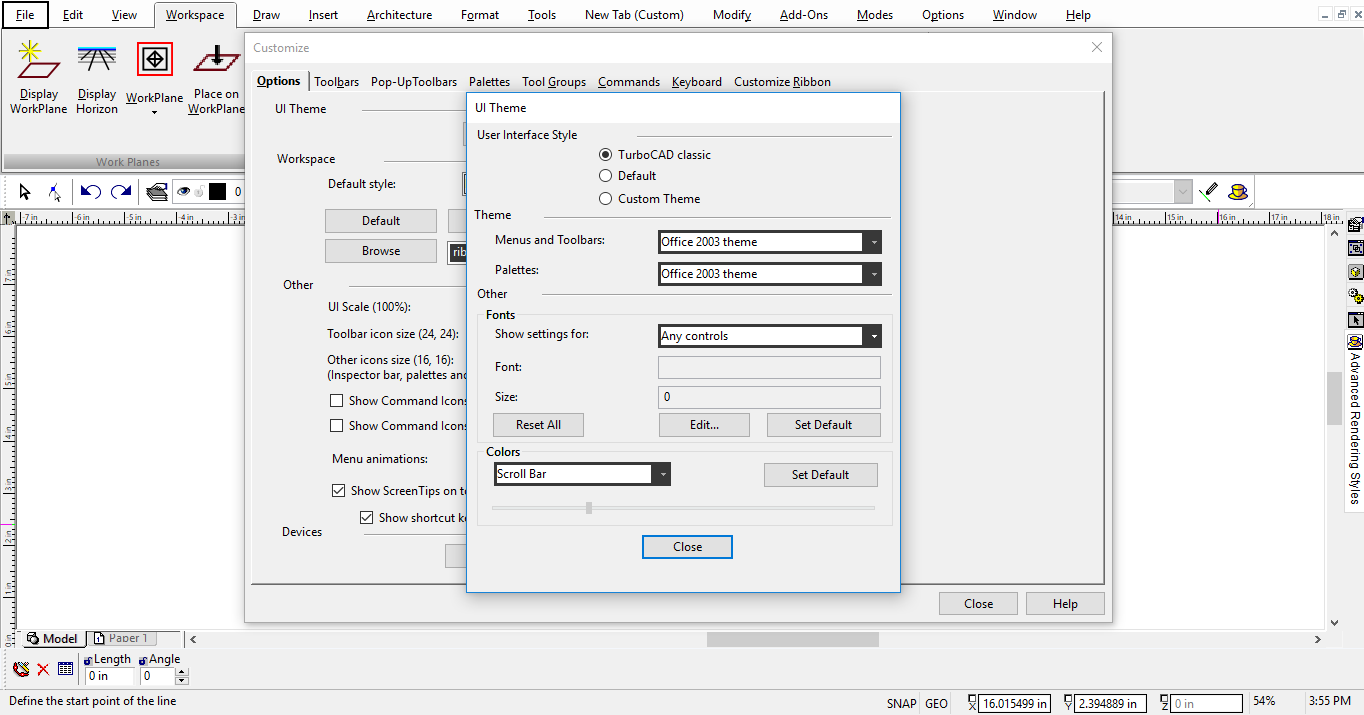
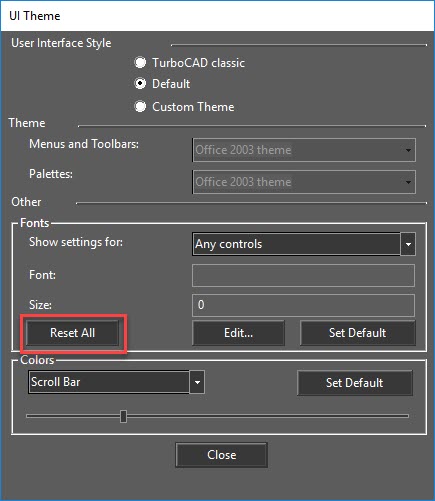
Styles and Themes
TurboCAD (All Variants)
These functions allow you to select from several different Workspace/UI looks, or "skins."
Default: uses the "new" (TurboCAD 2022) dark interface with new icons. TurboCAD Classic: uses a light background with TurboCAD's classic icons. Custom Theme: uses the new icon set, but allows you to choose a skin to customize the look and feel of the interface. Other: Various settings for how icons and tool-tips are displayed.
- Fonts: Select the font and its size for the selected control.
- Colors: Set color for the selected control.
- Reset All: Resets all the fonts for the selected control.
UI Scale Slider
TurboCAD (All variants)
Now TurboCAD is fully compatible with 4K monitors. Menu, toolbars and Ribbon updates accordingly when "UI Scale" is changed.
This will scale the "Toolbar icon size" and "Others Icon size" together. This option is implemented to make TurboCAD compatible with 4K display.
Workspace
Select the functionality and layout of tools:
- Default Workspace - Uses the standard TurboCAD interface and layout
- LTE Workspace - Uses the LTE Workspace layout which includes Dynamic input and the Command Line.
To Load a Config:
- Select a file from the Load From drop-down list.
- Click the Load From button.
To Create/Save a Config:
- Type or Select a name in the Save In drop-down list.
- Click the Save In button.
Locate/Browse Config Files:
- Click the Browse button to open the file location of your configuration files.
To Use the Default Configuration:
- Click the Default button.
Other
Toolbar icon size (X, X): Sets the size of the main toolbar icons in pixels X-by_X the default is 24 by 24. The range goes from 16x16 to 64x64. **
Other icon sizes (Inspector bar, Palettes etc.): Sets the size of the other application icons in pixels X-by_X the default is 24 by 24. The range goes from 16x16 to 64x64.
Show Command Icons in the Pull-down Menu: Designates whether icons will be shown in the pull-down menu.
Show Command Icons in the Local Menu: Designates whether icons will be shown on the local menu. **
Menu Animation: Sets the type of animation the will be performed by menus.
- System (Default): use the windows setting
- Random
- Unfold
- Slide
- Fade
- None
Show ScreenTips on toolbars: When checked, Tooltips are shown when the cursor hovers over toolbar items. Show shortcut keys in ScreenTips: When checked, shortcut keys are shown when the cursor hovers over toolbar items.
Customize Commands
The Commands page enables you to customize toolbars by adding and removing icons. Display the toolbar you want to change, and open the Commands page. Locate the commands you want to add to the toolbar and drag it from the Commands list to the toolbar itself.
 To remove an icon from a toolbar, drag it away from the toolbar into the Commands page.
Search Option:
You can also search for a command. Type a command in the "find" option to search, the first suitable item is highlighted. To browse through the commands, buttons next to the input field highlight and can be used to show the previous or next suitable item. Successful search options are added to the list and saved between sessions.
Customize Keyboard
The Keyboard page enables you to view current keyboard shortcuts (hotkeys), to modify them, or to create new ones. Whenever you make changes to the UI settings it is best to save the Workspace file (under the Options tab accessed via Tools | Customize) in order to accurately retain your changes.
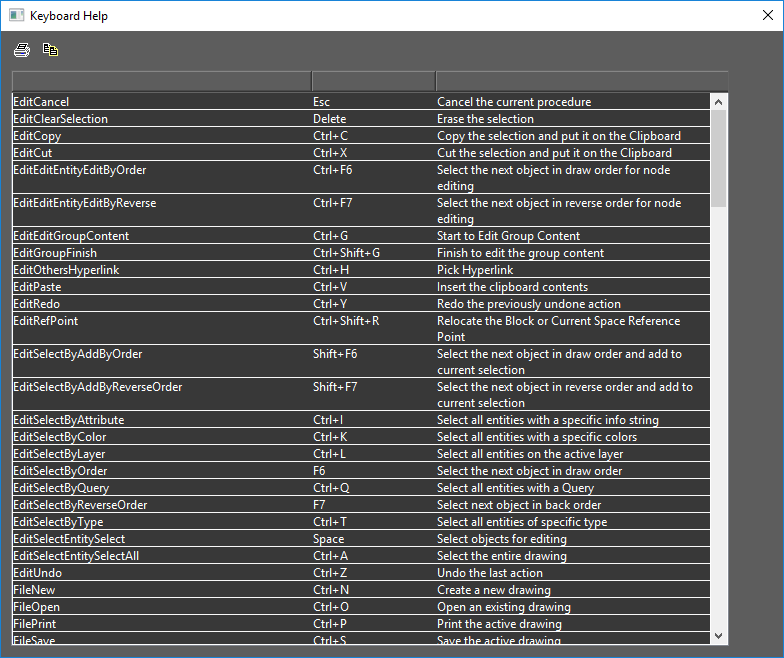
Tip: Select Help/Keyboard for a list of all shortcuts.
- Locate the Category and then the command for which you want a shortcut. If a shortcut already exists, it will be listed in the Key assignments box.

You can click Remove to delete any unwanted shortcuts.
-
To assign a shortcut, type it (for instance, press Ctrl+E) and it will appear in the Press New Shortcut Key box.
-
Click Assign to implement the shortcut.
Search Option:
You can also search for a command. Type a command in "find" option to search, the first suitable item is highlighted.To browse through the commands, buttons next to the input field can be used to show the previous or next suitable item. Successful search options are added to the list and saved between sessions.
Multiple Keyboard Shortcuts:
(Available in all Variants)
Unlike in the previous versions where there were not enough Ctrl-Alt-Shift key combinations to cover every command, users can now create multiple key combinations for customizable keyboard shortcuts.
Another use of this feature is that the user doesn't have to create/use a key combination which is difficult apply with one hand. The ideal case would be that the user uses left hand to apply the keyboard shortcut and the right-hand to control the mouse.
Example:
To assign shortcut such as "tt" to any command.
- Select the command in Customize Keyboard to which you want to assign the shortcut.
2.In the Press New Shortcut Key box, press the Control key and then press 't' twice. Then ,press the Assign button and close.
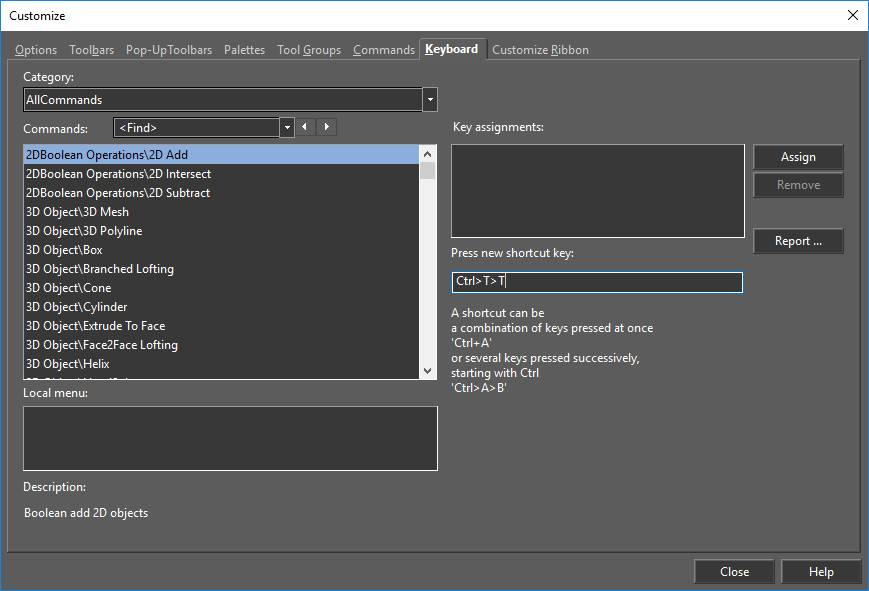
To invoke the command, press control and release control key, then press 't' twice.
Devices
Relevant if you have an Intellimouse connected to your computer. Wheel assignment: Shows the command that will be executed when you rotate the mouse wheel forward, back, or click with it. To change it, highlight the desired command, select Forward, Backward, or Click, and click Assign to implement the change. 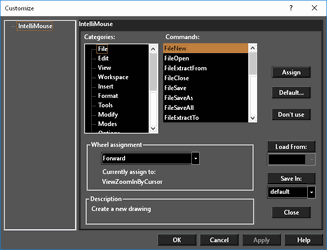
Built-In Folder
Occasionally the configuration INI files may become corrupted causing loss of functionality, and no amount of customizing will restore it. To fix this problem the standard procedure is to purge the Built-in folder by deleting it. WARNING: It is best to do this only after consulting with IMSI/Design support or technical services. To Delete the Built-in folder:
- Navigate in your Hard Disk to C:\Users\AppData\Roaming\IMSIDesign\TurboCAD 2022<>\Profiles
- Select the Built-In folder.Then select Delete from the local menu to delete the folder. Repeat WARNING: It is best to do this only after consulting with IMSI/Design support or technical services.
- Close the file window, then close the Customize dialog.
- Restart the application.
Customize Palettes
The Palettes page enables you to control which palettes appear and how they can be displayed and moved. 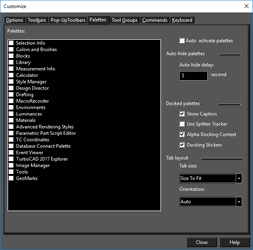 Auto activate palettes: Opens the palette relevant for the current option. For instance, when using hyperlinks, the Internet palette opens. Auto-hide palettes: Hides the palette when not in use. Docked palettes: These options are relevant while moving or docking palettes. Show Caption: Displays the palette title. Use Splitter Tracker: If disabled, the palette can be resized dynamically (in real time). Alpha Docking Context: If disabled, an outline of the palette appears while moving a palette. If selected, a transparent blue rectangle appears while moving. Docking Stickers: Displays the blue controls that appear while moving or docking.
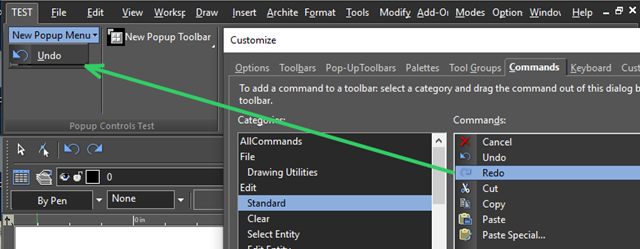
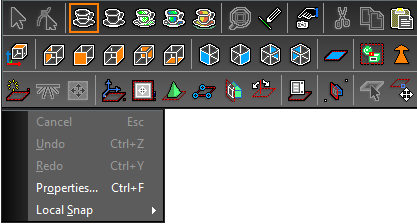
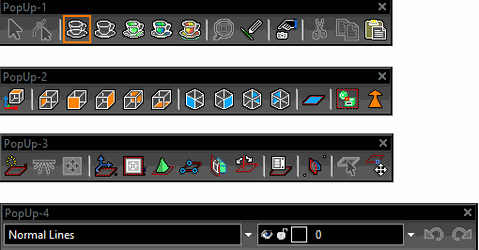
Customize Popup Toolbars
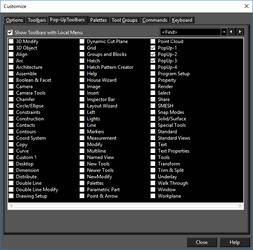 Popup toolbars are icons that appear with the local menu, which is opened by right-clicking. This is useful if you use certain icons frequently and want convenient access to them. There are three popup toolbars defined by default:
 If you want to add additional popup toolbars, simply check them on the list. If you want to change the existing popup toolbars, first display them as standalone toolbars. This is done in the Toolbars page of the Customize window, or by right-clicking in any toolbar area and selecting the popup toolbar you want to display.
 To customize the toolbar, click the arrow shown. This invokes options which enable you to add or remove icons.
  You can also use Customize Commands to add or remove icons.
Search Option: Whenever you make changes to the UI settings it is best to save the Workspace file (under the Options tab accessed via Tools|Customize) in order to accurately retain your changes.
You can also search for a command. Type a command in the"find" option to search, the first suitable item is highlighted. To browse through the commands, buttons next to the input field highlight and can be used to show the previous or next suitable item. Successful search options are added to the list and saved between sessions.
Customize Toolbars
The Toolbars page enables you to select which toolbars are displayed. 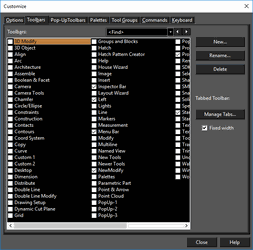 This page can also be opened by right-clicking in any blank toolbar area. You cannot delete default toolbars, but you can create new toolbars by clicking the New button. Toolbars you create this way can later be deleted.
Search Option:
You can also search for a toolbar. Type a toolbar name in "find" option to search, the first suitable item is highlighted. To browse through the toolbars, buttons next to the input field highlight and can be used to show the previous or next suitable item. Successful search options are added to the list and saved between sessions.
Customize a Toolbar:
To customize a new toolbar first, make sure it is displayed. Then click the arrow icon shown; the shape of this arrow depends on whether or not the toolbar is docked.

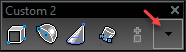 This invokes options which enable you to add or remove icons. You can also use Customize Commands to add or remove icons.
Note: If you prefer an older interface for toolbar customization, select Tools/Workspace/UI Themes, and you can select TurboCAD classic or Custom theme.
Whenever you make changes to the UI settings it is best to save the Workspace file (under the Options tab accessed via Tools|Customize) in order to accurately retain your changes.
Customize Tool Groups
Tool groups are used to specify what palettes and popup toolbars appear for certain groups of tools.
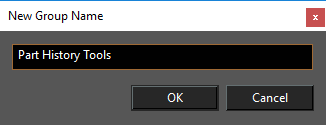
- To create a tool group, click the "+" icon.
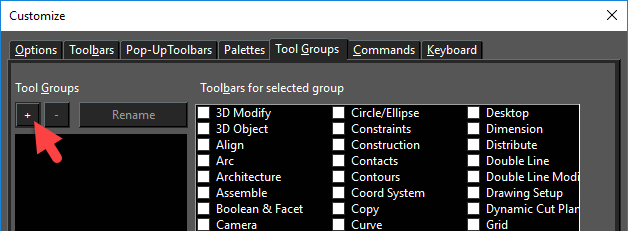
- Assign a name to the tool group.
In the top part of the window, select the toolbars that contain the tools in the group. In the lower part, select the palette (or palettes) and popup toolbars that will appear while you are working in any of these tools.
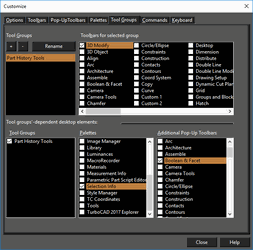
In the above example, the Selection Info palette will be the default open palette when you are working with any 3D Modify tool. Another example could be to open the Calculator palette when using any Dimension tool.