Standard 3D Objects
(Available in Platinum, Professional and Deluxe)
Default UI Menu: Draw/3D Object/3D Primitives
Ribbon UI Menu:

Standard 3D Objects, are created entirely within a 3D tool, with no reference to any other objects.
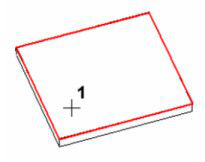
Box

Default UI Menu: Draw/3D Object/3D Primitives/Box
Ribbon UI Menu:

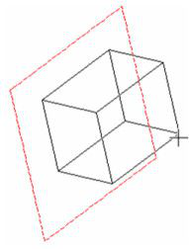
Creates an orthogonal, rectangular prism.
- Select two opposite corners for the rectangular base. The rectangle is created on the current workplane.
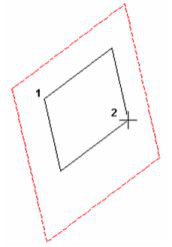
- Select the third point to define the box height. The height is normal to the workplane.
You can also enter the length, width, and height in the Inspector Bar.
Box Properties
The Properties window of a box contains a Box page, in which you can set the length, width, and height. 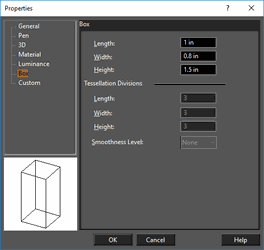
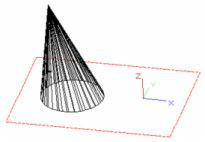
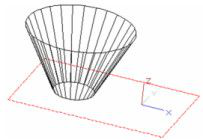
Cone

Default UI Menu: Draw/3D Object/3D Primitives/Cone
Ribbon UI Menu:

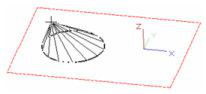
Creates a cone - by default, an object with a circular base that tapers to a point at the top. There are local menu options for creating non-standard cones.
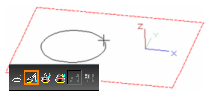
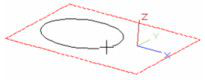
- Create the circular base by selecting the centerpoint and a point on the circumference. Or enter the radius, diameter, or circumference in the Inspector Bar. The circle is created on the current workplane.
- Select a third point to specify the cone height, or enter the height in the Inspector Bar. You can create the cone on either side of the workplane. The top point is directly above the base centerpoint.

Cone Properties
The Properties window of a cone contains a Cone page, in which you can set the geometric parameters. 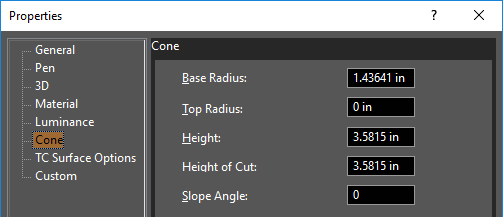 For TC Surface Options, see TC Surface Properties
Note: These options can be used separately or in combination. Cut Cone by Plane and Cut Cone by Lofting cannot be used together.
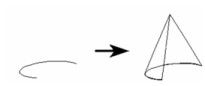
Local menu options: Specify 2D Base: Uses an existing 2D object as the base.
- Select the 2D object. (You cannot use 2D objects that are contained within a group or block.)
- Select a point to define the height, or enter the height in the Inspector Bar. The height is perpendicular to the workplane of the 2D object.
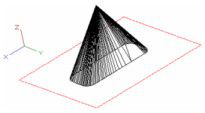
You can also select a 2D open object. In this case, a partial-cone surface object will be created.
You can also use a compound profile, open or closed, for the 2D base. (A compound profile is a series of connected lines and/or arcs.) Make sure Specify 2D Base and Use Compound Profile are both active, and select the compound profile.
When the profile is selected, select Finish Selection of Profile.
Specify Object Height Base: Creates an offset cone by using a specified point for the cone tip.
- Create the circular base.
- Select the point which is directly under the desired tip.
- Select a third point to specify the cone height, or enter the height in the Inspector Bar. The top point is directly above the selected point.
Cut Cone by Plane: Creates a truncated cone by cutting off the tip.
- Create a standard cone.
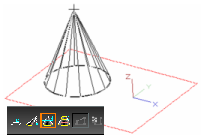
- Move the mouse back toward the base to create the cut. You can also enter the height of cut in the Inspector Bar.
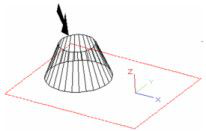
Cut Cone as Lofting: Creates an inverted, truncated cone by using a scaling factor for the cone base.
- Create a standard cone.
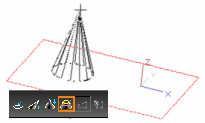
- Move the mouse outward to create the top of the cone. You can also enter a scaling factor in the Inspector Bar.
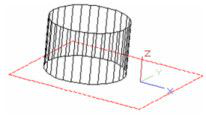
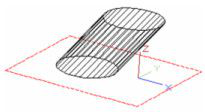
Cylinder

Default UI Menu: Draw/3D Object/3D Primitives/Cylinder
Ribbon UI Menu:

Creates a cylinder - by default, a circular prism.
- Create the circular base by selecting the centerpoint and a point on the circumference. Or enter the radius, diameter, or circumference in the Inspector Bar. The circle is created on the current workplane.
- Select a third point to specify the cylinder height, or enter the height in the Inspector Bar. You can create the cylinder on either side of the workplane.
Cylinder Properties
The Properties window of a cylinder contains a Cylinder page, in which you can set the geometric parameters. 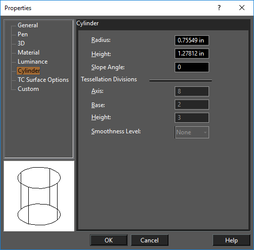 For TC Surface Options, see TC Surface Properties
Local menu option: Specify Object Height Base: Creates an offset cylinder by using a specified point for the top face.
- Create the circular base.
- Select the point which is directly under the desired center of the top face.
- Select a third point to specify the cylinder height, or enter the height in the Inspector Bar.
Hemisphere

Default UI Menu: Draw/3D Object/3D Primitives/Hemisphere
Ribbon UI Menu:

Creates a hemisphere (half of a sphere) with its circular base on the current workplane.
Note: A hemisphere is considered to be a Sphere object, and its Properties contain a Sphere page.
- Select the center point of the hemisphere. The point will be created on the current workplane.
- Click to size the hemisphere, or enter the radius in the Inspector Bar.
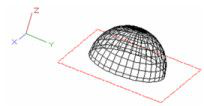
The hemisphere is created on the side of the positive Z axis.
Local menu option: Downward: Creates a hemisphere in the negative Z direction, "below" the workplane.
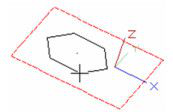
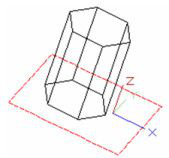
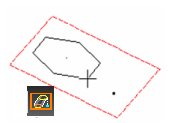
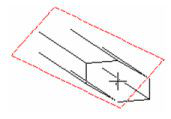
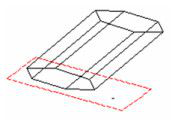
Polygonal Prism

Default UI Menu: Draw/3D Object/3D Primitives/Polygonal Prism
Ribbon UI Menu:

Creates a prism by defining a polygon (multi-sided, equal lengths, closed) as its base shape.
- Create the base polygon by selecting the centerpoint and one of the vertices. You can enter the number of sides, angle, and radius or side length in the Inspector Bar. The polygon is created on the current workplane.
- Select a third point to specify the prism height, or enter the height in the Inspector Bar. You can create the prism on either side of the workplane.
Prism Properties
The Properties window of a prism contains a Prism page, in which you can set the geometric parameters. 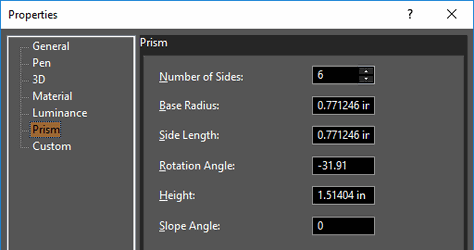
For TC Surface Options, see TC Surface Properties Specify Object Height Base: Creates an offset prism by using a specified point for the top face.
- Create the base polygon.
- Select the point which is directly under the desired center of the top face.
- Select a third point to specify the prism height, or enter the height in the Inspector Bar.
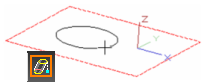
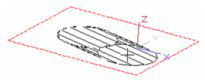
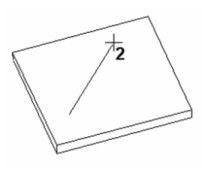
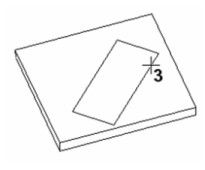
Rotated Box

Default UI Menu: Draw/3D Object/3D Primitives/Rotated Box
Ribbon UI Menu:

Creates a rectangular prism, based on a rectangle defined by three points.
- The rotated box will be placed on top of this shallow box. The first click defines one corner of the base rectangle.
- The second click defines one edge of the base rectangle.
- The third click defines the width of the base rectangle.
- The fourth and final click defines the height of the box.
You can also enter the length, width, and angle of the edge of the base rectangle, and the height, in the Inspector Bar.The Properties window of a rotated box contains a Box page, in which you can set the length, width, and height.
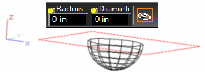
Sphere

Default UI Menu: Draw/3D Object/3D Primitives/Sphere
Ribbon UI Menu:
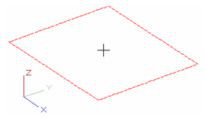
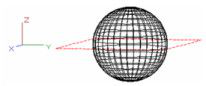
 Creates a sphere centered on the current workplane.
- Select the center point of the sphere. The point will be projected onto the current workplane.
- Click to size the sphere, or enter the radius in the Inspector Bar.
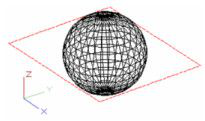
The sphere is created, centered on the workplane.
Sphere Properties
The Properties window of a sphere (and hemisphere) contains a Sphere page, in which you can set the radius. 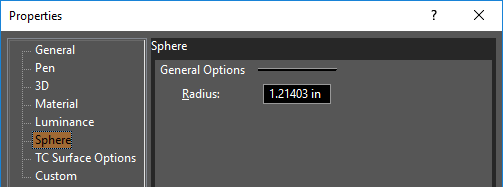 For TC Surface Options, see TC Surface Properties
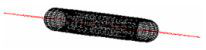
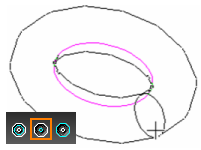
Torus

Default UI Menu: Draw/3D Object/3D Primitives/Torus
Ribbon UI Menu:

Creates a donut-shaped object by extruding a circle along a circular path.
- Create the circular base by selecting the centerpoint and a point on the circumference. Or enter the base radius in the Inspector Bar. The circle is created on the current workplane.
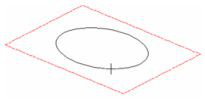
- The default option is Center, which means the cross-section of the torus uses the base circle as its center. Click to define the tube size, or enter the tube radius in the Inspector Bar.
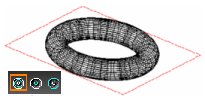
The torus is created, centered on the workplane.
Torus Properties
The Properties window of a torus contains a Torus page, in which you can set the geometric parameters.

For TC Surface Options, see TC Surface Properties Local menu options: Inner Radius: The base circle is the inner radius; the torus proceeds outward.
Outer Radius: The base circle is the outer radius; the torus proceeds inward.

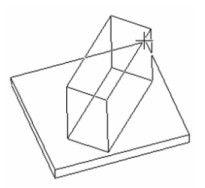
Wedge

Default UI Menu: Draw/3D Object/3D Primitives/Wedge
Ribbon UI Menu:

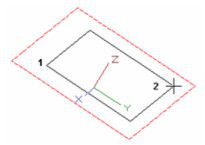
Creates a triangular wedge - a box cut diagonally in half.
- Create the base rectangle by selecting its opposite corners. You can also enter the length and width in the Inspector Bar. The rectangle is created on the current workplane.The order of selecting points is important - the wedge will be extruded from the second point.
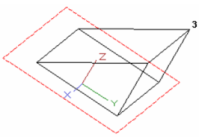
- Select a third point to specify the wedge height, or enter the height in the Inspector Bar. You can create the wedge on either side of the workplane.
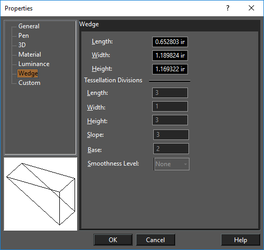
Wedge Properties
The Properties window of a wedge contains a Wedge page, in which you can set the geometric parameters.
 For TC Surface Options, see TC Surface Properties