Saving Views
(Available in all TurboCAD Variants)
Once you have used the zoom and pan tools to arrive at the exact view of your drawing that you want, you won't want to repeat all that work to get back to the same view later. You can save views and assign them names so that you can easily return to a saved view at any time. In addition, saved views must be created if you want to create viewports in Paper Space.
Note: For 3D views, you can also use camera object to save and display views in separate windows and with specific parameters. See Camera Objects
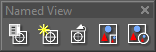
The Named Views tools are accessible from the View menu, or from the fly out World Plan icon on the Standard toolbar. 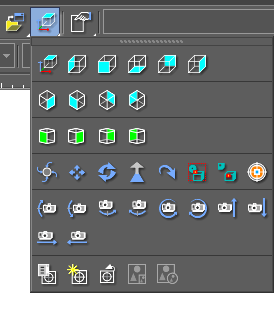 You can display the Named Views toolbar by right-clicking in any toolbar area and select Named View.
Note: Saved views can also be accessed and manipulated in the Design Director, in which you can also create new views. Render and camera settings can be manipulated here as well. See Design Director-Views
Creating a View

Default UI Menu: View/Named Views/Create View
Ribbon UI Menu:

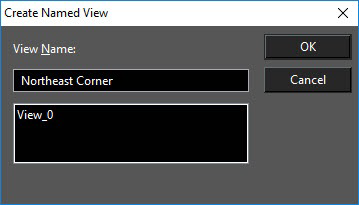
Saves a defined area of the screen as a named view. Define the rectangle that surrounds the area you want to save. In the Create Named View window, assign a unique name and click OK.
Note: If the drawing is already oriented to the view you want to save (i.e. you do not need to define a view rectangle), you can save the view using the Named View tool.
Named View

Default UI Menu: View/Named Views/Named View
Ribbon UI Menu:

The Named View window can be used to create a new saved view, or to display, modify, or delete a saved view.  Named views are saved with your drawing and remain available unless you delete them. Draft Rendering: Sets the rendering type when the view is rendered in Draft rendering mode. See Creating a Rendered View and Quality Rendering: Sets the rendering type when the view is rendered in Quality rendering mode Perspective: Activates Perspective mode. See The Camera Angle: The view angle for perspective mode. Position: The location of the camera position. Target: The location of the point the camera is facing. UP Vector: A point defining the up direction of the camera. Extents: The boundaries of the view.
Saving a View
- Use the zoom and pan tools to arrive at the view you want to save.
Note: If you want to create a view using a specific area of the screen,
- Select Named View from the menu or click the Named View icon to open the Named View window.
- Enter a name for the view. The name can be up to 32 characters in length and can include spaces.
- Click New to add the name to the list of named views.
Tip: Give the view a descriptive name that will help you remember it, such as "Garden Door." If you use names like "View 1" and "View 2," you'll quickly lose track of which is which.
Displaying a Saved View
In the Named View window, select the desired view and click Go To. This will leave the window open, in case you want to switch to another view. To immediately go to a named view and close the window, double-click on the view name.
Tip: If you want to display the previous view, use View / Zoom / Previous View.
Modifying a Saved View
Use the zoom and pan tools to arrive at the view with which you want to replace a saved view. Open the Named View window, select the view you want to replace with the current drawing view, and click Modify.
Deleting a Saved View
In the Named View window, select the view you want to delete, and click Delete.
Previous View

Default UI Menu: View/Zoom/Previous View
Ribbon UI Menu:

Displays the previous view, whether or not it was saved.
Note: If you want to display a saved view other than the previous one, select the view in the Named View window and click Go To.