Entity Marks

(Available in Platinum and Professional)
Default UI Menu: Insert/Entity Mark
Ribbon UI Menu:

Create custom marks to track, or count objects, and add information using Property Sets and Multi-blocks. Entity marks can be composed of one or both of two elements:
- Property Set Definitions – Create custom information for objects, and derive custom information from object geometry.
- Multi-View Blocks – Define composites of blocks that can vary their appearance depending upon viewpoint.
Property Set Definitions
Property Set Definitions (PSD) are used to define what kind of objects will associate with Entity Marks and assign the type and nature of data to be used with Entity Marks. Property Set Definitions are assigned in the Styles Manager palette. 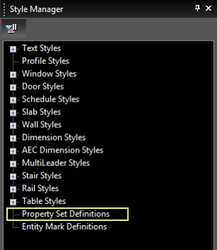
- Select Property Set Definitions in the Style Manager.
- Click the New button at the top of the palette.

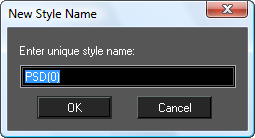
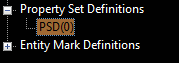
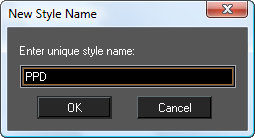
- When the New Style Name dialog appears enter a name then click OK.
- Select the new Property Set Definition in the Style Manager.
- In the Data area of the Style Manager (at the bottom), select Property definitions, then click on the data button that appears.

- The Property Set Definition dialog will open.
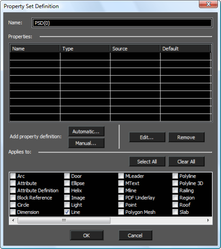
- Select the objects to which the PSD will apply, and then proceed with creating the property definitions for the set, either Automatic, or Manual, or Both. Note that the only objects which will work for Entity Marks are those associated with Property Definition Sets.
Automatic Definitions
Automatic definitions for PSD's are use to extract data directly from the object types.
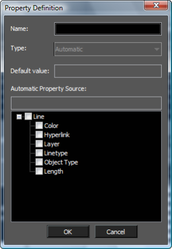
- Select a single property from the property list. A name reflecting the property will automatically be assigned.
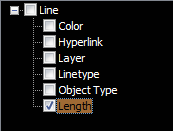
- Modify the name if needed.
- Click Ok create the property definition.
Manual Definitions
Automatic definitions for PSD's are use to extract data directly from the object types.
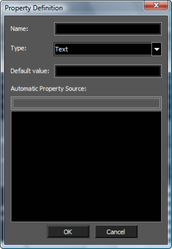
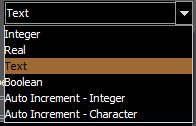
- Specify a Type for the property definition. Options include: Integer – a set number in integer format e.g. 5, 20, 3 Real – a set number in real format e.g. 1.5, 2.645, 3.14159 Text – a string of text e.g. Made by Troponopo inc. Boolean – a True/False value. Allows you to add a checkbox property e.g. (property name=SecurityGlass) True Auto Increment-Integer – an automatically incrementing integer value e.g. 0, 1, 2 Auto Increment-Character – an automatically incrementing character value e.g. A, B, C
- Specify a default value for the property definition.
- Create a name for the property definition.
- Click Ok create the Property definition.
Auto Increments
Auto Increment in manual property definitions (Auto Increment – Integer, Auto Increment – Character) are use to create sequential markers for object in your drawing. The increment value will depend upon the order of the objects creation, not the order in which you create the Entity Marks.
Assigning Property Sets to Objects
In order for Entity Marks to work with your objects you must assign the Property Sets with individual objects.
- Select all the objects of a specific type (Line, Circle etc.) to which you wish to assign property definition sets. Only select a single object type at a time.
- Open the Selection Info palette, expand the General area, and then click Property Sets.
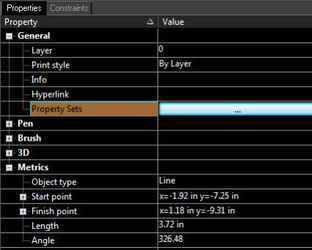
- Click the Data button adjacent to Property Sets to open the Add/Remove Property Sets dialog.
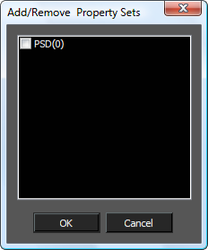
- A list of PSD's will appear, but only those which apply to the selected object type.
- Select the desired PSD's, and then click OK.
Entity Marks and Attributes
Block Attributes can be used to include object data with Entity marks. When you create the Block Attribute, type the name (tag) of the attribute in the following format: <Name_of_PSD><:>Name_of_Property_Definition> For example, if the PSD is called 'LineData' and the name of the Property Definition is 'Length' the Tag would be LineData:Length. When the attribute appears in the inserted mark on a line the line's length will be shown in the mark. The values shown in the displayed attribute will update if the associated object is modified.
Inserting Entity Marks
Once the Property Set Definitions, Multi view Block and Entity Mark Definition are all created and Property sets have been assigned to objects you can proceed to insert Entity Marks.
- Select the Entity Mark tool
- Click on the relevant object.
- Move the cursor and click to place the Entity Mark.
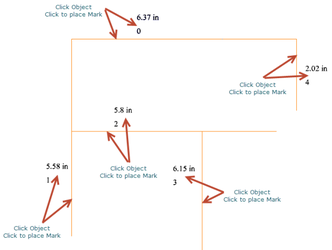
In the example above the Entity Mark show the Number of the Line, and the Length of the Line.
Multi-View Blocks
Multi-View Blocks (MVB) are used to create the visual elements of Entity Marks. MVBs are composed of pre-created blocks and block attributes. Multi-View Blocks are assigned in the Styles Manager palette. 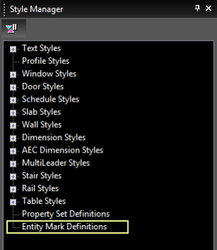
- Select Entity Marks Definitions in the Style Manager.
- Click the New button at the top of the palette.
- When the New Style Name dialog appears enter a name then click OK.
- Select the new Entity Mark Definition in the Style Manager.
- In the Data area of the Style Manager (at the bottom), select View Blocks, then click on the data button that appears.
- The Multi-View Block Definition dialog will open.
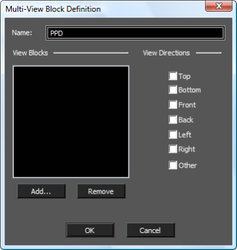
- Click the Add button to add a new block to the MVB.
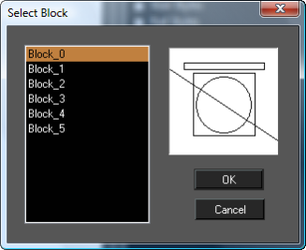
- Select a block from the list of blocks, and then click OK.
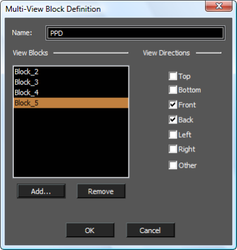
- Under View Directions select which directions will apply. The views are relative to the World Coordinate System. The Other directions is any view not expressly Top, Bottom, Front etc. View Directions do not re-orient blocks. If the block is flat on the world plane it will remain so even if you set it to a Left direction. Orient your blocks as you want them to appear.
- Add as many blocks as you want to the MVB then click OK.