Woodworking
(Available in Platinum)

Default UI Menu: Tools/WoodWorking/Create Layout
Ribbon UI Menu:

The Layout tool can be used for furniture design, and glass or metal cutting. The results show the optimal way to cut rectangular sheets or planks into rectangular parts. Go to Tools | WoodWorking | Create Layout
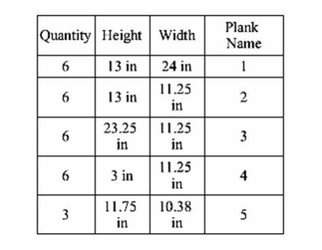
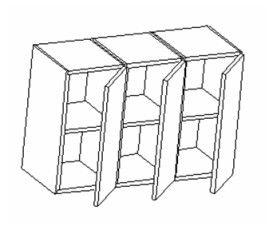
- Start with the object or objects you want to lay out. This example uses a parametric symbol from the "Cabinets" folder of the Library palette. (The object does not have to be a symbol or part.)
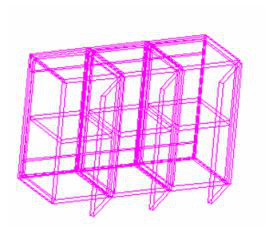
- Activate Layout, and click two points of a selection window around the objects. You can skip selecting objects if you are going to manually specify the planks.
- Select Finish from the local menu or Inspector Bar.
- In the Layout window, check all of the pieces you want to include in the layout.
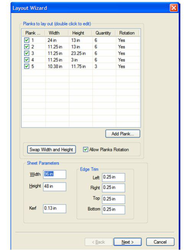
In the table you can:
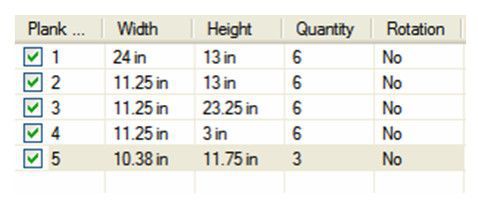
Double-click on any plank to open the Plank Parameters dialog. Where you can specify the properties of each plank individually, Including the quantity.
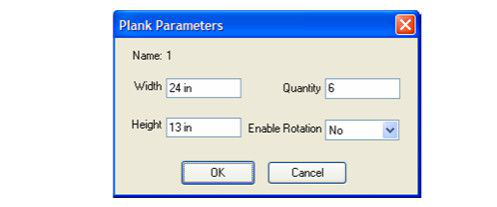
- Click Add Plank. Which will open the Plank Parameters dialog and allow you to manually create and specify planks.
- Click Swap Width and Height. Which will swap those values for the selected plank.
- Select or de-select Allow Plank Rotation. This will set the rotation parameter for all of the planks. If plank rotation is allowed the layout of the planks will be optimized to fit the sheet. If it is disallowed you can control how the planks will layout relative to the sheets grain. At the bottom of the window you can specify:
- Size of Board: defines the board or sheets from which the pieces will be cut.
- Kerf: Defines the width of the cutting blade.
- Edge Trim: defines trimming cuts in case the boards have ragged or damaged edges.
- Click Next.
- In the Format window, set the following options:
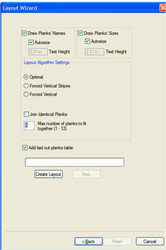
- Draw Planks' Names: If checked, block attributes containing the plank name will be assigned to each piece.
- Draw Planks' Sizes: If checked, block attributes containing the dimensions of the planks will be assigned to each piece.
- Autosize: Automatically chooses the size of the text.
- Layout: Check Forced VerticalStripes if you want through cuts, check Forced Vertical if you want through cuts along with using Join Identical Planks, if you want otherwise, check Optimal.
- Algorithm options: Check Join Identical Planks* if you have more than six identical pieces. And set the maximum number of parts from which pieces will be cut.
- Check Add laid out planks table to insert a table with all of the plank parameters after you inset the layout.
- Click Create Layout to begin calculating the layout. (You can interrupt the process by clicking Stop.)
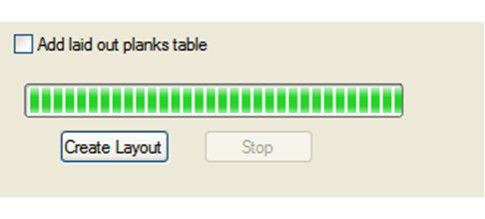
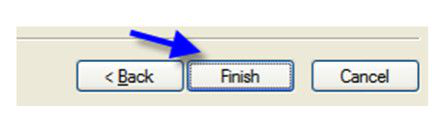
- When the calculation process is complete, click Finish.
- Click in the drawing to bring in the board layout.
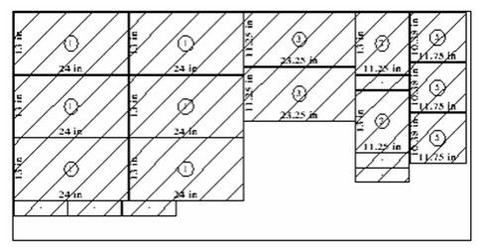
If you checked Add Name or Add Sizes, you will see the blocks indicated on each piece. Identical pieces have the same block letter.
- If you checked Add laid out planks table, click in the drawing to place the table with the layout data,