Arc
(Available in all TurboCAD Variants)
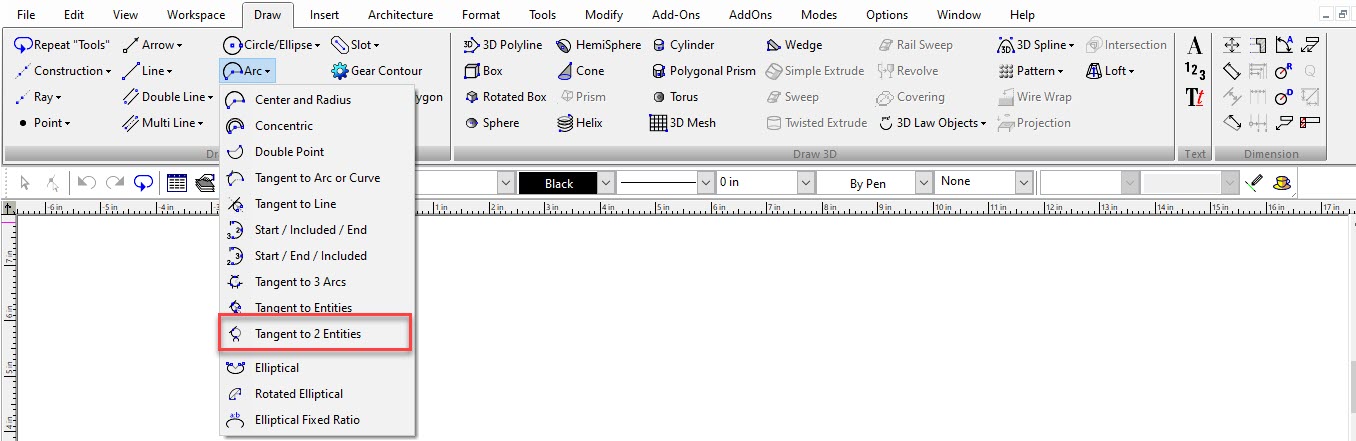
Default UI Menu: Draw/Arc
Ribbon UI Menu:

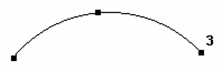
Most of the Arc tools are identical to Circle/Ellipse tools. After the initial circle is created, the arc is cut from it by defining the start and end angles. You can display the Arc toolbar by right-clicking in any toolbar area and selecting Arc.

Start and end angles can be changed with the Edit Tool (node editing). See Editing Circles, Ellipses, and Arcs
Arc-Center and Radius

Default UI Menu: Draw/Arc/Center and Radius
Ribbon UI Menu:
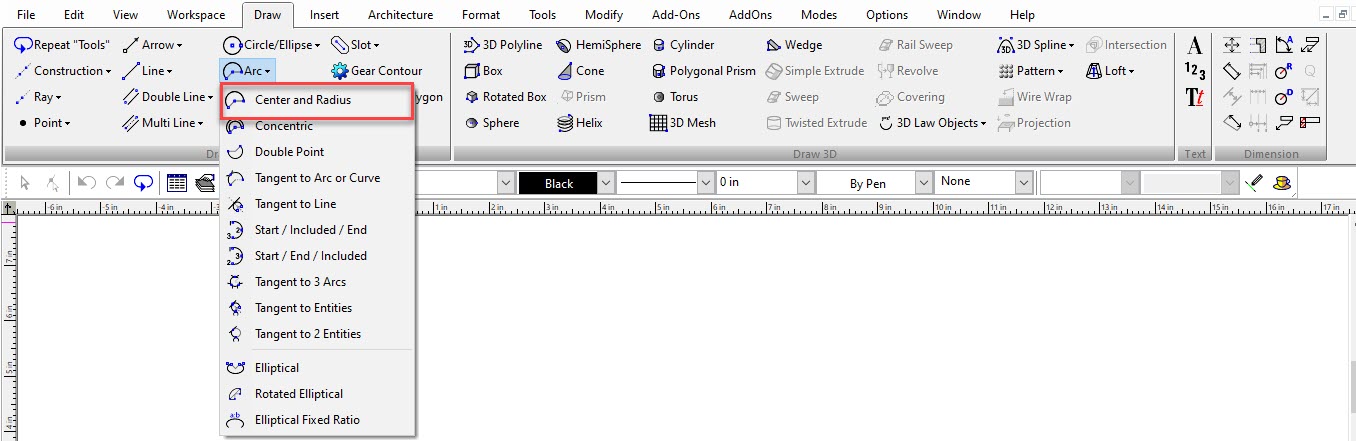
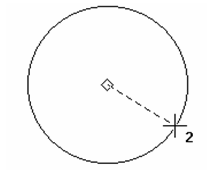
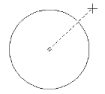
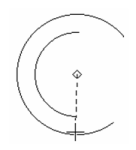
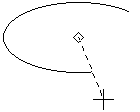
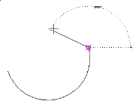
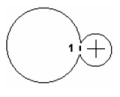
Creates an arc by defining its center, a point on its circumference, and the start and end angles.
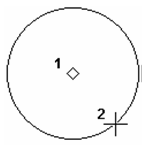
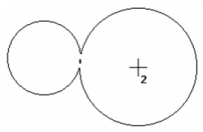
- Select the arc centerpoint and a point on the circumference of the circle from which the arc will be cut. You can also specify the radius, diameter, or circumference in the Inspector Bar.
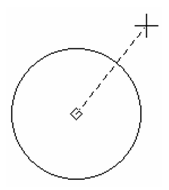
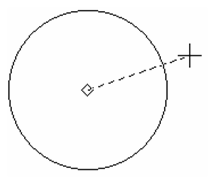
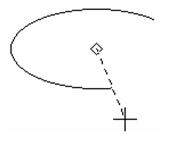
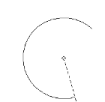
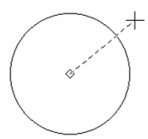
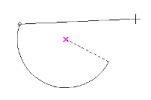
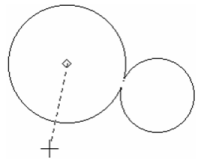
- A dotted line appears from the centerpoint. Move the cursor to set the arc start angle, or enter the angle in the Inspector Bar.
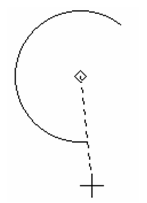
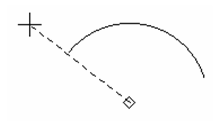
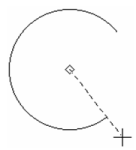
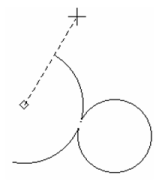
- Move the cursor counterclockwise (you can change this to clockwise with the Angle options) to draw the arc, or enter the end angle or arc length in the Inspector Bar.
Arc-Concentric

Default UI Menu: Draw/Arc/Concentric
Ribbon UI Menu:
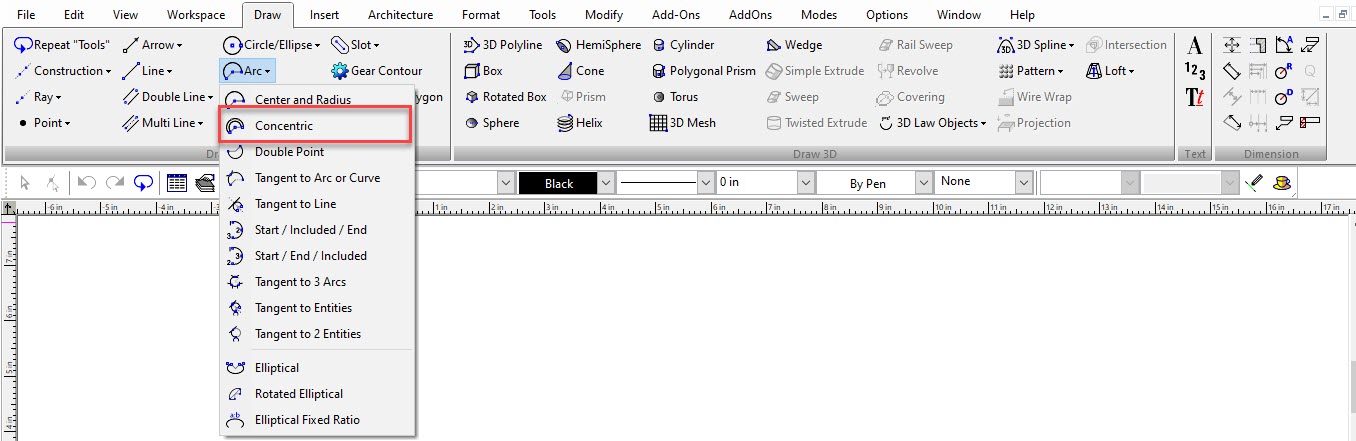
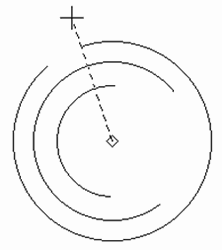
Creates arcs that share the same center point.
- Create the first arc by selecting the centerpoint, then moving the mouse and clicking to define its size. You can also enter the radius, diameter, or circumference in the Inspector Bar.
- A dotted line appears from the centerpoint. Move the cursor to set the arc start angle, or enter the angle in the Inspector Bar.

- Move the cursor counterclockwise to draw the arc, or enter the end angle or arc length in the Inspector Bar.

- Create the next arc the same way. The centerpoint is already defined, you just need to define the size, and start and end angles.

- Repeat these steps to draw multiple concentric arcs.
- Double-click to finish, select Finish from the local menu or Inspector Bar, or press Alt+F.
Arc-Double Point

Default UI Menu: Draw/Arc/Double Point
Ribbon UI Menu:
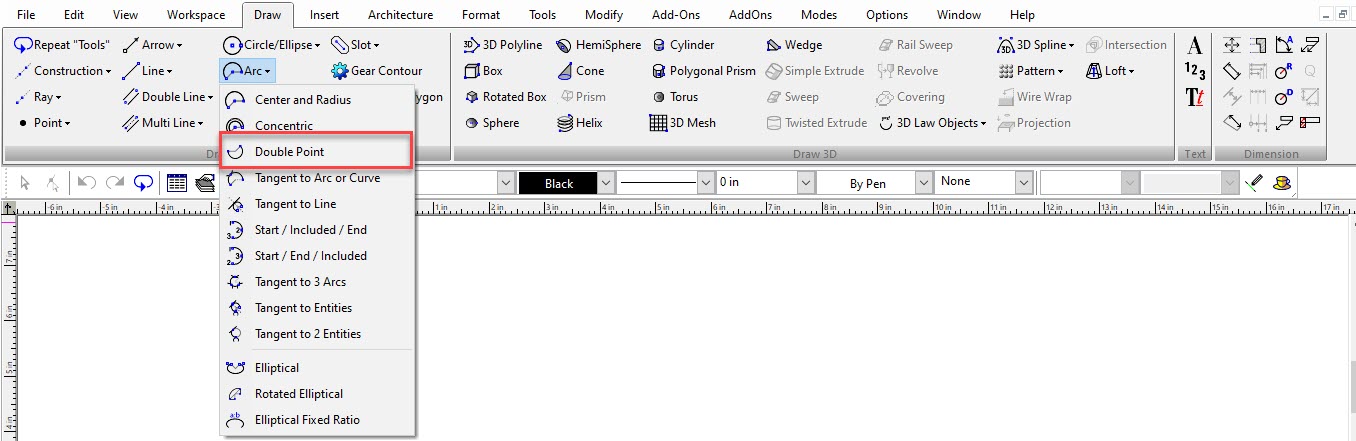
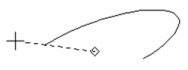
Creates an arc by defining two endpoints of its diameter.
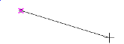
- Select a point on the circumference of the circle from which the arc will be cut.
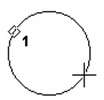
- Select the point on the opposite end of the diameter line, or enter the radius, diameter or circumference, and angle of the diameter line in the Inspector Bar.
- A dotted line appears from the centerpoint. Move the cursor to set the arc start angle, or enter the angle in the Inspector Bar.
- Move the cursor counterclockwise to draw the arc, or enter the end angle or arc length in the Inspector Bar.
Arc-Elliptical

Default UI Menu: Draw/Ellipse/Elliptical Arc
Ribbon UI Menu:
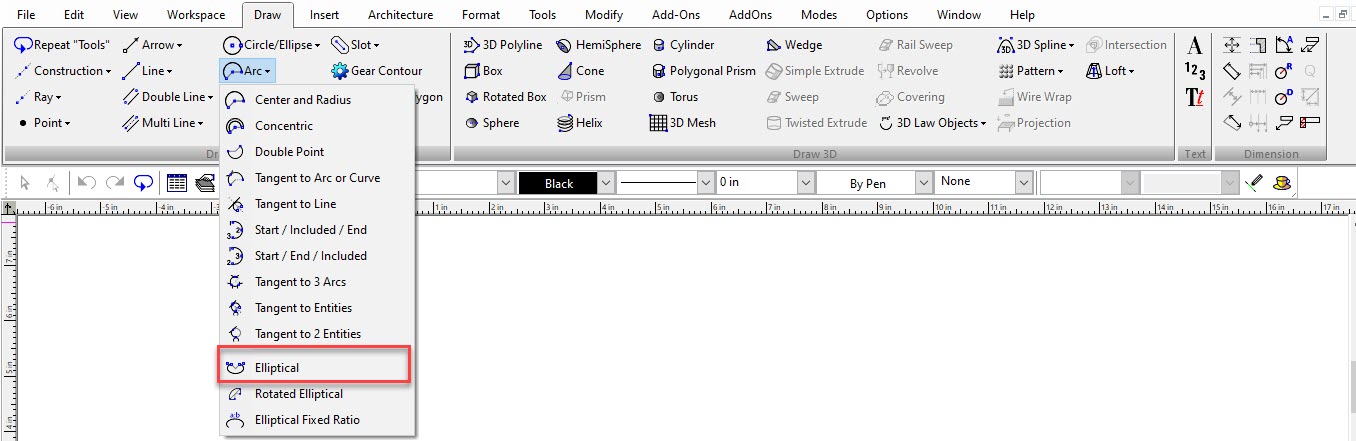
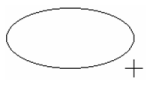
Creates an elliptical arc by defining a bounding rectangle for the ellipse. The axes of the ellipse will be orthogonal.
- Select the first corner of the bounding rectangle.
- Define the diagonally opposite corner of the bounding rectangle, or enter the major and minor axis lengths in the Inspector Bar.

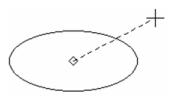
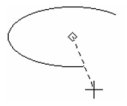
- A dotted line appears from the centerpoint. Move the cursor to set the arc start angle, or enter the angle in the Inspector Bar.

- Move the cursor counterclockwise to draw the arc, or enter the end angle or arc length in the Inspector Bar.
Arc-Elliptical Fixed Ratio

Default UI Menu: Draw/Ellipse/Elliptical Fixed Ratio Arc
Ribbon UI Menu:
Creates an elliptical arc by specifying its aspect ratio - the ratio of the major axis to the minor axis. The axes of the ellipse are orthogonal.
- Enter the aspect ratio in the a:b ratio field on the Inspector Bar. (If you want to repeat this value later then lock it, otherwise the field reverts back to the default.)
- Select the centerpoint of the ellipse.
- Move the mouse to size the ellipse.
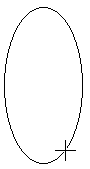 a:b = 0.5
 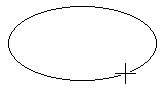 a:b = 2.0
- A dotted line appears from the centerpoint. Move the cursor to set the arc start angle, or enter the angle in the Inspector Bar.
- Move the cursor counterclockwise to draw the arc, or enter the end angle or arc length in the Inspector Bar.
Arc-Rotated Elliptical

Default UI Menu: Draw/Ellipse/Rotated Elliptical Arc
Ribbon UI Menu:
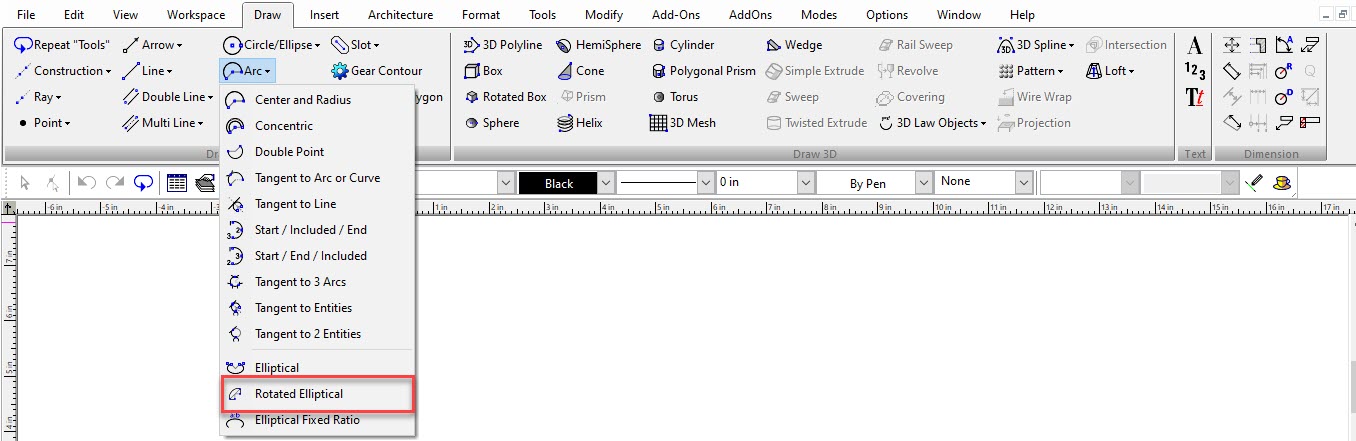
Creates a tilted elliptical arc.
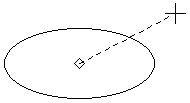
- Select the centerpoint of the ellipse.
- Move the mouse to set the length and angle of the major axis, or enter the major axis length and angle in the Inspector Bar.

- Set the length of the minor axis, which is always perpendicular to the major axis. You can also enter the axis length in the Inspector Bar.
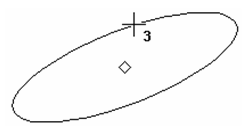
- A dotted line appears from the centerpoint. Move the cursor to set the arc start angle, or enter the angle in the Inspector Bar.
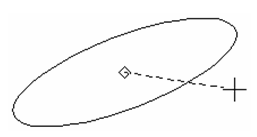
- Move the cursor counterclockwise to draw the arc, or enter the end angle or arc length in the Inspector Bar.
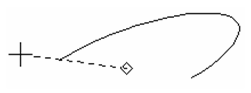
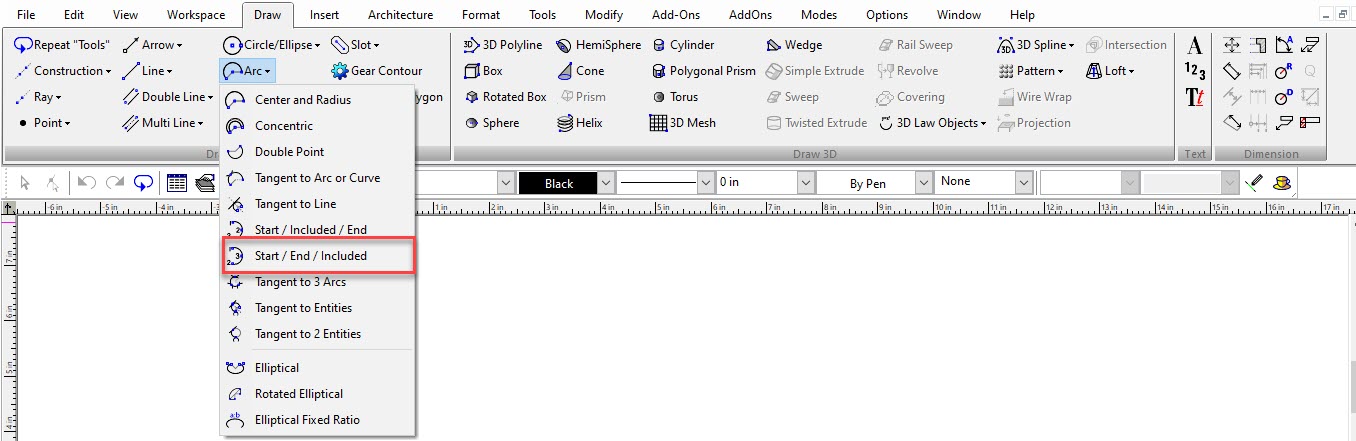
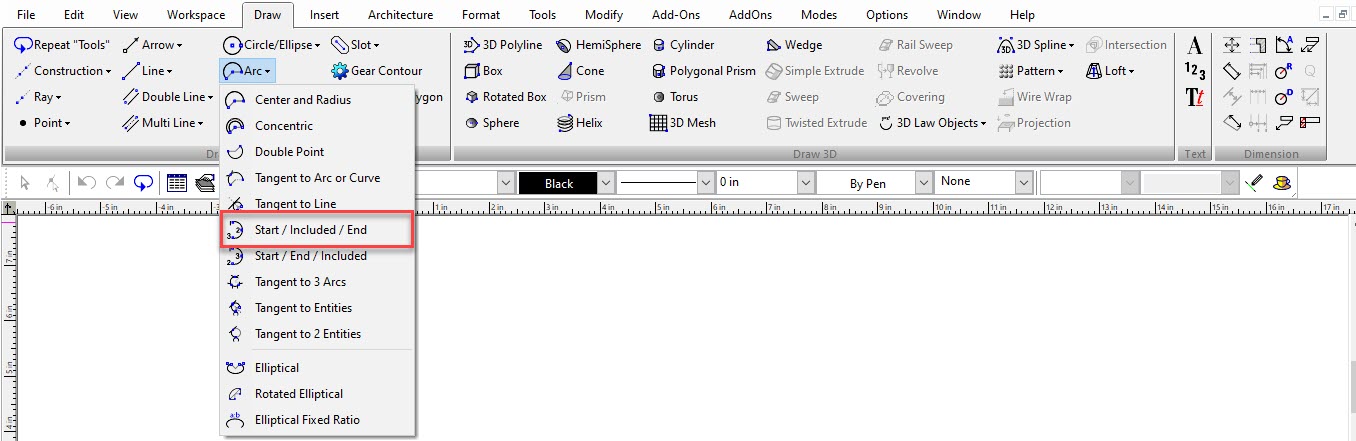
Arc-Start, End, Included

Default UI Menu: Draw/Arc/Start / End / Included
Ribbon UI Menu:
Creates an arc by defining the start point, the endpoint, and a point on the arc.
- Select the start point.
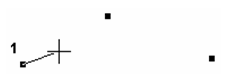
- Select the endpoint.
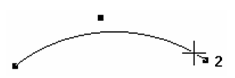
- Select a point through which the arc will pass.
Arc-Start, Included, End

Default UI Menu: Draw/Arc/Start / Included / End
Ribbon UI Menu:
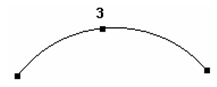
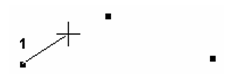
Creates an arc by defining the start point, a point on the arc, and the endpoint.
- Select the start point.
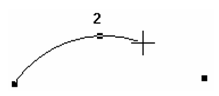
- Select a point through which the arc will pass.
- Select the endpoint.
Arc-Tangent to 2 Entities

Default UI Menu: Draw/Arc/Tangent to 2 Entities
Ribbon UI Menu:
Creates an arc tangent to two objects - lines, arcs, circles, or ellipses. You can select the arc segment that will remain on either side of the tangent points.
- Select the first tangent object, close to the point of tangency.
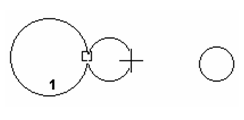
- Select the second tangent object, close to the point of tangency.

- Size the circle with the mouse; the arc will be cut from this circle. Or enter the radius, diameter, or circumference in the Inspector Bar.
- Move the cursor to either side of the arc to determine the arc segment that will remain.


Tangent Arc of Fixed Size
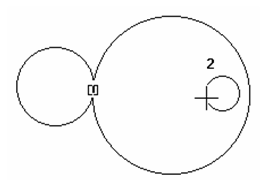
By default, Tangent to 2 Entities creates the smallest circle that touches two objects, and the arc is cut from this circle.
- To fix the size of the circle, enter the radius, diameter, or circumference in the Inspector Bar and lock it, but do not press Enter. When you move the cursor, the circle size remains constant.

- Select the second tangent object.

- The fixed-sized tangent circle, then arc, is created.
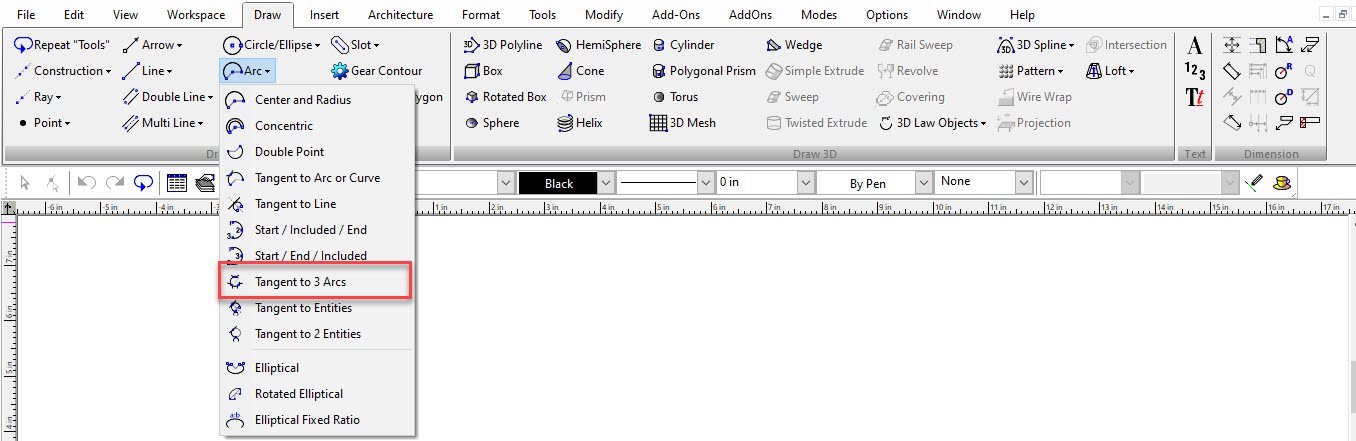
Arc-Tangent to 3 Arcs

Default UI Menu: Draw/Arc/Tangent to 3 Arcs
Ribbon UI Menu:
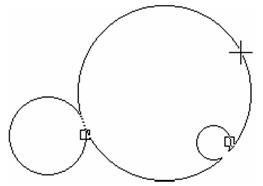
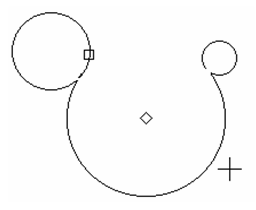
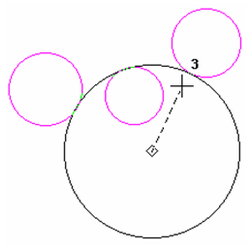
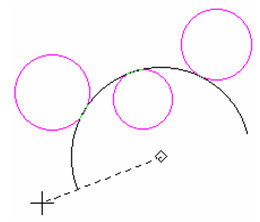
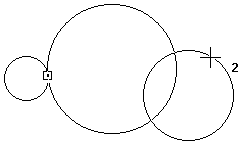
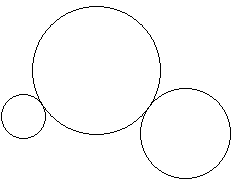
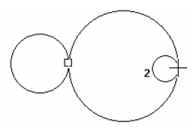
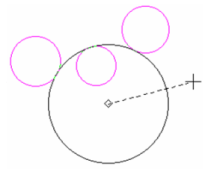
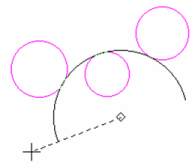
Creates an arc tangent to three arcs or circles. You can specify whether the existing arcs will be inside or outside the new arc.
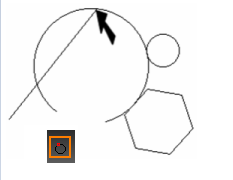
- Select the first tangent object. Click slightly outside the object to keep it outside the new circle. Click inside if you want the tangent object to be inside the new circle. If the object is clicked slightly outside, an outward-pointing arrow appears.

- Select the second tangent object. If the object is clicked slightly inside, an inward-pointing arrow appears.

- Select the third object. The tangent circle is created. The arc will be cut from this circle.
- A dotted line appears from the centerpoint. Move the cursor to set the arc start angle, or enter the angle in the Inspector Bar.

- Move the cursor counterclockwise to draw the arc, or enter the end angle or arc length in the Inspector Bar.
Arc-Tangent to Arc

Default UI Menu: Draw/Arc/Tangent to Arc or Curve
Ribbon UI Menu:

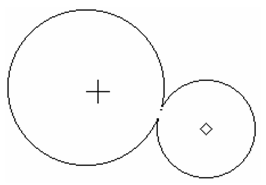
Creates an arc tangent to an arc, circle, or ellipse.
- Select the existing arc, circle, or ellipse to which you want the arc to be tangent. The tangent circle, from which the arc will be cut, extends from the point you selected.

- Select the centerpoint of the tangent circle, or enter the radius, diameter, or circumference in the Inspector Bar. (If you use the Inspector Bar and then press Enter, you will not be able to reposition the circle.). The circle will be created from the point you selected on the tangent object.

- Move the mouse to position the circle, either inside or outside the tangent object.
- A dotted line appears from the centerpoint. Move the cursor to set the arc start angle, or enter the angle in the Inspector Bar.

- Move the cursor counterclockwise to draw the arc, or enter the end angle or arc length in the Inspector Bar.

Arc-Tangent to Entities

Default UI Menu: Draw/Arc/Tangent to Entities
Ribbon UI Menu:

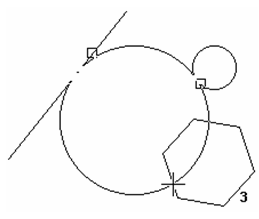
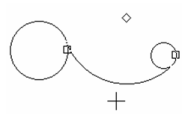
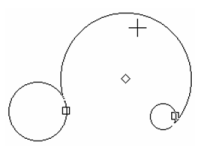
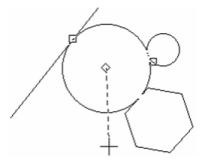
Creates an arc tangent to three objects (rectangles, polygons, arcs, etc.)
1Select the first tangent object.
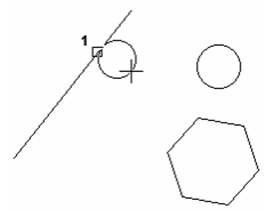
2Select the second tangent object.
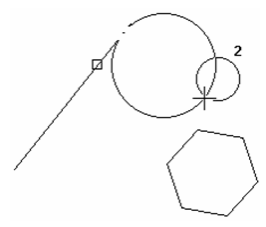
3Select the third tangent object. The tangent circle is created. The arc will be cut from this circle.
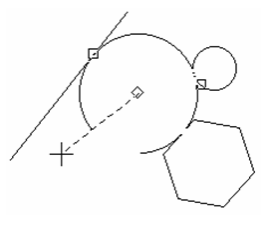
4A dotted line appears from the centerpoint. Move the cursor to set the arc start angle, or enter the angle in the Inspector Bar.

5Move the cursor counterclockwise to draw the arc, or enter the end angle or arc length in the Inspector Bar.
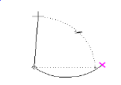
Local menu option: Through point: Makes the tangent circle pass through a specific point. In the example below, the line endpoint was selected, rather than the line itself. 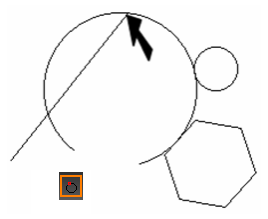
Tangent Arc of Fixed Size
By default, Tangent to Entities creates a circle that touches three objects, and the arc is cut from this circle.
- To fix the size of the circle, enter the radius, diameter, or circumference in the Inspector Bar and lock it, but do not press Enter. When you move the cursor, the circle size remains constant.
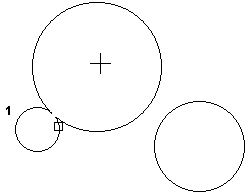
- Select the second tangent object, close to the point of tangency.
- The fixed-sized tangent circle is created.
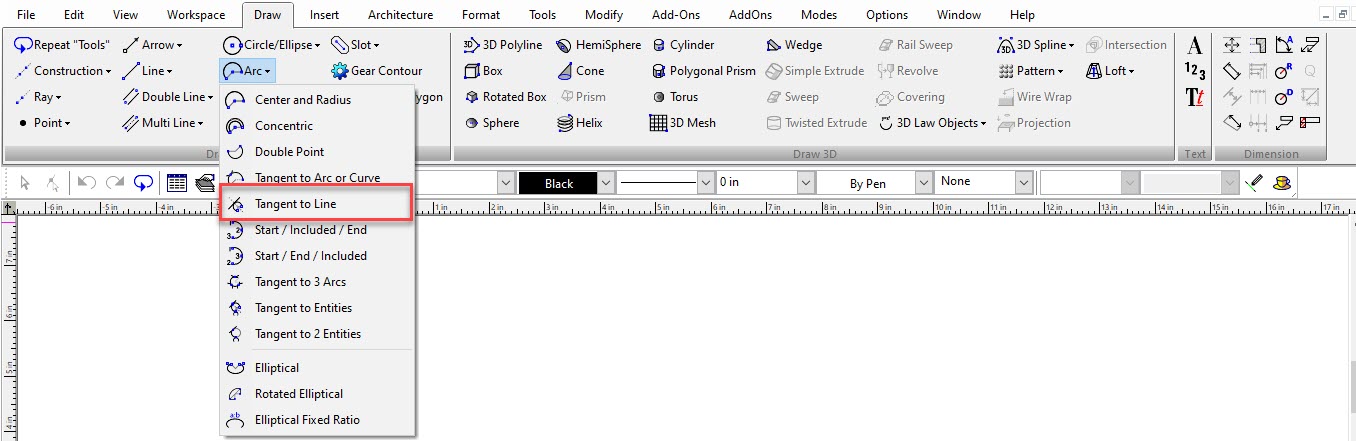
Arc-Tangent to Line

Default UI Menu: Draw/Arc/Tangent to Line
Ribbon UI Menu:
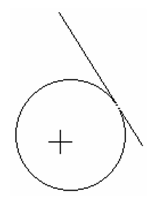
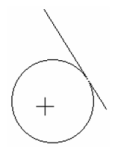
Creates an arc tangent to a line.
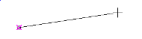
- Select the existing line to which you want the arc to be tangent. The tangent circle, from which the arc will be cut, extends from the point you selected.

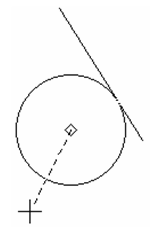
- Select the centerpoint of the circle, or enter the radius, diameter, or circumference in the Inspector Bar. (If you use the Inspector Bar and then press Enter, you will not be able to reposition the circle.) The circle will be created from the point you selected on the line.
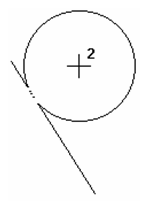
- Move the mouse to position the circle, on either side of the line.
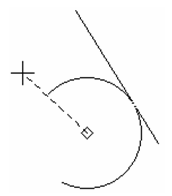
- A dotted line appears from the centerpoint. Move the cursor to set the arc start angle, or enter the angle in the Inspector Bar.
- Move the cursor counterclockwise to draw the arc, or enter the end angle or arc length in the Inspector Bar.
Arc tools for the LTE Workspace
 There are a specific set of tools designed to work in concert with the LTE Workspace In the LTE Workspace 2D tools behave with slight differences to standard TurboCAD methods.
- They allow use of dynamic input.
- They automatically drop when the action is completed, whereas standard TC tools continue until you change the tool.
- They have a Multiple option (local menu) that turns off auto-dropping for the individual tool.
- You can complete drop the tool by pressing the either the Enter or Space keys.
- You can re-activate the tool by pressing the Space Key again.
Note: LTE Workspace is not a feature of TurboCAD Deluxe
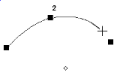
Arc_3 Points
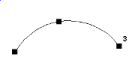
Creates an arc by defining the start point, a point on the arc, and the endpoint. This is a "generic" arc tool, because the local menu options enable you to define the arc in a number of different ways. Select the start point.
 Select a point through which the arc will pass.
 Select the endpoint.
 Local Menu Options: These options are available after the fist point of the arc is placed:
- Center:
Before you click the arc start point, you can select
Center
to define the center point first.You can then click the center point and start point.
- Angle: Rather than clicking the end point, you can select the Angle or Chord Length local option.

- End: With this option, after you click the arc start point, you can select End to click the end point.

- Radius: Then you can click the center point, or use the Angle, Direction, or Radius local option.

Arc_Center, Start, Angle
Note: You can use the local menu options to create this arc differently.
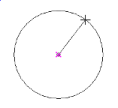
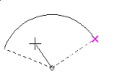
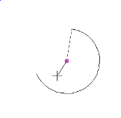
Creates an arc by defining its center, a point on its circumference where the arc starts, and the arc angle.
- Select the arc centerpoint and a point on the circumference of the circle where the arc will start. You can also specify the Radius and Start Angle in the Inspector Bar.
- Move the cursor counterclockwise to draw the arc, or enter the Angle in the Inspector Bar.
Arc_Center, Start, End
Note: You can use the local menu options to create this arc differently.
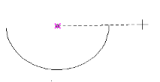
Creates an arc by defining its center, a point on its circumference where the arc starts, and the end point.
- Select the arc centerpoint and a point on the circumference of the circle where the arc will start. You can also specify the Radius and Start Angle in the Inspector Bar.
- Move the cursor counterclockwise to draw the arc, or enter the End Angle in the Inspector Bar.
Arc_Center, Start, Length
Note: You can use the local menu options to create this arc differently.
Creates an arc by defining its center, a point on its circumference where the arc starts, and the chord length.
- Select the arc centerpoint and a point on the circumference of the circle where the arc will start. You can also specify the Radius and Start Angle in the Inspector Bar.

- Move the cursor to draw the arc, or enter the Length in the Inspector Bar.

Arc_Concentric
Creates arcs that share the same centerpoint.
- Create the first arc by selecting the centerpoint, then moving the mouse and clicking to define its size. You can also enter the radius, diameter, or circumference in the Inspector Bar.
- A dotted line appears from the centerpoint. Move the cursor to set the arc start angle, or enter the angle in the Inspector Bar.
- Move the cursor counterclockwise to draw the arc, or enter the end angle or arc length in the Inspector Bar.
- Create the next arc the same way. The centerpoint is already defined, you just need to define the size, and start and end angles.
- Repeat these steps to draw multiple concentric arcs.

- Double-click to finish, select Finish from the local menu or Inspector Bar, or press Alt+F.
Arc_Double Point
Creates an arc by defining two endpoints of its diameter.
- Select a point on the circumference of the circle from which the arc will be cut.

- Select the point on the opposite end of the diameter line, or enter the radius, diameter or circumference, and angle of the diameter line in the Inspector Bar.

- A dotted line appears from the centerpoint. Move the cursor to set the arc start angle, or enter the angle in the Inspector Bar.

- Move the cursor counterclockwise to draw the arc, or enter the end angle or arc length in the Inspector Bar.

Arc_Elliptical
Creates an elliptical arc by defining a bounding rectangle for the ellipse. The axes of the ellipse will be orthogonal.
- Select the first corner of the bounding rectangle.
- Define the diagonally opposite corner of the bounding rectangle, or enter the major and minor axis lengths in the Inspector Bar.
- A dotted line appears from the centerpoint. Move the cursor to set the arc start angle, or enter the angle in the Inspector Bar.
- Move the cursor counterclockwise to draw the arc, or enter the end angle or arc length in the Inspector Bar.
Arc_Elliptical Fixed Ratio
Creates an elliptical arc by specifying its aspect ratio - the ratio of the major axis to the minor axis. The axes of the ellipse are orthogonal.
- Enter the aspect ratio in the a:b ratio field on the Inspector Bar. (If you want to repeat this value later then lock it, otherwise the field reverts back to the default.)
- Select the centerpoint of the ellipse.
- Move the mouse to size the ellipse.
 a:b = 0.5
  a:b = 2.0
 - A dotted line appears from the centerpoint. Move the cursor to set the arc start angle, or enter the angle in the Inspector Bar.

- Move the cursor counterclockwise to draw the arc, or enter the end angle or arc length in the Inspector Bar.
Arc_Rotated Elliptical
Creates a tilted elliptical arc.
- Select the centerpoint of the ellipse.
- Move the mouse to set the length and angle of the major axis, or enter the major axis length and angle in the Inspector Bar.

- Set the length of the minor axis, which is always perpendicular to the major axis. You can also enter the axis length in the Inspector Bar.

- A dotted line appears from the centerpoint. Move the cursor to set the arc start angle, or enter the angle in the Inspector Bar.

- Move the cursor counterclockwise to draw the arc, or enter the end angle or arc length in the Inspector Bar.
Arc_Start, Center, Angle
Creates an arc by defining its start point, the center point, and the angle.Note: You can use the local menu options to create this arc differently.
- Select the arc start point and then the center point. You can also specify the Radius and Angle in the Inspector Bar.

- Move the cursor counterclockwise to draw the arc, or enter the Angle in the Inspector Bar.
Arc_Start, Center, End
Creates an arc by defining its start point, the center point, and the end point.Note: You can use the local menu options to create this arc differently. .
- Select the arc start point and then the center point. You can also specify the Radius and Angle in the Inspector Bar.

- Move the cursor counterclockwise to draw the arc, or enter the End Angle in the Inspector Bar.
Arc_Start, Center, Length
Creates an arc by defining its start point, the center point, and the chord length.Note: You can use the local menu options to create this arc differently.
- Select the arc start point and then the center point. You can also specify the Radius and Angle in the Inspector Bar.

- Move the cursor counterclockwise to draw the arc, or enter the Length in the Inspector Bar.
Arc_Start, End, Angle
Creates an arc by defining its start point, end point, and angle.Note: You can use the local menu options to create this arc differently.
- Select the arc start point and then the end point. You can also specify the Length and Angle in the Inspector Bar.
- Move the cursor to draw the arc, or enter the Angle in the Inspector Bar.
Arc_Start, End, Direction
Creates an arc by defining its start point, end point, and tangent direction.Note: You can use the local menu options to create this arc differently.
- Select the arc start point and then the end point. You can also specify the Length and Angle in the Inspector Bar.

- Move the cursor to set the tangent direction of the arc, or enter the Angle in the Inspector Bar.

Arc_Start, End, Included
Creates an arc by defining the start point, the endpoint, and a point on the arc.
- Select the start point.

- Select the endpoint.

- Select a point through which the arc will pass.

Arc_Start, End, Radius
Creates an arc by defining its start point, end point, and arc radius.Note: You can use the local menu options to create this arc differently.
- Select the arc start point and then the end point. You can also specify the Length and Angle in the Inspector Bar.
- Move the cursor to set the radius arc, or enter the Radius in the Inspector Bar.
Arc_Tangent to 2 Entities
Creates an arc tangent to two objects - lines, arcs, circles, or ellipses. You can select the arc segment that will remain on either side of the tangent points.
- Select the first tangent object, close to the point of tangency.

- Select the second tangent object, close to the point of tangency.
- Size the circle with the mouse; the arc will be cut from this circle. Or enter the radius, diameter, or circumference in the Inspector Bar.

- Move the cursor to either side of the arc to determine the arc segment that will remain.
Tangent Arc of Fixed Size
By default, Tangent to 2 Entities creates the smallest circle that touches two objects, and the arc is cut from this circle. To fix the size of the circle, enter the radius, diameter, or circumference in the Inspector Bar and lock it, but do not press Enter. When you move the cursor, the circle size remains constant. 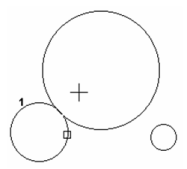 Select the second tangent object.
 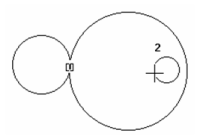 The fixed-sized tangent circle, then arc, is created.
Arc_Tangent to 3 Arcs
Creates an arc tangent to three arcs or circles. You can specify whether the existing arcs will be inside or outside the new arc.
- Select the first tangent object. Click slightly outside the object to keep it outside the new circle. Click inside if you want the tangent object to be inside the new circle.If the object is clicked slightly outside, an outward-pointing arrow appears.

- Select the second tangent object.If the object is clicked slightly inside, an inward-pointing arrow appears.

- Select the third object. The tangent circle is created. The arc will be cut from this circle.

- A dotted line appears from the centerpoint. Move the cursor to set the arc start angle, or enter the angle in the Inspector Bar.
- Move the cursor counterclockwise to draw the arc, or enter the end angle or arc length in the Inspector Bar.
Arc_Tangent to Arc
Creates an arc tangent to an arc, circle, or ellipse.
- Select the existing arc, circle, or ellipse to which you want the arc to be tangent. The tangent circle, from which the arc will be cut, extends from the point you selected.
- Select the centerpoint of the tangent circle, or enter the radius, diameter, or circumference in the Inspector Bar. (If you use the Inspector Bar and then press Enter, you will not be able to reposition the circle.)The circle will be created from the point you selected on the tangent object.
- Move the mouse to position the circle, either inside or outside the tangent object.

- A dotted line appears from the centerpoint. Move the cursor to set the arc start angle, or enter the angle in the Inspector Bar.
- Move the cursor counterclockwise to draw the arc, or enter the end angle or arc length in the Inspector Bar.
Arc_Tangent to Line
Creates an arc tangent to a line.
- Select the existing line to which you want the arc to be tangent. The tangent circle, from which the arc will be cut, extends from the point you selected.

- Select the centerpoint of the circle, or enter the radius, diameter, or circumference in the Inspector Bar. (If you use the Inspector Bar and then press Enter, you will not be able to reposition the circle.)The circle will be created from the point you selected on the line.

- Move the mouse to position the circle, on either side of the line.
- A dotted line appears from the centerpoint. Move the cursor to set the arc start angle, or enter the angle in the Inspector Bar.

- Move the cursor counterclockwise to draw the arc, or enter the end angle or arc length in the Inspector Bar.

Arc_Tangent to Entities
Creates an arc tangent to three objects (rectangles, polygons, arcs, etc.)
- Select the first tangent object.

- Select the second tangent object.

- Select the third tangent object. The tangent circle is created. The arc will be cut from this circle.
- A dotted line appears from the centerpoint. Move the cursor to set the arc start angle, or enter the angle in the Inspector Bar.
- Move the cursor counterclockwise to draw the arc, or enter the end angle or arc length in the Inspector Bar.

Local menu option: Through point: Makes the tangent circle pass through a specific point. In the example below, the line endpoint was selected, rather than the line itself.
Tangent Arc of Fixed Size
By default, Tangent to Entities creates a circle that touches three objects, and the arc is cut from this circle. To fix the size of the circle, enter the radius, diameter, or circumference in the Inspector Bar and lock it, but do not press Enter. When you move the cursor, the circle size remains constant.

Select the second tangent object, close to the point of tangency.

The fixed-sized tangent circle is created.
