Render Manager
Default UI Menu: Tools/Render Manager
Ribbon UI Menu:

The Render Manager is opened whenever you click an option to Edit: Materials, Environments, Render Styles, or Luminances.
Expanding a folder will show sub-folders and/or names for Materials or Luminance, etc. The list on the left will show tiny thumbnails next to the name (if available) and larger thumbnails in the right-hand pane. If no thumb's are available, a simple box with a warning sign is used to represent the item. 
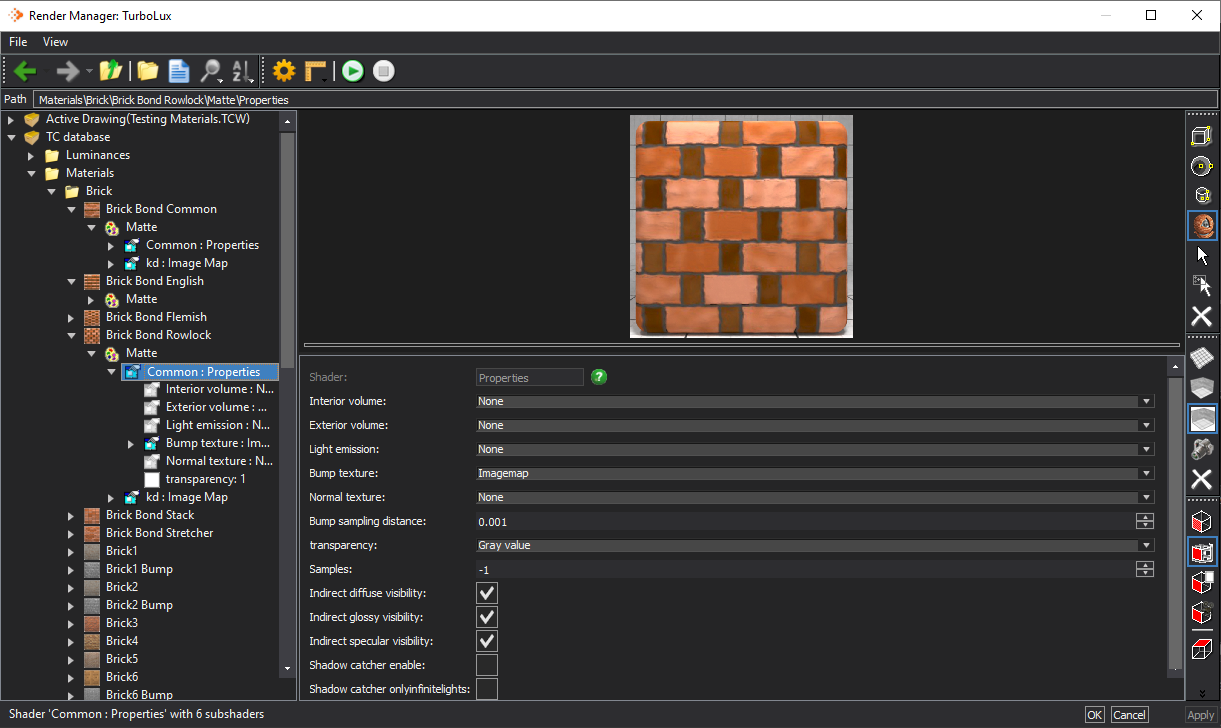
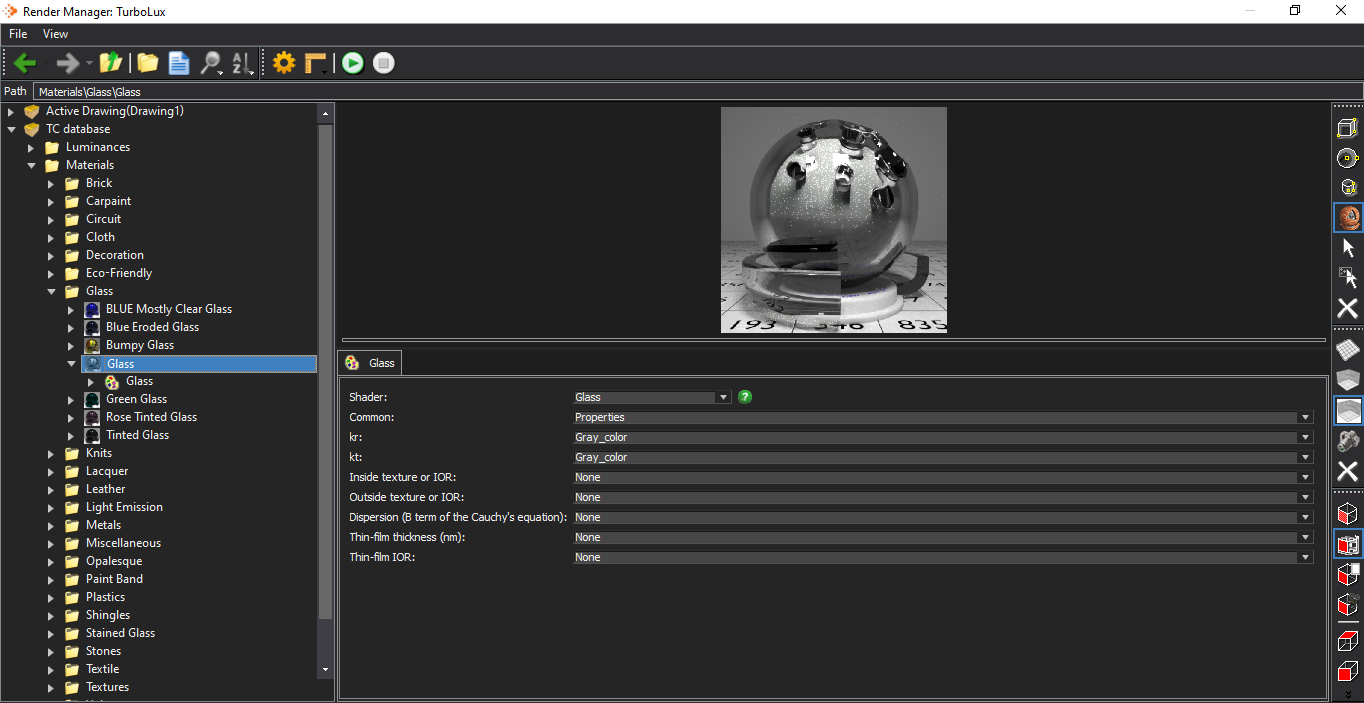
Clicking on a Material name (or Luminance, etc.) will expand and show the list of shaders used. The right-hand window will split showing the thumbnail in the top pane and the shaders in the lower window. You can double-click the shader to open its properties or click on the shader name in the left-hand list. With the ability to resize the window, scrolling within some property lists can become a thing of the past. The Status Bar at the bottom will display information about the selected item. OK will save your changes and Cancel will exit the editor without saving. As of this writing, the Apply button will only update the thumbnail in the palette, but not the drawing or items in the drawing as before.
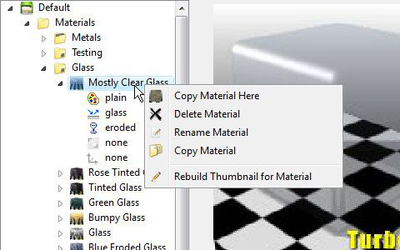
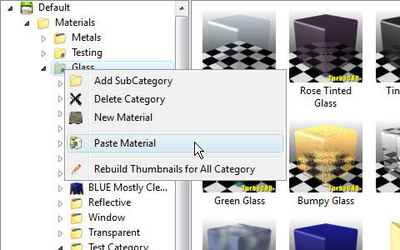
Tree Context MenusEach menu is the same in Materials, Luminance, etc., but Materials is used below just as an example. Add SubCategory: Name and add a sub-category to the selected category. It will create a matte white "Default" material (this can be renamed). A category has to have a least one material in it.Delete Category: This deletes the selected category and its objects, plus any sub-categories. There is no Undo.New Material: Name and create a new material. Initially, this will be a matte white material.Rebuild Thumbnails for All Category: This rebuilds thumbnails only for materials in the category, not materials in sub-categories (if present), using the last used Preview settings. 
Copy Material Here: Place a copy of the selected material in the current category. You will be prompted to create a new name.Delete Material: This deletes the selected material.Rename Material: Give the selected material a new name.Copy Materials: Places a copy of the material on the clipboard. Use the Paste Material command to place it into any other Materials category, except the one it was copied from. Rebuild Thumbnails for Material: This rebuilds the thumbnail for the selected material using the last used Preview settings.
ToolbarsStandard toolbar: 
Back and Forward arrows allow you to retrace your steps through the editor.Up: will move you up to the next Category level.View Tree: will show/hide the left-hand pane.Views: gives you size choices on how you want to view the Category thumbnails.Sort: There are 2 Sort options available; Name: Ascending and Name: Descending. The Sort option only affects the lists in the right hand pane. It will not sort the list on the left. Preview-Render toolbar: 
Options: Opens the Advanced Options dialog.Units: Specify the units to be used in the thumbnail model.Refresh: Use this to re-render the thumbnail, after making changes to settings (if Auto Update is turned Off in Advanced Options).Stop: Stops the rendering process of the thumbnail. Models toolbar: 
Cube: creates a thumbnail containing a cube with rounded edges.Sphere: creates a thumbnail containing a sphere.Cylinder: creates a thumbnail containing a cylindrical object.Presentation: creates a thumbnail with the Presentation icon.Selected: creates a thumbnail using a selected object in the drawing.Compound Selection: creates a thumbnail using several selected objects in the drawing.No Model: no model is used in the thumbnail. You might use this when creating a Environment thumbnail. Scenes toolbar: 
Floor: inserts a limited size grid patterned floor into the sceneRoom: creates a thumbnail inside an enclosed area containing a grid pattern.Studio: creates a thumbnail inside a Ray Cube environment.Studio with enhanced lights: creates a thumbnail inside a Ray Cube environment with improved lighting.No scene: creates a thumbnail without any scenery present; just a Graduated background. Views toolbar: 
Default: a Front view with perspective (25°), looking down at about 30°.Dimetric: a south-east dimetric type of view, but the viewers position is lower than normal.Active View: uses the camera settings used by the current view in the drawing.Custom: Enter coordinates for your viewing position (From), to where you are looking (To). In most cases, set the UP Vector (Up) value to: 0,0,1. For a "Plan/Top" type view, use: 0,1,0 for the UP Vector. You may need to click on the green Refresh icon after closing the Camera Properties dialog (seen below).Top: creates a Top view. Front: creates a Front view.Back: creates a Back view.Right: creates a Right view.Left: creates a Left view. 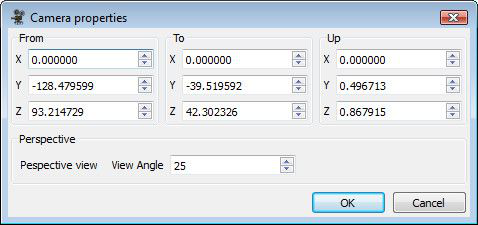
You can rotate, pan and zoom within the thumbnail window.Rotation: center mouse button / hold down the wheel.Pan: Shift + center mouse buttonZoom: roll the mouse wheel. Right-clicking on a thumbnail will give you two options: "Open Containing Folder" or "Properties". "Open Containing Folder" will open Windows Explorer in the folder containing the thumbnail. You can delete the image file, which will remove the thumbnail from the editor. "Properties" opens the standard Windows Properties dialog for the thumbnail. 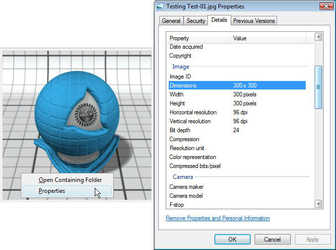
Advanced OptionsDisplays the settings used when creating a thumbnail preview. Each "settings" window has various options available depending on the setting chosen. 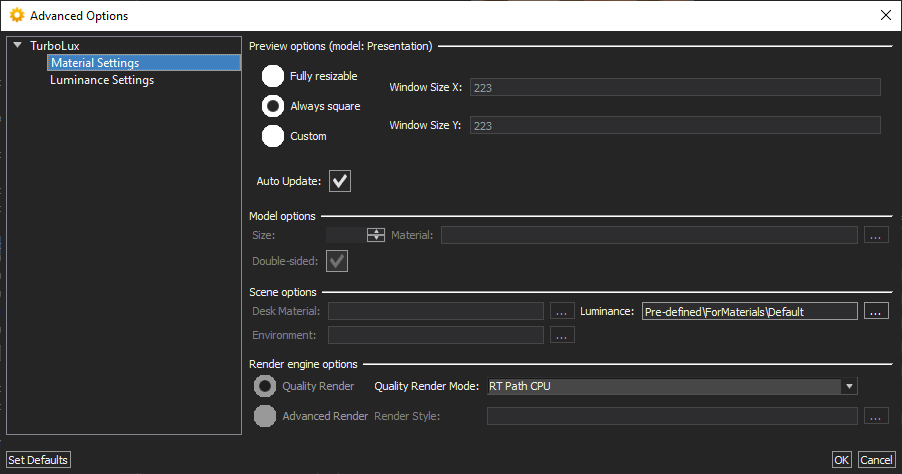
Preview options: Window Size options display the current size of the preview pane. These sizes will be used when creating a saved thumbnail. Currently, the numbers can't be edited in the dialog. Resizing the upper right pane will change the numbers.Auto Update: is on by default. As changes are made to settings, the thumbnail will update; just changing a number will trigger an update. When this is turned off, use the Refresh button on the Render toolbar to update the thumbnail. Model options:Size: Defines the size basic models (Box, Sphere, etc.) used in thumbnails. The default size is 39.370079 inches or 1 meter.Material: Specify the material settings for the basic models. Not available in "Material Settings".Double-sided: Controls the visibility for the front and back sides. Scene options:Desk Material: A pre-defined Grid is the default for the desk or floor material or choose a different material from the list. Available in all settings.Luminance: A pre-defined setting for Materials and Render Styles and a different pre-defined setting for Environments. Not available in "Luminance Settings".Environment: A pre-defined "Ray Cube Gradient" setting is used or choose from the list. Not available in "Environment Settings".Units: "By Drawing" is the default or choose from the list. Render engine options: Choose a style from the list. Not available in "Render Style Settings".Advanced Render — Render Style: On by Default Quality Render — Quality Render Mode: If activated, use "Raytrace Full" or select from the list. Editor WindowDisplays the various options for the selected shader. Clicking on the green question mark icon will open this Help file. Some fields will have an cycle icon. This allows you to choose the type of field you want to use; spinner (absolute values) or slider (percentage values). 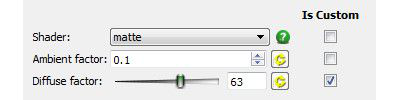
The Is Custom column allows you to checkmark only those fields you may want to make frequent changes to. 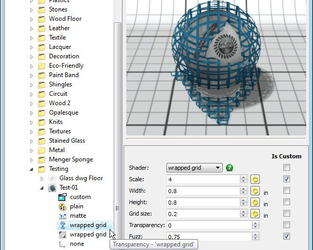
When you go to edit the material, it will open at the "Custom" shader setting and only the checked fields in the various categories will be displayed together on one page. No need to jump back-n-forth between shader pages.