Views
(Available in all TurboCAD variants)
The view is the area of the drawing space that appears on your screen. As your drawing becomes larger and more complex, it's important to find views that let you work at the right location in your drawing, at an appropriate level of detail.
Tip: Layers are a useful way to change how objects. You can place objects on various layers and then manipulate layer visibility.
This section covers views in 2D. When working in 3D, there are additional viewing tools and other ways to examine your model. See 3D Views .
Aerial View

Default UI Menu: View/Aerial View
Ribbon UI Menu:

Opens an additional window to provide a second view of the drawing. You can use Aerial View to create a close-up view of one small part of the drawing, or of the entire drawing. Aerial View is especially useful if you do not have a large monitor. You adjust the view in the drawing screen, without changing the aerial view. Use a rectangle to define the area you want to include in the aerial view. This view appears in the small drawing window. 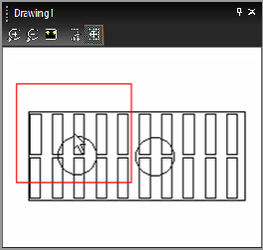 The red rectangle represents what appears on the main drawing window. The first three tools in the aerial view window control the view inside the aerial view: Aerial Zoom In: Magnifies the aerial view. Aerial Zoom Out: Shrinks the aerial view. Aerial Zoom Extents: Zooms to an aerial view containing all objects in the drawing. The last two tools are used inside the aerial view window, but affect the overall drawing. Aerial Zoom Window: Sets a new drawing view by using a selection window in the aerial view. Aerial Pan View: Sets a new drawing view by moving the red rectangle that appears inside the aerial view window. You can also pan the aerial view with the cursor. Place the cursor just inside one of the borders of the aerial view window. After a second or two, the cursor will change to a small solid arrow and the aerial view will move in the indicated direction.
 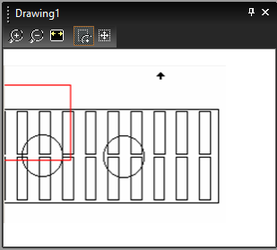 Move the cursor away from the edge to end panning.
Panning
Default UI Menu: View/Pan
Ribbon UI Menu:

Panning means to move, or scroll, the view to another location across the plane of the drawing. Two simple ways of panning are to use the scroll bars or arrow keys. The scroll bars work the same way that they do in other Windows programs. You can click the scroll bar arrow buttons to scroll one step, click in the body of the scroll bar, or drag the body of the scroll bar itself. The arrow keys are also simple and intuitive: press the up, down, left, or right arrow key to pan a single step.
Tip: To quickly pan to a specific point, place the cursor at the point, then press Ctrl+End. You will instantly move to a view with the point you chose at the center of the screen.
Vector Pan
 Pans the drawing based on a vector defined by two points. Select a base point and a destination point. The drawing moves so that the base point moves to the destination point.
Pan to Point
 Hotkey: Ctrl+End Pans the drawing so that the selected point becomes the drawing center. If you use the View menu command, select a point and the point will move to the center of the screen. To use the hotkey, place the cursor at the desired center and press Ctrl+End.
Redrawing
Hotkey: F5
Default UI Menu: View/Redraw
Ribbon UI Menu:
 In most cases, the screen will be redrawn after each change. Occasionally, however, you may find that the screen is not completely "cleaned up" after an operation. You can manually redraw the screen using the Redraw command.
Zooming
Default UI Menu: View/Zoom
Ribbon UI Menu:

Zooming means to move "closer to" or "farther from" the drawing space, viewing the drawing at a greater or smaller level of detail. You can always check the current zoom percentage via the zoom indicator, located, by default, at the lower right corner of the screen. 
Using a Wheel Mouse
Zooming with a wheel mouse is a particularly handy way to get around in a drawing. Move the cursor to where you want to work, and move the wheel backward to zoom out or forward to zoom in. Some wheel mouse setups require that the scroll bars be turned off for zooming to work. Some wheel mice are set up by default to scroll instead of zoom. If you would like your wheel to zoom, select Tools / Customize and open the Intellimouse page. You will be able to assign commands to the wheel functions. This feature works with other wheel mice as well.
Zoom In and Zoom Out
Hotkey: <+> or <-> (on numeric keypad) 
 Magnifies or shrinks the current view. The zoom factor is equal to two by default, but you can change this in the Advanced Preferences page of the Program Setup.
Tip: Change the zoom factor to 1.4 to double the view every two zoom steps.
If you zoom using the <+> and <-> keys of the numeric keypad, the view centers on the cursor. If you use the View menu commands or icons, the zoom will center on the current view, regardless of the position of the cursor.
Note: As you zoom out, the representation of small objects is simplified, thereby increasing redraw speed. You can set the size at which this occurs using the Suppress display field on the Display page of the Drawing Setup.
Zoom Window
Hotkey: Ctrl+Home  Zooms to an area defined by a rectangle. The rectangle is defined by selecting its two opposite corners, or by dragging the mouse from one corner to the other.
Note: Because the dimensions of the zoom rectangle will probably not be exactly proportional to the screen, the closest view that includes the entire rectangle will be used.
Zoom Extents
Hotkey: Ctrl+Backspace  Zooms to an area that completely contains all visible objects (including lights and camera objects). This is the same area enclosed by the selection rectangle if you select all the objects. Any objects on an invisible layer will not be taken into consideration.
Zoom Full View
Hotkey: Shift+Backspace  Only available in Paper Space, displays the entire drawing sheet. The drawing sheet may consist of multiple printer paper sheets, indicated by dashed lines.
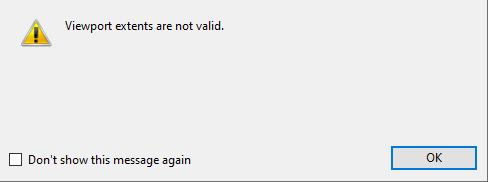
Note: Zoom diagnostic message appears when the user tries to zoom in or zoom out beyond the maximum zoom factor or limit.
Zoom Selection
Hotkey: Alt+Backspace  Zooms to an area that completely contains all currently selected objects.
Tip: You can also use the Design Director to quickly zoom on an object or group of objects.
Printed Size
 Zooms at approximately the size the drawing will be when printed. In this view, one inch of screen space is approximately equal to one inch on paper. The exact ratio of screen space to Paper Space will vary, depending on your graphics display and screen resolution.
Uniform for All Views
Used for multiple windows of the same drawing, enables you to zoom all windows simultaneously.