Paper Space
(Available in all TurboCAD Variants)
Default UI Menu: Insert/PaperSpace
Ribbon UI Menu:

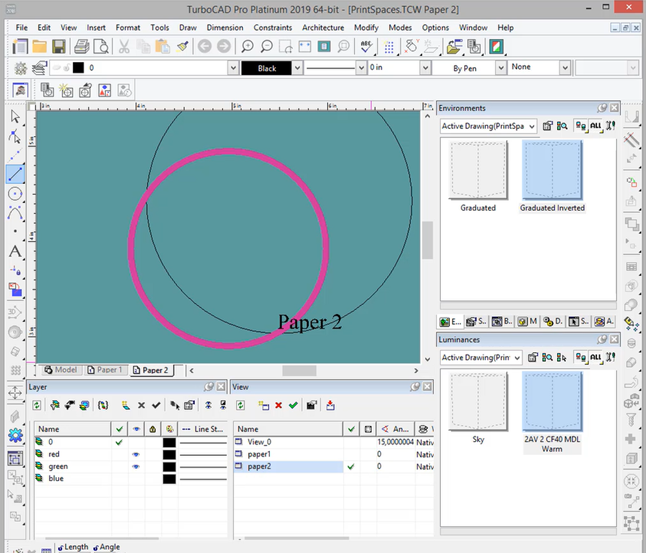
While Model Space is typically used while creating geometry, Paper Space is geared toward creating the final layout of your drawing for printing or plotting on paper. In Paper Space, you typically arrange drawing elements on one or more sheets of paper. The Paper, the large white rectangle in the middle of the drawing window, shows you how your drawing will be laid out on the page when printed. You do not have to draw on the paper; you can draw anywhere in the drawing space and later fit the drawing to a sheet of paper. You can also turn off the paper sheet shown. The pattern of horizontal and vertical lines, which may be shown on the paper, is the grid that marks exact locations in the drawing.
Tip: You can use the TC Explorer Palette to see all Paper Spaces defined for any open drawing.
Manipulating Paper Spaces
By default, a new file contains one Paper Space, named Paper 1. You can create, delete, or rename spaces by using the Paper Space menu, or by right-clicking on any Space tab to access the local menu. These menus can also be used to switch between spaces.
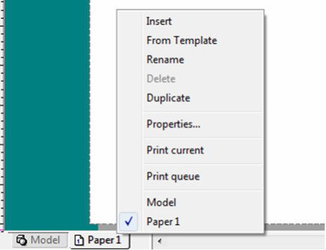
Insert: Creates a new, empty Paper Space.
From Template: Allows you to import paper space and layouts from existing TCT and TCW files.
Rename: Enables you to assign a name to the active Paper Space.
Delete: Deletes the Paper Space that was last inserted. You will not be able to delete the last remaining Paper Space of your drawing.
Duplicate: Creates a copy of the Paper Space.
Properties: Opens the Properties window . Different Paper Spaces can have different properties.
Print Current: Opens the Print Dialog for the current space.
Print Queue: Opens the Print Queue.
Using Named Views
TurboCAD 2019 Platinum, Professional, Deluxe only
Named Views can now be associated with a Layer Set, allowing for more efficient management of that Set. Also, when a Named View is inserted as a Viewport into a Paper Space, that space ID (name) is now properly saved.
From Template
To import Paper Space layout from existing files:
- Right click on a space tab then select From Template.
- The Open dialog will appear.
- Select the desired file and click Open.
- The Insert PaperSpace(s) dialog will appear.
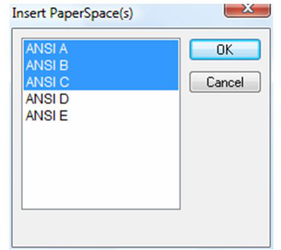
- Select the Paper Spaces you want.
- Click OK.
- The Paper Spaces will be inserted into your drawing.
It is important to import only paper spaces that are using the same unit system (English/Metric). If differing unit systems are used this will result in incorrect scaling of layout elements.
Print Queue
To import use the Print Queue:
- Right click on a space tab then select Print Queue. Or
- Select Print Queue from the File menu.
- The Print Queue dialog will open. If you opened the queue from the space tab, that space will be selected for printing.
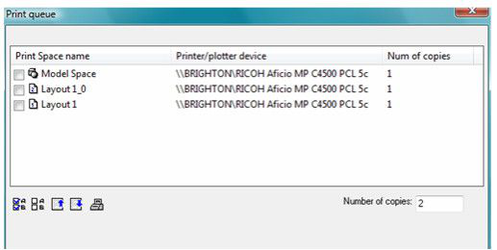
In the Print Queue you can select the spaces you want to print. If you double-click on any of the listed spaces you will open the print dialog for that space. You can configure the print setup for that space including the printer to be used. The order of the items in the queue sets the order in which the spaces are sent to the printers.
Options:
Select All: Selects all of the spaces for printing.
Deselect All: Deselects all of the spaces for printing.
Move Up: Moves the currently selected space up in the queue.
Move Down: Moves the currently selected space down in the queue.
Properties: Opens the Print Properties for the currently selected space.
Copies: Sets the number of copies to be printed.
Paper Space Properties
The Page Setup page contains options for the printer, printer paper, worksheet selection, paper size, paper orientation, and printing origin. These settings are saved with the drawing.
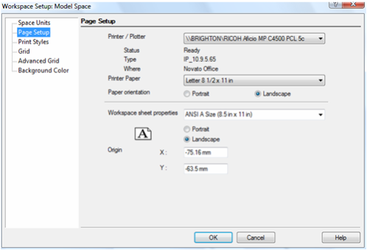
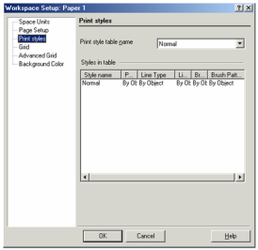
The various Paper Spaces can be used for different print setups. For example, you can have one setup for shop drawings on D size paper, and another with renderings on A size paper. The Print Styles page enables you to select a print style.
Switching to Paper Space
You can use the small button at the top left corner, at the intersection of the rulers, to toggle between Model and Paper Spaces.
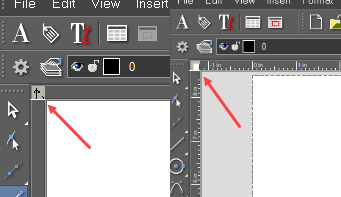
Note: If the rulers are turned off, this button will not appear. Use Rulers to toggle the ruler display.
There are also workspace tabs at the lower left corner of the screen. By default, each file contains one tab for Paper Space. Click the tabs to switch spaces.
Note: If scroll bars are turned off, these tabs will not appear. Use Scroll Bars to toggle the scroll bar display.