Adding or Changing a Background Image
There are two ways to access background choices:
Method 1: Ribbon Tabs
- Select a page by clicking on it in the Page Thumbnails (bottom bar of The Print Shop for Macintosh).
- Click on Project in the Ribbon Tabs (the top of The Print Shop for Macintosh) to reveal available Color, Paper, and Texture Background choices.
Method 2: Arrange Menu
- Select a page by clicking on it in the Page Thumbnails (bottom bar of The Print Shop for Macintosh).
- Click on the Arrange menu and hover the mouse over the Change Background Paper item. A submenu will appear with the available category choices.
After accessing the background categories:
-
Click on one of the background category choices (Color, Paper, etc.).
-
The background category determines how you select the background:
Color Backgrounds: Click on a color square from the Swatches tab. For more information about the other color selection tabs, see the Choose Color topic.
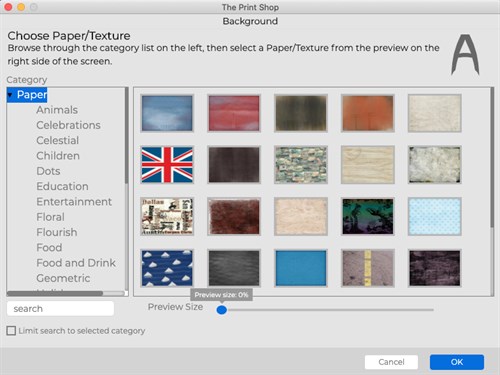
Paper and Texture Backgrounds:
In the Add Background window, click on subcategory names to display the available backgrounds.
Custom: Click on this icon to browse to an image file on your computer. Double-click on folders to open them or use the Look in drop-down menu to locate a folder of images on your computer. Double-click on a thumbnail in the right side of the Choose Background Image window. The Print Shop for Macintosh will set the file that you chose as the page background. Please be aware that the image will be cropped to fit the shape of the project.
-
Click OK to assign the selected background to the current page.
-
You can change the background on all pages in the project to match the current page's background by clicking on the Apply Background to All Pages button in the Ribbon Tabs (the top of The Print Shop for Macintosh).