Digitizer
This section covers commands you can use when tracing your drawing with a digitizer.
Digitizer Tracing Mode
Menu: Tools / Digitizer / Digitizer Tracing Mode
Lets you zoom the screen image of the drawing you are tracing while retaining the present scale on the digitizer pad.
Make sure there is a check mark next to the Digitizer Tracing Mode indicating that it is active. Use the Zoom commands to zoom the current screen image of your drawing.
The Zoom commands will not change the relationship between the drawing information being entered and the digitizer pad. Zoom commands only change the size or location of the drawing on the screen.
Align Drawing
Menu: Tools / Digitizer / Align Drawing
Synchronizes the digitizer pad with the display quickly and easily. You should have already set up Digitizer Tracing Mode before you align the drawing.
Point 1: Point on the screen
Point 2: Corresponding point on the digitizer pad
Point 3: Point on the screen
Point 4: Corresponding point on the digitizer pad
These points will tell DesignCAD the relationship that the area of the digitizer pad should have with the drawing screen.
NOTE: DesignCAD will ignore this command if you do not have a digitizer or if it is not recognized by your computer.
Create Digitizer Menu
Menu: Tools / Digitizer / Create Digitizer Menu
Creates a digitizer menu. The menu created with this command does not appear on the screen. The
menu contains several selection boxes. These boxes are spaces where commands are selected.
-
To create a digitizer menu, follow these steps: Draw the menu template. This is the paper template that will be affixed to the digitizer.To start with, draw a border box the size of the menu. The menu can be any size, but the larger the menu template is, the more of the digitizer drawing area the menu will take up.
-
On the template, draw individual “command” boxes for each DesignCAD command you want on the menu. These command boxes can be any size you want. Draw text or a picture to be associated with each command in the command box.
- Print the finished template at a scale of 1. Cut it out and affix it to the digitizer, inside the active drawing area of the digitizer.
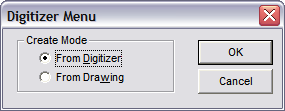
- Choose the Create Digitizer Menu command. Choose the method of creation in the Digitizer Menu window, and click OK.
- Now set a point in the lower left corner of the digitizer template. Set a point in the upper right corner of the digitizer template.
- Next, set a point in the lower left corner of the command box. Set a point in the upper right corner of the command box.
- Enter the command name in the Command box. The DesignCAD macro command names can be found in the DesignCAD Macro Command Name section of the MACROCMD. INI file. The command names appear to the right of the equal mark in the MACROCMD. INI file.
- Set two more points for the next command box, or press the Enter button to end the command.
Load Digitizer Menu
Menu: Tools / Digitizer / Load Digitizer Menu
Loads the “data” portion of a digitizer menu. The“paper” portion of the menu should be attached to the digitizer before the digitizer is loaded. A maximum of 10 digitizer menus can be loaded at once.First, attach the paper template onto the digitizer.
Choose the Load Digitizer Menu command. The Load Digitizer Menu box appears. Choose the digitizer menu name in the File Name box, then click OK or press Enter.
Now set a point in the lower left corner of the digitizer menu. A rubber-band box shows how the digitizer menu will be loaded. Set a point in the upper right corner of the digitizer menu.
Save Digitizer Menu
Menu: Tools / Digitizer / Save Digitizer Menu
Saves the current digitizer menu. This command saves the menu in .DGM file format.
Point 1: Point inside the digitizer menu
After creating the digitizer menu, choose the Save Digitizer Menu command and set a point inside the menu area. The Save Digitizer Menu window appears. Enter the name of the new digitizer menu in the File Name box and click Save.
Close Digitizer Menu
Menu: Tools / Digitizer / Close Digitizer Menu
Closes the active digitizer menu.
Point 1: Point inside the menu area
Set a point inside the menu area. The digitizer menu is closed.
Add Menu Item
Menu: Tools / Digitizer / Add Menu Item Adds a command to an existing digitizer menu.
Point 1: Point inside the menu area
Open the digitizer menu to be changed. Choose the Add Menu Item command and set a point in the area the new command is to occupy. The Digitizer Menu Command window. Enter the name of the new command in the Command box.
Click Continue to add another command or Done to close the window.
Remove Menu Item
Menu: Tools / Digitizer / Remove Menu Item
Removes a command from an existing digitizer menu.
Point 1: Point inside the menu area
Open the digitizer menu to be changed. Choose the Remove Menu Item and set a point in the area occupied by the command you want removed. The command is removed from the digitizer menu.