Render Library
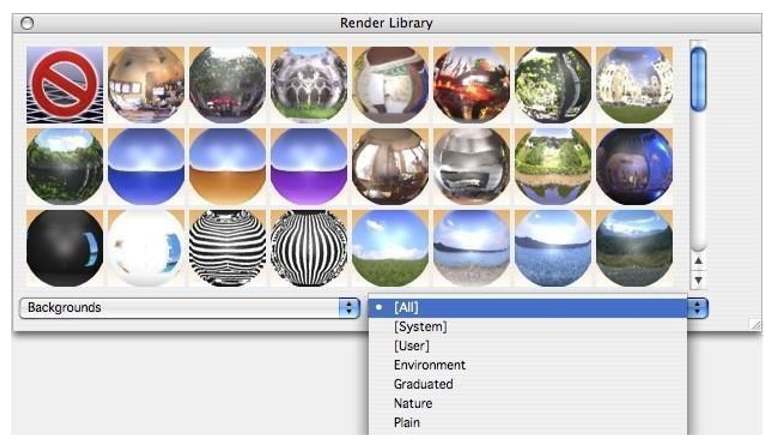
The Render Library window is used to apply materials and decals to objects, and to select the scene’s background and foreground properties. The Render Library window is accessed through the Window:Render Library menu option. The window displays preview images that indicate the render properties of a particular item. The library type and category drop-down controls the items displayed in the window.
The Library Type drop-down list controls which library is displayed on the palette. Depending on the layout, this is the left-most or top-most drop-down (Decals in the figure to the left). The library types supported include HDR Backgrounds, Backgrounds, Foregrounds, Decals, and Materials.
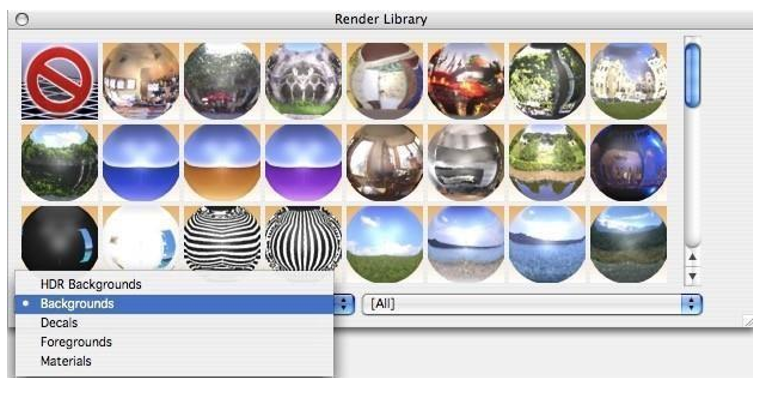
Each of the material and color libraries is divided into categories, which appear on the pop-up menu on the right. Choosing a category controls what appears on the Preview Bar. In addition to viewing categories, you can view based on where the material or color came from. [All] displays all materials and colors. [System] displays materials and colors that are included with Shark. [User] displays colors and materials imported or created by the user.
One more general note regarding the Render Library window. By clicking in the lower right corner, you can resize the window. Resizing the window, a provides a means to customize the size for your particular user environment.
Accessing the Render Library
On the Window menu, choose Render Library. The Render Library window is displayed.
Note: You can reshape and resize the Render Library, as well as move it around the workspace, as you design.
There are three methods for applying materials.
Apply Normal
The Apply Normal option applies materials to a single face.
Applying colors or materials to an individual face
Select Apply Normal, at the top of the Render Library.
From the Library Type drop-•down, choose the library you want. All of the library’s contents appear on the Preview Bar. Notice, as you move your pointer over each thumbnail, its name appears at the top of the Render Library.
(optional) From the Categories drop-•down, choose a category to specify what appears on the Preview Bar. Drag a selection onto a surface.
Apply Body
The Apply Body option applies materials to an entire object.
Applying colors or materials to an entire object
Select Apply body, at the top of the Render Library.
From the Library Type drop-•down, choose the library you want. All of the library’s contents appear on the Preview Bar. Notice, as you move your pointer over each thumbnail, its name appears at the top of the Render Library.
(optional) From the Categories drop-•down, choose a category to specify what appears on the Preview Bar. Drag a selection onto an object.
Apply Similar
The Apply Similar option applies materials to objects with the same color or material as the object to which you are applying.
Applying colors or materials to all similar surfaces
Select Apply Similar, at the top of the Render Library.
From the Library drop-•down, choose the library you want. All of the library’s contents appear on the Preview Bar. Notice, as you move your pointer over each thumbnail, its name appears at the top of the Render Library. (optional) From the Categories drop-•down, choose a category to specify what appears on the Preview Bar.
Drag a selection onto an object.
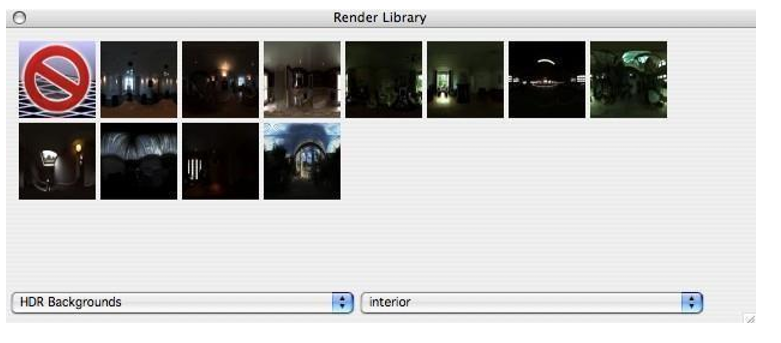
HDR Backgrounds Library
High Dynamic Range (HDR) images are images that contain complex lighting data in addition to the visible image. This allows for a straightforward way to introduce complex lighting environments into your rendered scene. These images can be captured with specialized equipment or obtained from outside sources. A number of HDR images are included and can be accessed in the Render Library.
User-supplied HDR images can be added to a custom category folder:
PC- \Punch!\Shark\PhotoRender\Materials\ MacUsers//Documents/Punch!/Shark/PhotoRender/Materials/
Custom images are displayed in the Render Library under HDR Backgrounds, with a category of the same name as the folder you created. All HDR images must have an .hdr extension. Supported formats include spherical, latitude/longitude, angular, vertical cross cube, horizontal cross cube, and vertical strip cube maps.
Applying an HDR Background
From the Library Type drop-•down, choose HDR Backgrounds. HDR Backgrounds are displayed on the Preview Bar.
(optional) From the Categories drop-•down, choose a category to specify what appears on the Preview Bar.
Drag the background onto the design.
To see the effects, activate a rendering tool.
Settings for HDR images are controlled on the Photo Realistic Render Settings dialog.
Applying a custom HDR background
Save an image to the path specified above, depending on the type of computer you are using.
From the Library Type drop-•down, choose HDR Backgrounds. HDR Backgrounds are displayed on the Preview Bar.
From the Categories drop-•down, choose the category that corresponds to the image you want. Drag the background onto the design.
To see the effects, activate a rendering tool.
Settings for HDR images are controlled on the Photo Realistic Render Settings dialog.
Materials Library
The materials library is a collection of predefined material property settings that can be applied to renderable objects within a model. A material defines the surface color, transparency, reflectivity, and displacement properties of an object. A wide variety of visual appearances can be produced with the proper combination of these attributes.
Each material has a potentially large set of attributes that is determined by the internal material definition. These attributes have been mapped to a smaller, basic set of common attributes. The common attributes are edited using the Materials page in the Inspector. A Material tab will be displayed in the Inspector when the object is selected. The simultaneous editing of common material attributes for multiple selected objects is supported in the Material edit page. The ability to edit the full set of material attributes is supported through the advanced button located in the lower right corner of the Inspector.
Note: All objects that do not have a material, will have a default material applied to them the first time the scene is rendered. The DefaultCSMFile entry in the [RenderOptions] section of the Render.ini file controls the default material. If the DefaultCSMFile entry is not found, the material specified by the MiscPlain.csm material file is used.
Applying a material
From the Library Type drop-•down, choose Materials. Materials are displayed on the Preview Bar.
(optional) From the Categories drop-•down, choose a category to specify what appears on the Preview Bar. Drag the material onto the surface where you want it to appear.
Applying a materials for multiple objects
Press and hold the Shift key, then select the objects. Position the cursor over a preview image and Ctrl-•click.
From the shortcut menu, choose Apply Material to Select Object(s). The material is applied to the selections.
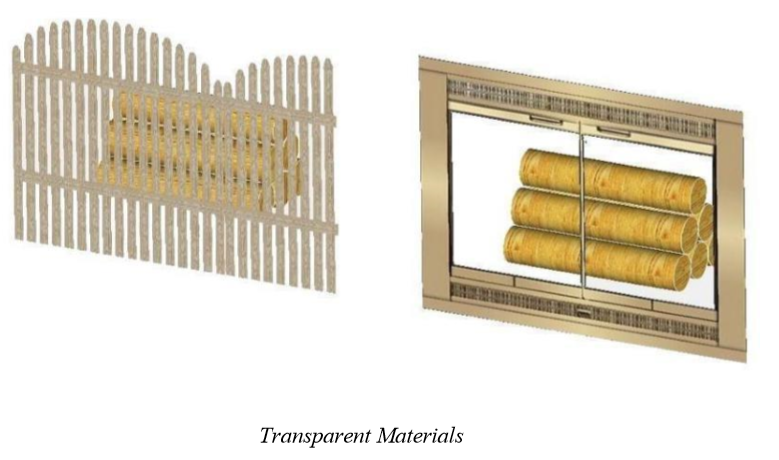
Transparent Textures
The Render Library includes textures with transparent settings. Textures shown with a black background indicate a transparent texture.
Texture Folder Locations
Textures are loaded into the Render Library with the program’s initial launch. These textures are loaded from two directories: Textures and Custom Textures.
Mac Location
Textures /Library/Application Support/Punch!
Custom Textures /Users/Shared/Punch!
PC Location
Textures Install folder
Custom Textures Install Folder
You can add user-defined textures in BMP or JPEG format to these folders. Textures must be divisible by 8 for OpenGL.
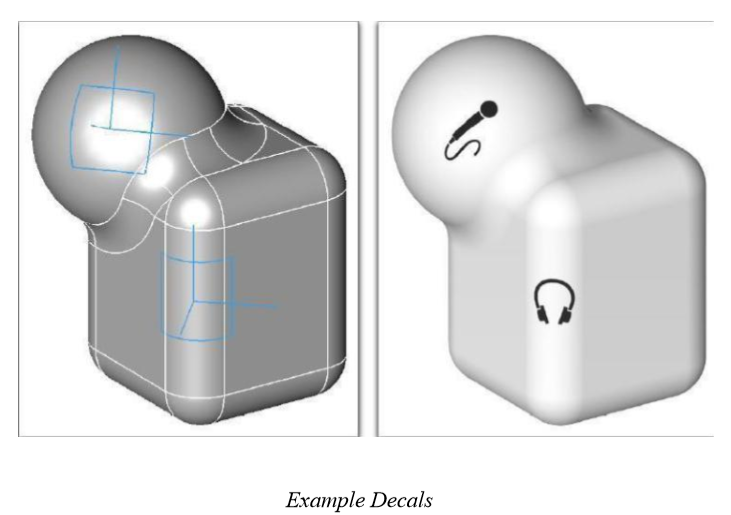
Decals Library
The Decals library is a collection of predefined decals that can be applied to renderable objects within a model. A decal overrides the local surface color properties of an object to give the appearance of an appliqué.
Applying decals
Position the cursor over a decal image.
Position the cursor over a decal image.
Press and hold down the left button, then drag the decal over to the object where you want it to appear. Release the mouse button. Any number of decals may be applied to an object.
Decal Wrapping
As a decal is dragged over an object, the decal symbol will snap to the surface of the object of interest, changing shape (planar rectangle, cylindrical patch, and spherical patch) to indicate the decal’s wrapping mode. The wrapping mode of the decal is automatically determined by the curvature of the surface at the current drop point.
Planar Wrap
Planar wrap mode projects the artwork along the decal’s normal vector. The artwork will appear on the object surface wherever it lands. Planar decals will appear on the opposite side of an object, and drag along any faces parallel to the normal vector.
Cylindrical Wrap
Cylindrical wrap mode projects the artwork along the surface normals of an imaginary cylinder that passes through the decal’s location point. Any portion of the object that lies within the cylindrical wedge radiating out from the cylinder’s axis through the decal's cylindrical patch will display the artwork. If the decal extends past the “end” of the object, the decal will drag towards the center of the wrap cylinder.
Spherical Wrap
Spherical wrap mode projects the artwork along the surface normals of an imaginary sphere that passes through the decal’s location point. Any portion of the object that lies within the spherical wedge radiating out from the sphere's center through the decal’s cylindrical patch will display the artwork.
Editing Decals
Once applied, decals are selectable geometric objects. They are edited like all other geometry, by using the Data page of the Inspector. The edit page has controls for settings the rotation, width, height, wrap mode, auto wrap, lock normal, masking, and color.
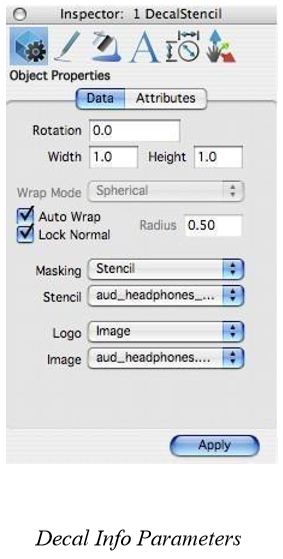
Rotation Angle Rotation angle, in degrees, turns the decal about its normal axis.
Width/Height Width and height change the decal’s coverage area. The values reflect linear or arc lengths depending on the wrap mode.
Auto Wrap Local Normal The Wrap Mode drop-down list, the Auto Wrap, and Lock Normal checkboxes control the decal’s wrap mode behavior. The wrap mode determines how the decal artwork is applied to the object surface. The wrap mode may be Planar, Cylindrical or Spherical.
If Auto Wrap is checked, the wrap mode is matched to the underlying object’s surface curvature at the decal’s center point. The computed wrap mode is displayed in the disabled Wrap Mode drop-down list. If the decal is moved to another region of the object, the wrap mode will be recalculated.
If Auto Wrap is unchecked, the wrap mode is set using the Wrap Mode drop-down list. If the decal is moved to another region of the object, the wrap mode will not change.
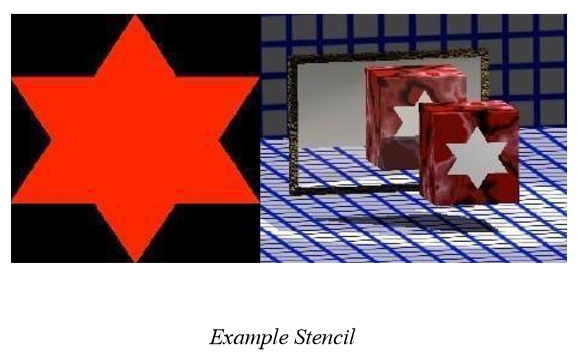
Masking The Masking drop-down list controls how the decal artwork is applied to an object’s surface. Masking can be set to Stencil or Factor.
Stencil Masking Stencil masking uses an image file to define the regions of the decal artwork that will show on an object’s surface. The stencil image file is selected from the Stencil drop-down list. The red component (per RGB) of each pixel in the stencil image file is used as a color mix factor. A red value of 0.0 indicates that 0% of the artwork color is used at that pixel location. A red value of 1.0 indicates that 100% of the artwork color is used at that pixel location. Any intermediate value will result in a mixture of the artwork color and the underlying material color.
Typically, a stencil file is composed of fully red and fully black pixels. This provides a clean cropping of decal artwork. However, interesting “dirty” or “aged” effects can be created using a stencil image file that consists of a mottled red patch on a black background.
Factor Masking Stencil Factor masking uses a single mix factor to compute the artwork material color combination. This is similar to the Stencil masking except there is only 1 value used for all pixels. The mix factor is set using the Factor slider.
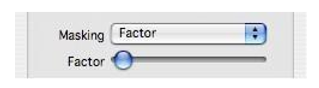
Typically, Factor masking is used to put a full image on an object surface. This can be used for rectangular logo artwork or placing artwork on walls.
Logo The Logo drop-down list controls the source of the decal’s artwork. Logo can be set to Color or Image.
Color logos use a solid color for the decal artwork. The color of the decal entity is used for the artwork color. The color can be changed using the Pen menu or the Data page in the Inspector.
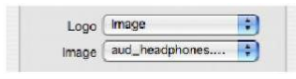
Image logos use an image file for the decal artwork. The image artwork file is selected from the Image drop-down list. Image logos are used for complex artwork decals. This is often used to apply company logos to objects being rendered for proof of concept engineering images.
Foregrounds Library
The Foregrounds library is a collection of predefined foreground effects that can be applied to a model. Foregrounds affect the way the space between the eye point and the scene objects alter the rendering results. Common foreground effects include fog and snow. See the section on Render: Foreground Edit for more detail on the available foreground shader types.
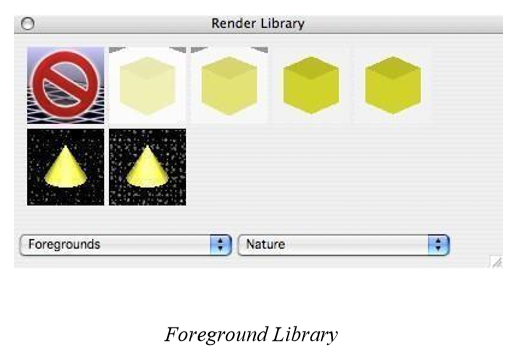
Applying a foreground
Position the cursor over a preview image.
Press and hold down the left mouse button then drag the foreground over to the model.
Release the mouse button to place.
Backgrounds Library
The Backgrounds library is a collection of predefined background effects that can be applied to a model. Backgrounds control the appearance of those regions of a scene that do not contain objects. Common background effects include 2 color gradients, solid colors, and backdrop images. See the section on Render: Background Edit for more detail on the available background shader types.
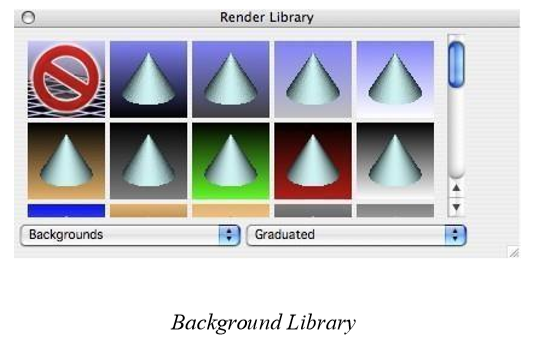
Applying a background
Position the cursor over a preview image.
Press and hold down the left mouse button, then drag the background over to the model.
Release the mouse button to place.