Animation
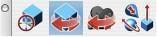
The animation tools located in the main tool palette provide commands for generating QuickTime movies by moving relevant camera locations. There are seven options for creating movies that include walk through, fly by, paths, object VR, panoramic VR, and object-based animations. In addition to the camera animations, you can record QuickTime movies of the screen.

Animation Tool Palette
Walk Through
The Walk Through command creates a movie where the camera position follows a curve or collection of curves. The camera eye point is a point on the curve. The camera reference point (look at) lies out on a tangent to the curve at the camera point.
Using the Walk Through tool
- Select the Walk Through option in the Animation menu.
- Pick the curves used for the camera travel path.
- Set the appropriate values in the Animation Dialog.
- Set the appropriate values in the Compression Dialog.
- A progress bar displays as each frame in the movie is calculated, compressed, and saved to a QuickTime file.
Fly By
The Fly By command creates a movie where the camera eye point follows a curve and the reference point is assigned a fixed location.
Using the Fly By tool
- Select the Fly By option in the Animation menu. Pick the curve used for the camera travel path.
- Click a location in the drawing that is the fixed camera reference point.
- Set the appropriate values in the Animation Dialog.
- Set the appropriate values in the Compression Dialog.
- A progress bar displays as each frame in the movie is calculated, compressed, and saved to a QuickTime file.
Paths
The Paths command creates a movie where the camera eye point follows a curve and the reference
point also follows a curve. Positions along the two curve sets are evaluated at equally spaced positions to calculate the camera eye and associated reference point.
Using the Paths tool
- Select the Paths option in the Animation menu.
- Pick the curve used for the camera eye travel path.
- Pick the curve used for the camera reference path.
- Set the appropriate values in the Animation Dialog.
- Set the appropriate values in the Compression Dialog.
A progress bar displays as each frame in the movie is calculated, compressed, and saved to a QuickTime file.
Animation Dialog
The WalkThrough, FlyBy, and Path animation tools each display a dialog box for details associated with the animation.
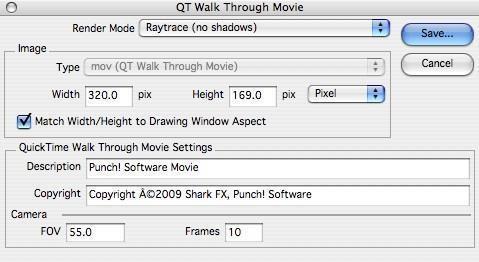
Animation Dialog
Render Mode
This pull down menu provides options for the type of rendering associated with the movie. The pull down includes the various preview and raytrace modes.
Image Width/Height
These two fields specify the width and height of the movie. The larger these values, the longer the animation will take to generate. There are four options for determining the width and height of the image: Pixel, 72 dpi, 150 dpi, and 300 dpi. You can choose the option you want from the drop-down menu.
Match Width/Height
This checkbox will force the width/height ratio of the animation window to that of the current drawing window.
Description/CopyRight
User defined strings for description and copyright notices.
Camera FOV
The Field of View relative to the camera eye point.
Camera Frames
The number of frames to generate for the movie.
Compression Dialog
The Compression Settings dialog box is displayed by QuickTime as a means to control the compression options for the animation. This dialog box has options for the user to choose a compression algorithm, and color, quality, and motion settings.
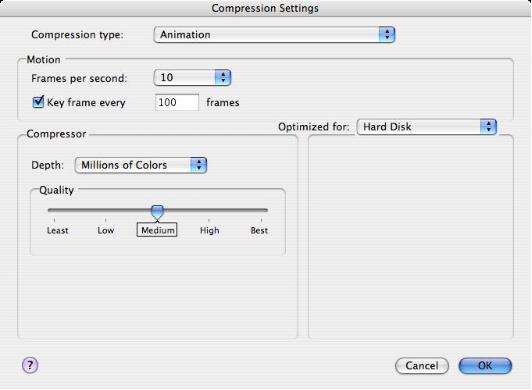
Compression Settings Dialog
QuickTime supplies a variety of image-compression algorithms with the Image Compression Manager. This section discusses some of these compressors and identifies their strengths and weaknesses. You can use this discussion as a guideline for choosing a compression algorithm for your specific situation. All the compressors support both temporal and spatial compression, except for the Photo and Raw Compressors, which support only spatial compression.
For Punch! Via, we typically recommend the Animation Compressor.
Object VR
This option creates an object-based virtual reality QuickTime movie. Object VR keeps the reference point fixed, but the eye is free to move about. Typically, the reference point is the center of the object, hence the term Object VR. In order to calculate an Object VR movie, many numerous images at different angles are calculated and composed into an interactive movie.
Creating an Object VR Movie
- Select the Animation:Object VR menu item.
- Assign settings in the Object VR dialog box.
The object VR dialog box provides a variety of settings to customize your movie. These settings are described below.
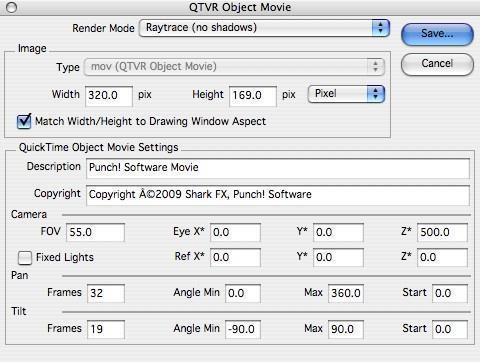
Object VR Dialog
Render Mode
This pull down menu provides options for the type of rendering associated with the movie. The pull down includes the various preview and raytrace modes.
Image Width/Height
These two fields specify the width and height of the movie. The Larger these values, the longer the animation will take to generate. There are four options for determining the width and height of the image: Pixel, 72 dpi, 150 dpi, and 300 dpi. You can choose the option you want from the drop-down menu.
Match Width/Height
This checkbox will force the width/height ratio of the animation window to that of the current drawing window.
Description/CopyRight
User defined strings for description and copyright notices.
Camera FOV
The Field of View relative to the camera eye point.
Camera Eye, Ref
The camera eye point and reference point. Click on the label to activate the field, then use the Snap tool to reference a location in the drawing.
Fixed Lights
The Fixed Light checkbox will keep light sources fixed with respect to the geometry, otherwise the lights move with the camera.
Pan
The Pan Frames value sets the number of images to be generated around the sphere equator (latitudes) for the movie. The extents of the eye point movement (in degrees) and the initial pan angle are set using the Angle Min, Max and Start angle values.
Frames The number of frames in longitude.
Angle Min The minimum angle for pan frames. Default 0.
Angle Max The maximum angle for pan frames. Default 360.
Angle Start The starting angle for pan frames. Default 0.
Tilt
The Tilt Frames value sets the number of images to be generated from pole to pole for the movie. The extents of the eye point movement (in degrees) and the initial tilt angle are set using the Angle Min, Max and Start angle values.
Frames The number of frames in latitude.
Angle Min The minimum angle for pan frames. Default 0.
Angle Max The maximum angle for pan frames. Default 360.
Angle Start The starting angle for pan frames. Default 0.
Panoramic VR
A panoramic movie keeps the eye point fixed as the observation point is rotated 360 degrees. This gives
type is selected, the QTVR Panoramic Movie Settings dialog box below is displayed.
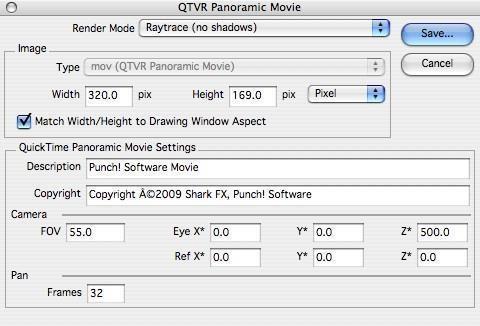
Panoramic VR Dialog
Render Mode
This pull down menu provides options for the type of rendering associated with the movie. The pull down includes the various preview and raytrace modes.
Image Width/Height
These two fields specify the width and height of the movie. The Larger these values, the longer the animation will take to generate. There are four options for determining the width and height of the image: Pixel, 72 dpi, 150 dpi, and 300 dpi. You can choose the option you want from the drop-down menu.
Match Width/Height
This checkbox will force the width/height ratio of the animation window to that of the current drawing window.
Description/CopyRight
User defined strings for description and copyright notices.
Camera FOV
The Field of View relative to the camera eye point.
Camera Eye,Ref
The camera eye point and reference point. Click on the label to activate the field, than use the Snap tool to reference a location in the drawing.
Pan Frames
The number of frames to generate for the movie.
Object-•Based Animation
The Object Animation palette provides tools for animating objects including curves, surfaces, and solids, animating cameras, and recording scenes.
Set Object Axis
This tool sets a coordinate system and origin to a part. This is required for object animations that are about a coordinate system other than the global coordinate system.
Set Object Action
The Set Object Action tool creates an animation effect for an object consisting of either a translation or rotation during a specified time.
Set Camera
The Set Camera Action tool defines a camera moving along a path during a specified time.
Animate Scene
The Animate Scene tool will calculate and display a set of frames for a set of object and camera actions. The user can select outputting the results to the screen or to a QuickTime movie.
Record QuickTime
The Record QuickTime option is used to time capture screen shots from the drawing, frame or entire screen. The resulting images are compressed and stored for playback as a QuickTime movie. One use of the Record QuickTime tool is to generate user-training movies associated with TurboCAD.
Using the Record QuickTime tool
- Select the Record QuickTime menu item.
- Select from the menu, whether you want to capture just the drawing window, the application frame or the entire display/monitor screen.
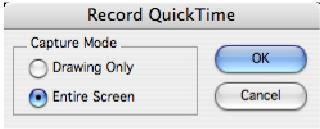
Screen Capture Options
- Specify the Compression settings and frame rates. The higher the frame rate, the more images captured.
- Specify the file name for the resultant QuickTime movie.
- Select the QuickTime tool once again when you have completed the recording