Architectural Tools
Architectural tools are available for drawing 2D elements such as walls, doors, and windows. These tools provide the ability to quickly draft walls, windows, and doors.

Drawing Walls
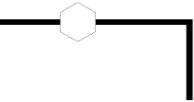
There are three methods for drawing walls: specifying the centerline, inside line or outside line.
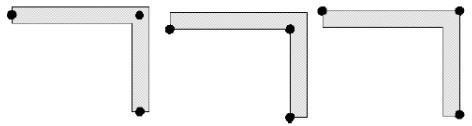
CenterlineInsideOutside
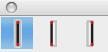
Single Wall Tools
The Single Wall tools are available in a sub-tool palette and create one wall by specifying either its centerline, inside line or outside line.You can set the wall’s thickness, length, and angle by manually dragging your cursor, or entering values on the Data Entry Window after the tool is activated. These values can be changed before or after the wall is drawn.
Using a Single Wall Tool
- Drag through the Architectural tool palette and choose the Wall Single Tool.
- Drag through the sub--tool palette and choose which method you want.
- Click to set the wall’s start point.
- Set the endpoint using one of the following methods:
- Drag and click to set the endpoint.
Enter values in the Data Entry fields. Be sure to press Enter to accept new values.
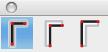
Multi Wall Tools
The Connected Wall tools are available in a sub-tool palette and create multiple connected walls by specifying either their centerline, inside line or outside line.
You can set the wall’s thickness, length, and angle by manually dragging your cursor, or entering values on the Data Entry Window after the tool is activated. These values can be changed before or after the wall is drawn.
Using a Connected Wall Tool
- Drag through the Architectural tool palette and choose the Wall Connected tool.
- Drag through the sub--tool palette and choose which method you want.
- Click to set the wall’s start point.
- Continue to drag and click to define wall endpoints.
- Right--click, or Ctrl--click, to end drawing mode.
Drawing curved walls
- Drag through the Architectural tool palette and choose the Wall Connected tool.
- Drag through the sub--tool palette and choose which method you want.
Click to set the wall’s start point.
- Press and hold the Ctrl key (Option key for Mac) as you drag and click to place.
- Continue to drag and click to define wall endpoints.
- Right--click, or Ctrl--click, to end drawing mode.
Wall Settings
The Wall Settings dialog allows you to specify up to five components, or regions, to your wall, defining the thickness and color of each, as well as pattern.
You can also control the display of auto dimensioning on the Wall Settings dialog.
Controlling wall settings
- Select a Wall tool.
- On the Data Entry Window, click the Options button.
On the Wall Settings dialog, choose the number of components and specify their properties.
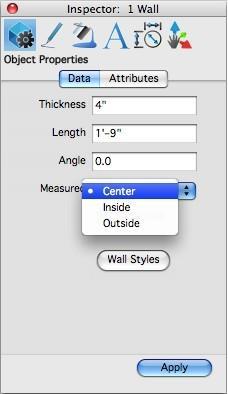
Wall Dimensions
Walls dimensions are measured as either inside, outside or center. By default, they follow the wall type.
You can change the measure of a dimension using the Object Info dialog and also change its measured type using the drop-down menu.
To quickly turn the display of wall dimensions on or off, deselect the display of Dimensions on the Concept Explorer’s Layers tab. Walls follow the same convention as all other dimensions, which by default, are added to the dimension layer.
Window Tool
The Window tool allows you to attach a window to a wall. The window becomes a feature of the wall. There are two window styles to choose from: overlapping sill and tight sill. You can specify which style you want on the Data Entry Window. The width and offset value can also be set on the Data Entry Window.
Using the Window Tool
- Select the wall to which you want to add a window.
- Click to select the center point for the window.
Door Tool
The Door tool allows you to attach a door to a wall. The door becomes a feature of the wall. There are three door styles to choose from: single door, double door, and sliding door. You can specify which style you want on the Data Entry Window. The width, angle, and offset value can also be set on the Data Entry Window.
Using the Door Tool
- Select the wall to which you want to add a door.
- Click to select the center point for the door.
- Drag to set the angle and door swing.
- Click to place.

Insert Group
The Insert Group tool allows you to create complex wall attachment designs using drawing tools, then attach them to walls as one object. Be sure these designs are grouped together.
Using the Insert Group Tool
- Select the wall to which you are attaching a group.
- Select the group you’re attaching. Position your cursor at the location on the wall where you want the group to appear.
- Click to place.
Slab Tool
The Slab tool allows you to create a foundation that attaches to the bottom of existing walls. The slab’s thickness is projected below the wall; the greater the thickness, the further the slab projects downward. Another property of slabs is the offset, which determines how far the slab extends from the wall. You can control the slab thickness and offset in the Data Entry window.

There are two ways to edit a slab:
Select tool- edit the object’s properties in the Inspector.
Deep Select tool- drag individual points to resize or reshape the object.
Slabs are placed on a new drawing layer, which is accessible in the Concept Explorer. Once placed, you can apply textures and materials to the slab to customize its appearance.
Using the Slab tool
- Click the Slab tool.
- (option) Specify the slab thickness and offset values in the Data Entry window.
- Press and hold the Shift key and click to select the walls to use for the slab, or drag a selection window around the walls to select them all. The slab is attached to the selected walls.
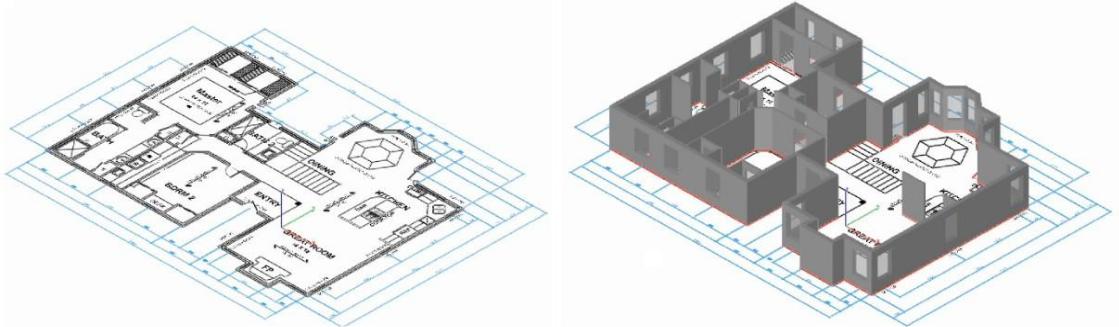
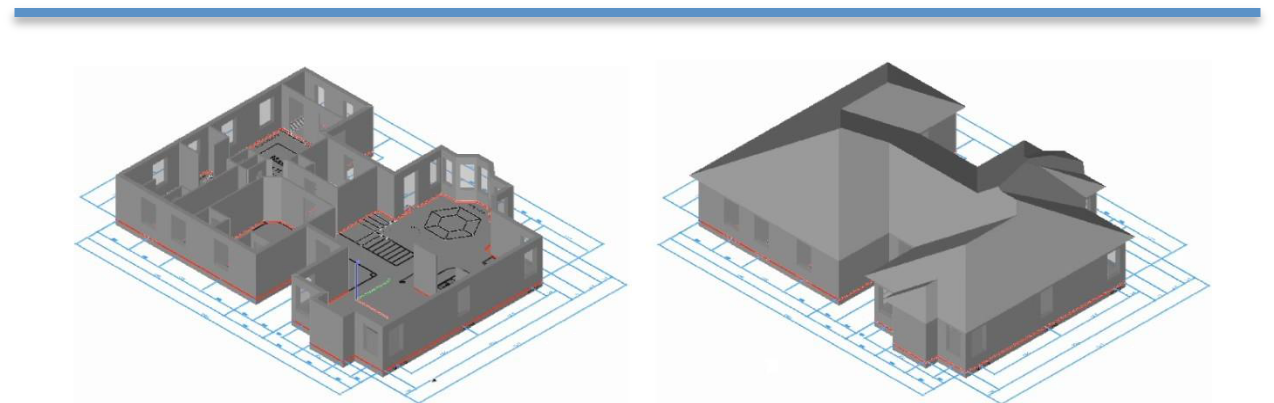
Make 3D Tool
The Make 3D tool allows you to transform 2-dimensional wall, doors, and windows into 3-dimensional objects. before the drawing is transformed, you are able to change the default settings.
There are two ways to edit a 3D object:
Select tool- edit the object’s properties in the In s p e c t o r .
Deep Select tool- drag individual points to resize or reshape the object.
3D objects are placed on a new drawing layer, which is accessible in the Concept Explorer. Once placed, you can apply textures and materials to the objects to customize their appearance.
Using the Make 3D tool
- Click the Make 3D tool.
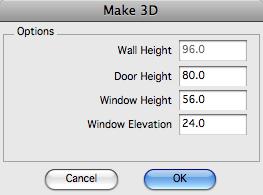
- Click to select the wall(s) you want to make 3D. You can press and hold the Shift key and click to select each wall or drag a selection window around all the walls. The Make 3D Options dialog box is displayed.
- Enter values, in inches, to specify the wall, door, and window height, as well as the window elevation. Click OK. The selections become 3--dimensional.
Roof Tool
The Roof tool allows you to create a surface that attaches to the top of existing walls. The offset value determines how far the slab extends from the wall. You can control the slab thickness and offset in the Data Entry window.
There are two types of roofs available in the Data Entry window, each with different properties:
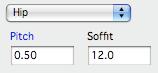
When creating a hip roof, you can specify the pitch and soffit size. The roof’s pitch is projected above the wall; the greater the pitch, the further the roof projects. The soffit value determines how far the roof extends from the wall.
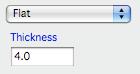
When creating a flat roof, you can specify the thickness. The roof’s thickness is projected above the wall; the greater the thickness, the further the roof projects.
There are two ways to edit a roof:
Select tool- edit the object’s properties in the Inspector.
Deep Select tool- drag individual points to resize or reshape the object.
Roofs are placed on a new drawing layer, which is accessible in the Concept Explorer. Once placed, you can apply textures and materials to the roof to customize its appearance.
Using the Roof tool
- Click the Roof tool.
- Choose the type of roof you want to create from the Data Entry window drop--down menu.
- (optional) Specify the roof’s properties.
Press and hold the Shift key and click to select the walls to use for the roof, or drag a selection window around the walls to select them all. The roof is attached to the