Fill Properties
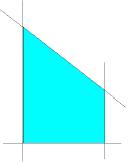
The Fill Properties settings allow you to control the appearance of the fill that appears or does not appear, within an enclosed object.
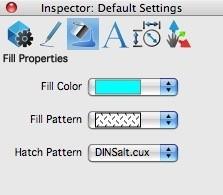
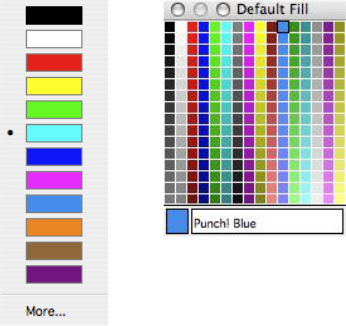
Fill Color
This option specifies the fill color for smart polygons. Click More to display a tool palette with additional pattern fills. The pattern by which a color fills a space is controlled by the Fill Pattern option.
One Point Fill tool
You can fill a region with one mouse click using the One Point Fill tool. This tool supports auto-trimming and intelligent associativity to the neighboring untrimmed curves. Press the Shift key to select specific curves to be involved in the fill. The fill color and pattern are defined on the pen menu.
Using the One Point Fill tool
- Position your cursor in the center of the region you want to fill and click to place.
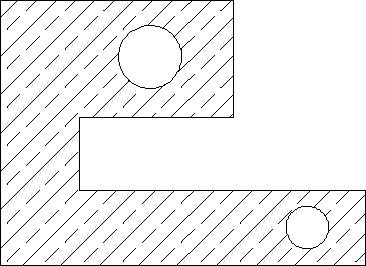
Note: Filling uses a bitmap to define the region. Use this tool if you have large regions to fill in a solid color in preference of the Hatch tool, which generates lines.
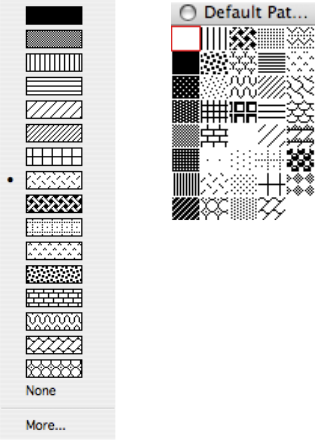
Fill Pattern
The Fill Pattern command specifies the pattern used for smart polygons. Unlike the Cross-Hatch command, the fill pattern uses a bitmap fill. Click More to display a tool palette with additional pattern fills.
Hatch
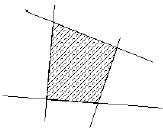
The Hatch command applies hatch patterns to collections of closed 2D curves. The current hatch pattern is specified from the drop-down or by clicking the Options button when the Hatch tool is enabled.
To edit a hatch, select the hatch pattern, and then go to the Cross-Hatch dialog. The Cross-Hatch dialog box will fill the values with the selected hatch pattern.
One Point Hatch tool
You can create a hatch with one mouse click using the One Point Hatch tool. This supports auto-trimming and intelligent associativity to the neighboring untrimmed curves. To change the default hatch pattern, click the Options button on the Data Entry Window and choose the hatch pattern you want on the Object Cross Hatch dialog box.
Using the One Point Hatch tool
- Position your cursor in the center of the region where you want a hatch and click to place.
Note: Hatching uses a spacing and angle attribute to control scale and orientation. Hatches are comprised of individual line segments and recognizes interior holes.
Hatch Options
When the Hatch tool is active, the Options button appears on the Prompt toolbar. The default Cross Hatch dialog box allows you to set the current cross hatch pattern.
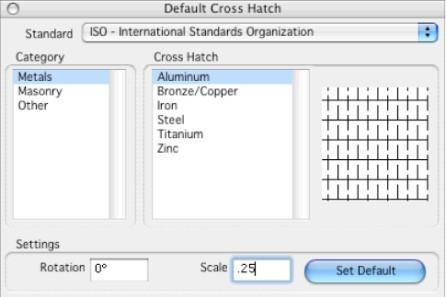
Cross Hatch Dialog
Standard Specify ISO or DIN Standard patterns.
Category The hatch categories for a given standard.
Cross Hatch Patterns for the given category
Rotation The rotation angle for the cross-hatch pattern.
Scale The scale value for the cross-hatch pattern.
Set Default Click this button to set the current standard, category, cross hatch pattern, and settings for newly created hatches.