Address Book and Mail Merge
To use the Address Book and Mail Merge feature in PrintMaster you can create a contact list from scratch or import an existing contact list in .csv file format. A video tutorial for the Address Book feature exists on the following link:
To create an Address Book from scratch follow these steps.
-
Select the project type you wish to personalize with names or addresses
-
In the left hand Design Tools navigation select Text
-
From the Text tools option select Address
-
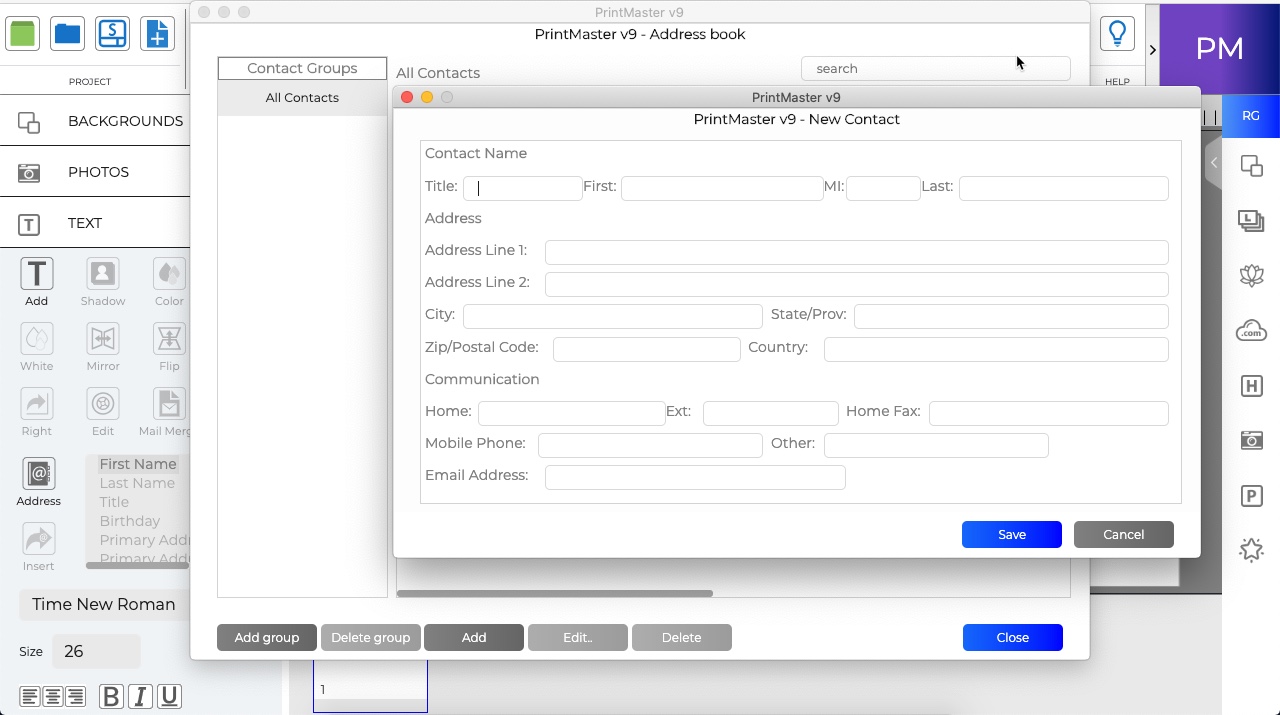
You should now see the Address Book. Select Add to create a New Contact
-
Fill out the New Contact details and select Save.
-
To create another contact select Add again. To change a contact select Edit, to delete a contact select Delete.
To import an Address Book from an existing .csv file format follow these steps.
-
Select the project type you wish to personalize with names or addresses
-
In the left hand Design Tools navigation select Text
-
From the Text tools option select Address
-
You should now see the Address Book. Select Import to import your contacts
-
Select Browse to find the .csv file you would like to import
-
Open the .csv file and you will see the Import Contacts dialogue
-
If your .csv file contains a Header Row with names or other data designations you can have that row removed from the import process by changing the Header Rows field
-
Next you must assign each of the columns a name. On the right side you can assign each column to a matching address book field by using the pull down menu option under the Name column.
-
Assign each column you wish to import into PrintMaster a name and select Import.
To place a contact details into a project follow these steps:
-
In the left hand Design Tools navigation select Text
-
From the Text tools option select Address
-
You should now see the Address Book
-
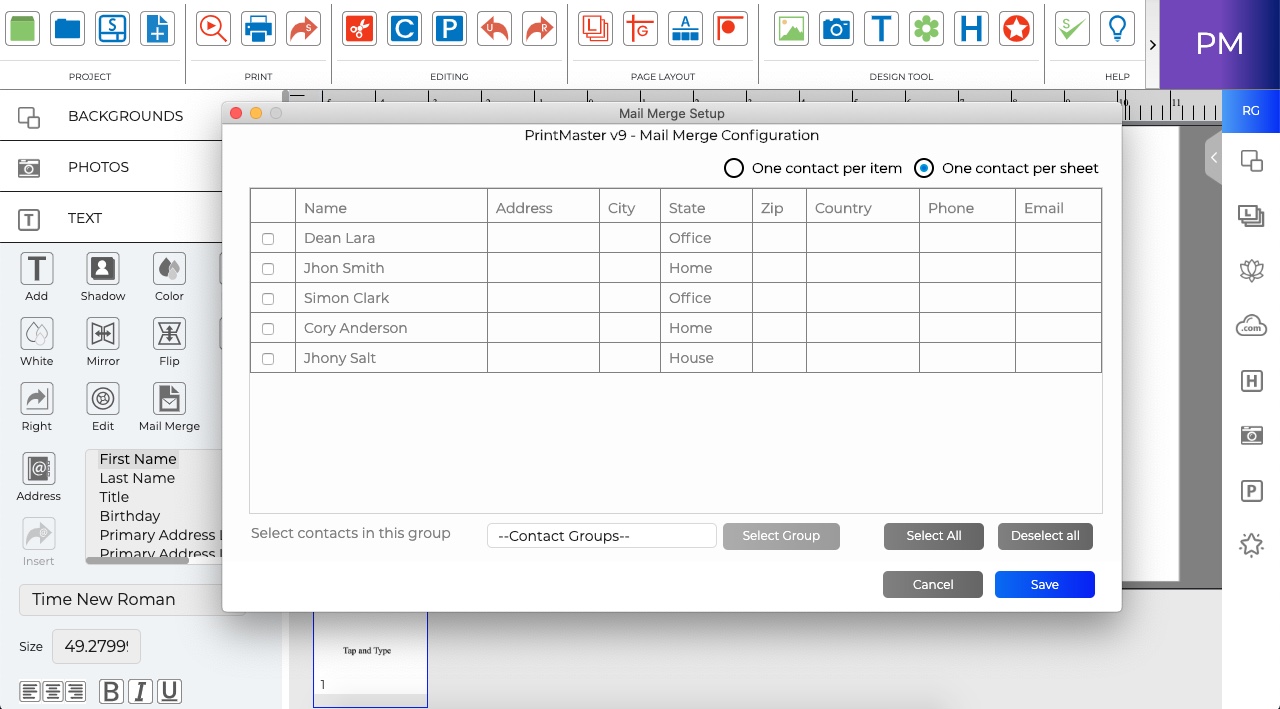
From the Address Book select the Contacts that you would like to include in your project
-
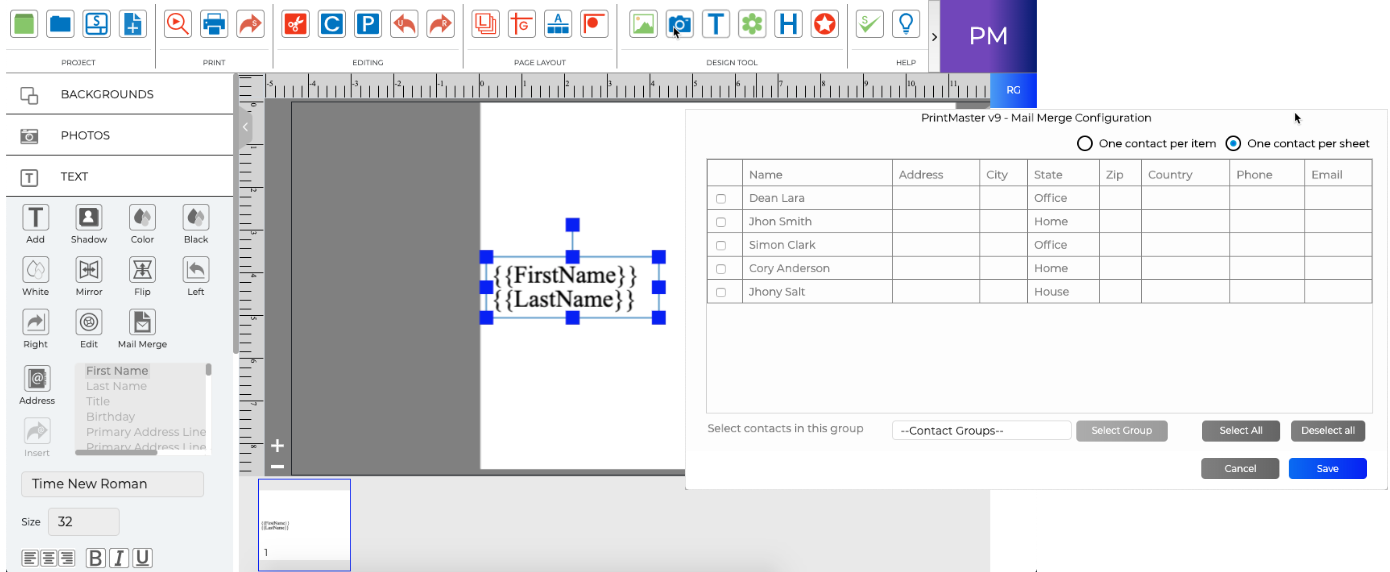
Next add a text box to the project by selecting the Add option from the Text tools option
-
To add a name and address from your Address Book select the First Name from the Field next to the Address button.
-
With the text cursor in the text box where you want to place the First Name, select the Insert button. Continue this process to add the Last Name, Address 1 and remaining address fields.
-
You may need to increase the Font size to make it easier to read. Select the Size option under the font name and choose a larger font size.
-
Print Preview your project to make sure all of the Fields are properly displayed by selecting the File / Print at Home option and Preview.
-
When asked to apply mail merge contacts to your document select Yes.
Related Topics