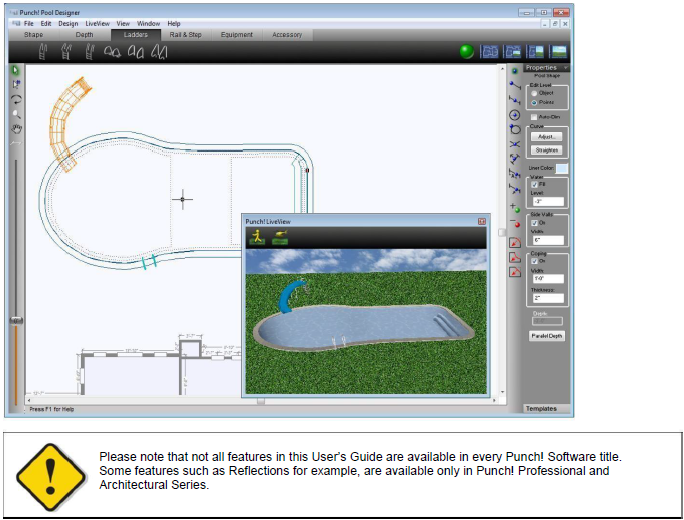
Pool Designer
Imagine the pool of your dreams, picture it in your mind. Now make it a reality with Punch! Pool Designer! Create a pool as extravagant or intimate as you like. Create the ultimate atmosphere by selecting just the right accessories, from Pool Designer. Get started now…
Launching Pool Designer
-
Click Design menu > Launch PowerTool. The PowerTool Launcher is displayed.
-
Click to select Pool Designer and click the Launch button. The Pool Designer is launched.
Create a Pool Using Pool Wizard
The Punch! Pool Wizard lets you choose a pool shape from pre-designed Basic Shapes, Advanced Shapes, and Above Ground shapes. After choose your pool shape, you can customize the pool properties, such as coping (the tiles that edge your in-ground pool), water, liner, and more, or create your pool using the default settings.

To create a pool using Pool Wizard 
-
From the Shape tab, click the Pool Wizard Tool. Pool Wizard is displayed. (alternatively) Click File > Pool Wizard.
-
Click a one of the pool shape tabs and choose the pool shape you want. A full- color preview is displayed when you click a shape thumbnail.
-
After selecting your shape, customize the properties on the Properties Bar.

Coping Properties define the overall width and thickness of the coping around the pool.
- Water Properties your pool is displayed filled with water when viewed in 3D View. If you want your pool to appear empty in 3D View, deselect the Fill Pool checkbox.
To change the water level, type the distance you want the water to appear, from the top edge of the pool, in the Water Level text box.
- Liner Properties specifies the depth of your pool. By default, some pools feature both a shallow end and a deep end. Type the depth for the shallow end of your pool in the Shallow End Depth text box.
By default, the Deep End Depth checkbox is selected. Type the depth for the Deep End of your pool in the Deep End text box.
Deselect the User Defined Depth Areas checkbox if you want to create custom shallow and deep ends using the methods described in the section “Defining the Depth of your Pool”.
- Sizing you can change the Sizing properties by entering custom dimensions for your pool. In the Pool Width text box, type the width you want; in the Pool Height text box, type the height you want.
Note: By default, Punch! Pool Wizard automatically calculates the aspect ratio to keep your shape intact. Deselect the Maintain aspect ratio checkbox to override this feature.
-
Default button returns to the pool’s original width and height.
-
When you have selected your pool’s shape and customized its properties, click OK. Your pool is displayed on the Pool Designer workspace.
Shaping your Pool
The first step to creating the pool of your dreams is to select the shape you want. Punch! offers pool tools to create a pool from basic shapes and a Pool Wizard to create a more advanced design.

Rectangle Pool Tool

Creates a rectangular or square pool shape. These shapes are created using the same drawing method as rectangles and squares. For more information, see “Drawing Rectangles and Squares”.
Oval/Circle Pool Tool

Creates an oval or circular pool shape. These shapes are created using the same drawing method as rectangles and squares. For more information, see “Drawing Circles and Ovals”.
Polygon Pool Tool

Allows you to define the pool shape using polylines. These shapes are created using the same drawing method as polygons. For more information, see “Drawing Polygons”.
Multigon Pool Tool

Creates a multigon pool shape. These shapes are created using the same drawing method as multigons. For more information, see “Drawing Multigons”.
Curved Pool Tool

Allows you to define a pool shape using curves. These shapes are created using the same drawing method as curves. For more information, see “Drawing Curves”.
Pool Shape Properties

Pool Designer offers a variety of ways to customize and edit your pool. You can control the shape, walls and coping (the tile lip that surrounds the top edge of your pool). Pool Designer also allows you to create and store templates, plus add colors and materials to your pool.
Note: Always press ENTER to accept new values in a text box.
- Edit Level Select Object to resize the whole object or Points to edit individual points on the shape. For more information, see “Editing Detail Shapes”.
- Auto-Dim checkbox controls the displays of dimensions in 2D. When selected, dimensions are displayed.
Note: Dimensions are not available for Oval/Circle or Curved depths.
- Curve options control curvature. For more information, see “Changing Curve Tension”.
- Liner Color color preview shows the current liner color. To change the color, click the preview, then select the color you want from the Color window and then click OK.
- Water When the Fill checkbox is selected, water is displayed in your pool in the 3D view. To change the water level, type the distance you want the water to appear from the top edge of the pool, in the Level text box. To remove water from the 3D view, deselect the Fill checkbox.

Water On Water Off
- Side Walls checkbox controls the width of the side walls. If enabled, side walls are visible in the 3D view. To change the wall width, type the width you want in the Width text box. To remove the side walls, deselect the On checkbox.
- Coping settings control the display and size of the coping around the pool. When the On checkbox is selected, coping is displayed in the 3D view. Type the width and thickness you want in the corresponding text boxes. When deselected, coping is not visible in the 3D view.
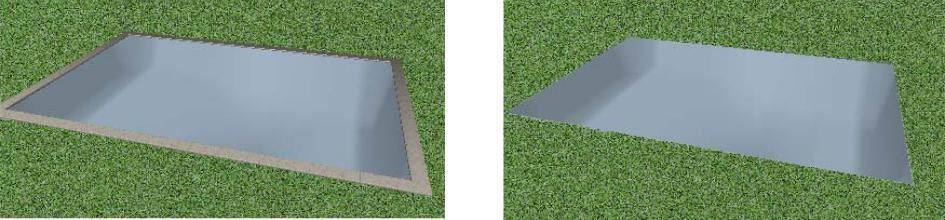
Coping On Coping Off
- Depth defines how deep the shape projects into the ground. This text box is only available when there are no manually drawn depths created for the pool.
Defining the Depth of your Pool
After you have fine-tuned the shape of your pool, you can set the depth by drawing shapes, with the tools that work just like those on the Shapes Tab.

Rectangle Depth Tool

Creates a rectangular or square depth shape. These shapes are created using the same drawing method as circles and ovals. For more information, see “Drawing Rectangles and Squares”.
Oval/Circle Depth Tool

Creates an oval or circular depth shape. These shapes are created using the same drawing method as rectangles and squares. For more information, see “Drawing Circles and Ovals”.
Polygon Depth Tool

Allows you to define the depth shape using polylines. These shapes are created using the same drawing method as polygons. For more information, see “Drawing Polygons”.
Multigon Depth Tool

Creates a multigon depth shape. These shapes are created using the same drawing method as multigons. For more information, see “Drawing Multigons”.
Curved Depth Tool

Allows you to define a depth shape using curves. These shapes are created using the same drawing method as curves. For more information, see “Drawing Curves”.
Pool Depth Properties
In addition to changing the depth of an area in your pool, you can reshape and resize the depth to suit your needs. After you’ve created a shape, click the shape to select it. Its properties are displayed on the Properties Bar.
Note: Always press ENTER to accept new values in a text box.
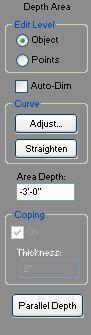
- Edit Level Select Object to resize the whole object or Points to edit individual points on the shape. For more information, see “Editing Detail Shapes”.
- Auto-Dim checkbox controls the displays of dimensions in 2D. When selected, dimensions are displayed.
- Note: Dimensions are not available for Oval/Circle or Curved depths.
- Curve options control curvature. For more information, see “Changing Curve Tension”.
- Area Depth defines how deep the shape projects into the ground. The entire depth shape uses the specified depth value and the rest of the pool shape slope to that depth. Using various depth shapes, you can create a pool with multiple depths.
- Note: To create an island in your pool, type 0 in the Area Depth text and press ENTER.
- Parallel Depth button allows you to create a matching depth either inside or outside an existing depth. By default, the Parallel Depth is offset 6" from the inside edge. To increase or decrease the Offset Distance, type the amount of space you want between the edge and the Parallel Depth.
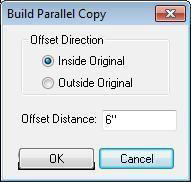
When you add a parallel depth, the new area depth is the same as the original depth. So, when using parallel depths to create a sloped depth, be sure to adjust the area depth value for each depth.
Parallel Depth added inside the original depth at 6" offset
Managing Your Pool Design
You can easily view your pool’s volume and sizing, as well as customize drawing options.
To calculate your pool’s volume
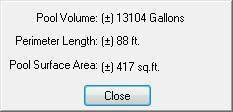
- Click Design menu > Calculate Pool Volume. A dialog box is displayed with your Pool Volume, Perimeter Length, and Pool Surface Area.
To customize your pool’s options
- Click Design menu > click Pool Options. The Options dialog box is displayed.

- Pool Liner Render Quality Move the slider side to side to increase or decrease the Pool Liner Rendering Quality.
- Water Transparency Move the slider side to side to increase or decrease the Water Transparency.
- Move Equipment With Pool To enable equipment to move with your pool, select the checkbox. Your equipment stays in place anytime you move or resize your pool.
-
Move Steps With Pool To enable steps to move with your pool, select the checkbox. Your steps stay in place anytime you move or resize your pool.
-
Configure the options and then click OK.
Adding a Ladder with Steps
The ladder with steps options are available on the Ladders tab. Using one of these tools you can add a ladder with steps to the edge of your pool. Each tool offers some variety in the rail style.
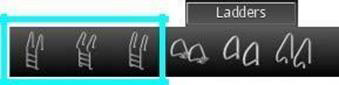
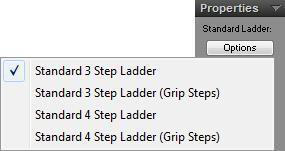
When one of the tools is active you can choose the style you want from the Options button on the Properties tab. The styles offer 3-step and 4-step ladder options. Below is an example of the styles available for the Standard Ladder Tool.
To add a ladder with steps
-
Click the Ladders tab and choose the ladder tool you want. The Options button is displayed on the Properties Bar.
-
Click the Options button and choose the style you want.
-
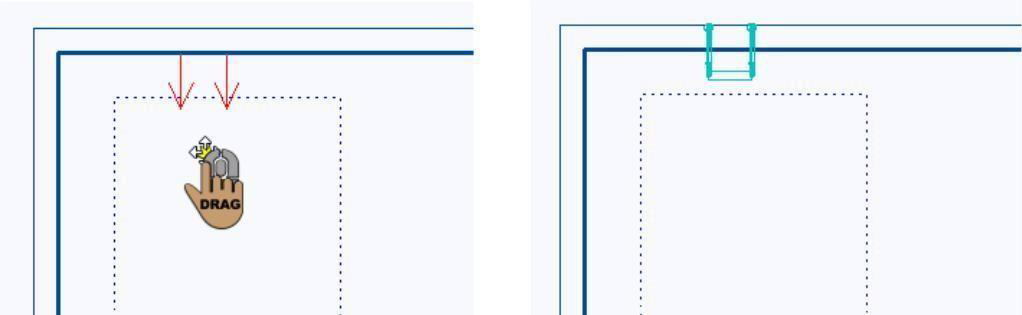
Position your cursor on an edge of the pool where you want the ladder to be placed and then click-and-drag so the red arrows are pointing in the direction you want the component to face. Release your mouse to place the ladder.
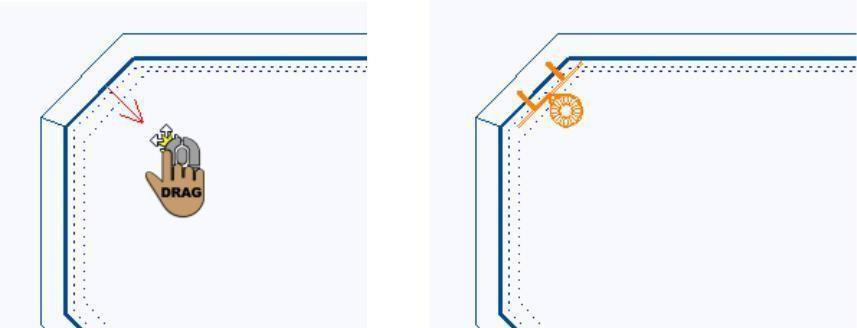
Adding Ladder Rails without Step
The ladder rails options are available on the Ladders tab. Using one of these tools you can add ladder-style rails without steps to the edge of your pool. Each tool offers some variety in the rail style.
To add ladder rails without steps
-
Click the Ladders tab and choose the rail tool you want.
-
Position your cursor where you want the rails to be placed and then click-and-drag so the red arrows are pointing in the direction you want the component to face. Release your mouse to place the rails. The component is displayed in your design.
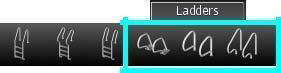
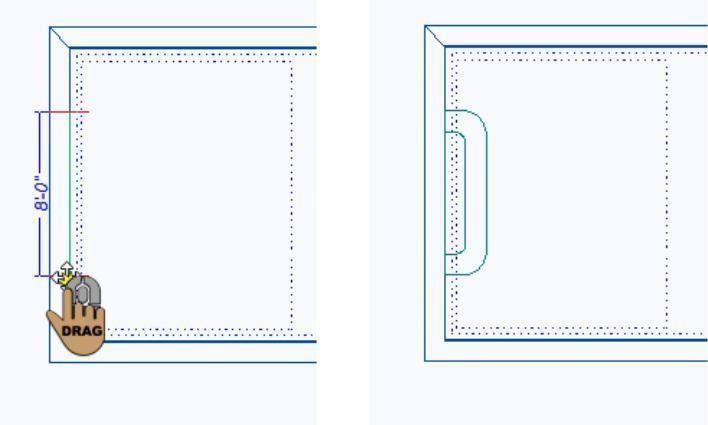
Adding a Hand Rail
The hand rail options are available on the Rail & Step tab. Using one of these tools you can add a hand rail to the edge of your pool. Each tool offers some variety in the rail style.

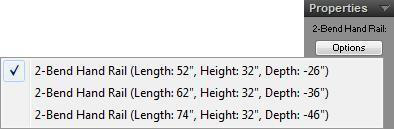
When one of the tools is active you can choose the style, you want from the Options button on the Properties tab. The styles offer various sized hand rail options, with the dimensions noted for each style option. Below is an example of the styles available for the 2-Bend Hand Rail Tool.
Note: Options are available for all of the hand rail tools with the exception of the Spa-Rail Tool.
To add a hand rail
-
Click the Rail & Step tab and choose the hand rail tool you want. The Options button is displayed on the Properties Bar.
-
Click the Options button and choose the style you want.
-
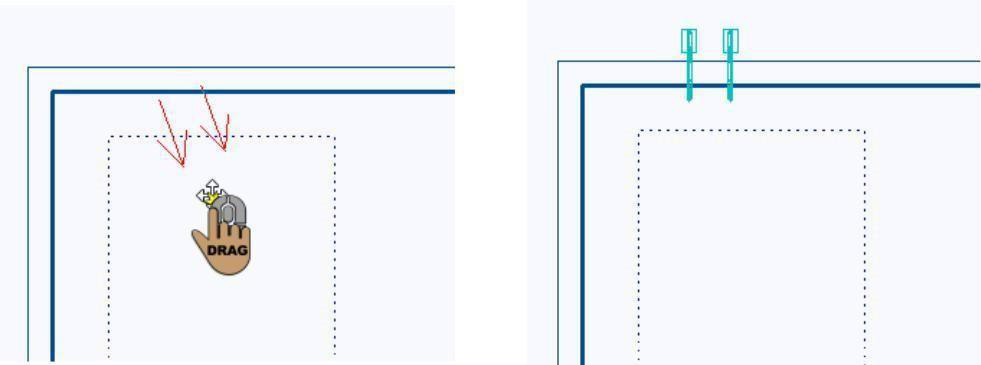
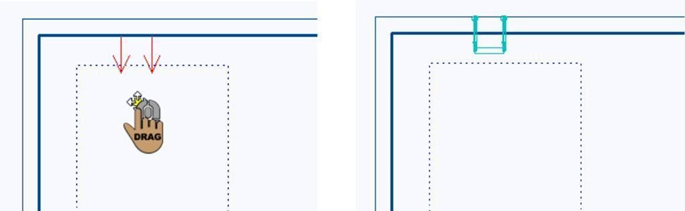
Position your cursor on an edge of the pool where you want the hand rail to be placed and then click-and-drag so the red arrows are pointing in the direction you want the component to face. Release your mouse to place the hand rail.
Adding Steps
You can easily add steps to an edge of your pool using one of the step tools on the Rail & Step tab. To following options are available from the Register/Return toolset:
-
Perimeter Steps
-
Freehand Steps
-
Pre-Built Steps
Perimeter Steps
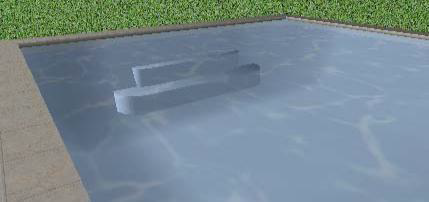
Perimeter steps are drawn along the edge of the pool. Dimensions are display as you drag to extend the length of the steps.
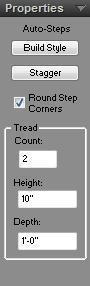
Before adding perimeter steps to your pool design you can specify the Auto-Steps settings on the Properties tab. Once the steps are placed you can only edit the height of each step, the elevation of each step, and the shape of the steps.
Note: Always press the ENTER key to accept new values in a text box.
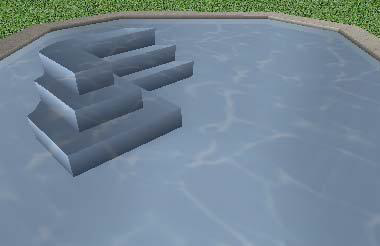
- Build Style button provides options for the step shape style. Parallel steps follow the shape of the pool while Straight steps create a straight line.

Parallel Steps Straight Steps
- Stagger button provides options to control how the ends of the steps are staggered when the Parallel style is selected (only available for Parallel Steps style).

No Stagger Standard Stagger Slanted Stagger
- Round Step Corner checkbox allows you to choose if you want the corners of Parallel steps rounded or straight. When selected, the corners are rounded; when deselect they are straight (only available for Parallel Steps style).
- Tread Count defines the number of step treads.
- Height defines the distance from one step to the next.
- Depth defines the distance from the back of the exposed step to the front.
To place a wall receptacle 
- On the Rail & Step toolbar, click the Perimeter Step Tool.
- On the Properties tab, set the Auto-Steps properties you want.
- Use the Click-and-Drag drawing method to set the length for the steps along an edge of the pool.
Freehand Steps
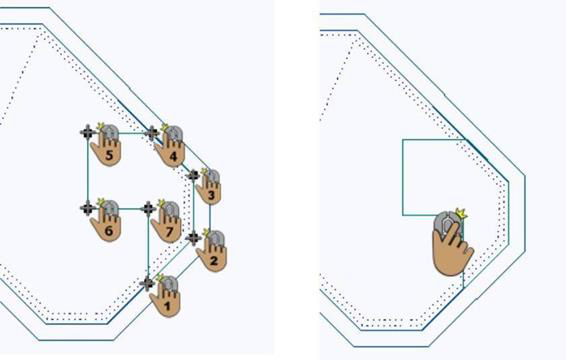
Freehand steps are drawn by clicking points to define the shape of the step. Using this tool, you can create a unique shape to along any edge of your pool design. Dimensions are display as you drag to extend the segments of the steps. The step is placed at the current working elevation, which you can adjust before you draw, or you can edit the step’s elevation after it is placed.
For more information, see “Controlling Elevations”.
You can edit the step height and curvature on the Properties tab before or after you draw the step.
Note: Always press the ENTER key to accept new values in a text box.
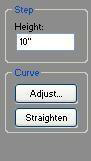
- Height defines the distance from the bottom of the step to the top.
- Curve options control curvature. For more information, see “Changing Curve Tension”, which begins on page 238.
To add a freehand-drawn step 
- On the Rail & Step toolbar, click the Freehand Step Tool.
- Use the Define 2D Shape drawing method to draw a freehand step.
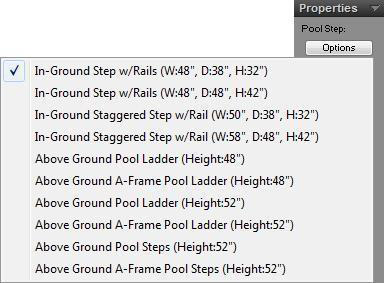
Pre-Built Steps
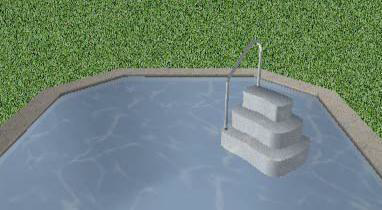
Pre-built steps are placed in your drawing with a single click. All of the steps and the hand rails are combined as one component.
When the tool is active you can choose the style, you want from the Options button on the Properties tab. The styles offer in-ground and above-ground options with various sizes.
Below are some references that may be helpful as you design:
-
Controlling Elevations
-
Editing Your Pool Design
To add pre-built steps 
- On the Rail & Step toolbar, click the Pre-Built Steps Tool.
- On the Properties tab, click the Options button and choose the style you want.
- Use the Click Once to Place drawing method to place the pre-built steps in your design.
Adding Pool Equipment
Pool equipment is available on the Equipment tab. Using these tools, you can complete your pool design by adding details such as the support system parts, skimmers, and more.

Below are some references that may be helpful as you design:
-
Controlling Elevations
-
Editing Your Pool Design
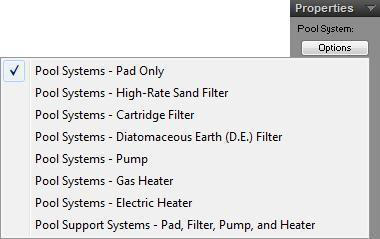
Pool Support Systems
The support system components are available to add to your pool design. When the tool is active you can choose the type, you want from the Options button on the Properties tab. You can add components individually or choose a pre- built support system that includes a filter, pump, and heater combined on a concrete pad.
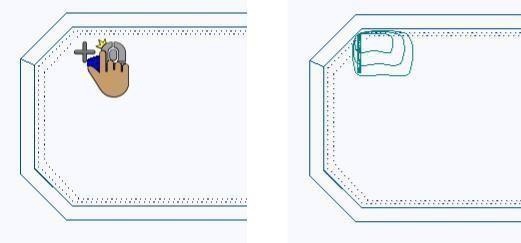
To add a pool support system 
- On the Equipment tab, click the Pool Support Systems Tool.
- On the Properties tab, click the Options button and choose the support system you want to add.
- Use the Click Once to Place drawing method to place the support system in your design.
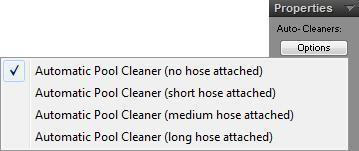
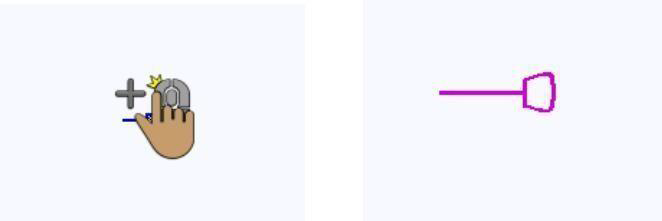
Automatic Cleaner
You can add an automatic cleaner to your pool design. When the tool is active you can choose the type, you want from the Options button on the Properties tab.
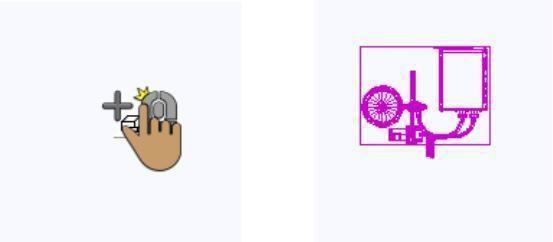
To add an automatic pool cleaner 
- On the Equipment tab, click the Automatic Cleaner Tool.
- On the Properties tab, click the Options button and choose the pool cleaner you want to add.
- Use the Click Once to Place drawing method to place the pool cleaner in your design.
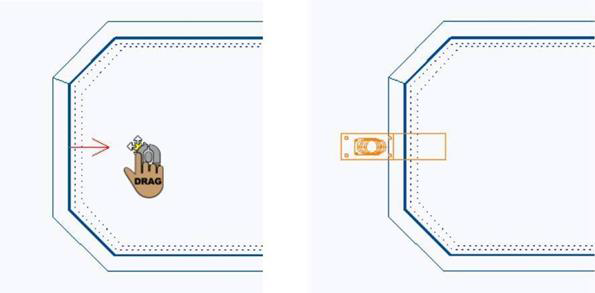
Surface Skimmer
You can add a surface skimmer that is built into the edge of your pool. By default, this is added along an edge where the coping exists. Once place you can click-and-drag the skimmer to a new location in your pool.
Note: If you do not position the surface skimmer along the pool edge, Punch! automatically places the surface skimmer on the closest edge.
To add a surface skimmer 
-
On the Equipment tab, click the Surface Skimmer Tool.
-
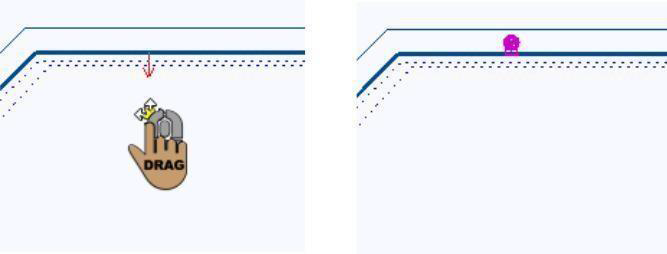
Position your cursor on an edge of the pool where you want the surface skimmer to be placed and then click-and-drag so the red arrows are pointing in the direction you want the component to face. Release your mouse to place the surface skimmer.
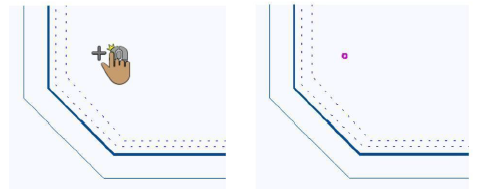
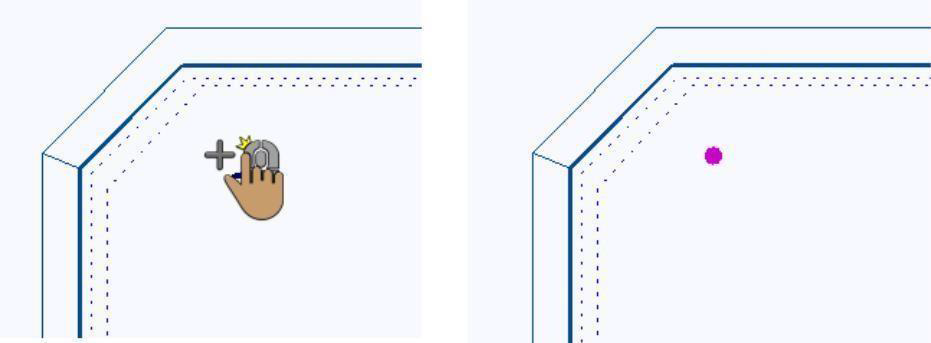
Drain
You can add a drain to your pool design with just one mouse click. Drains are automatically placed at the elevation of the lowest detected depth where you click.
To add a drain 
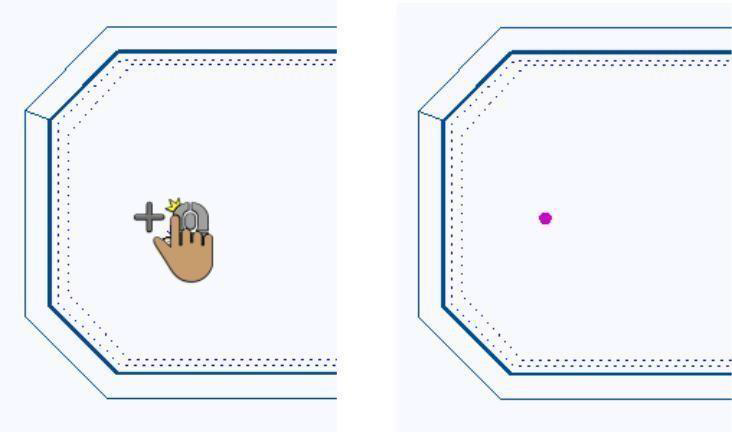
- On the Equipment tab, click the Drain Tool.
- Use the Click Once to Place drawing method to place the drain in your design.
Leaf Skimmers
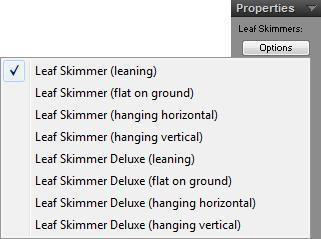
The Leaf Skimmer Tool offers a variety of options for adding a skimmer to your pool design. When the tool is active you can choose the type, you want from the Options button on the Properties tab.
To add a leaf skimmer 
- On the Equipment tab, click the Leaf Skimmer Tool.
- On the Properties tab, click the Options button and choose the skimmer you want to add.
- Use the Click Once to Place drawing method to place the leaf skimmer in your design.
Floating Thermometer
The Floating Thermometer Tool places a thermometer in your pool at the surface. Once placed you can move the thermometer by dragging it to a new position or using your arrow keys to nudge it into place.
To add a floating thermometer 
1. On the Equipment tab, click the Floating Thermometer Tool.
- Use the Click Once to Place drawing method to place the thermometer in your design.
Chlorinator
The Chlorinator Tool places a chlorine float in your pool at the surface. Once placed you can move the chlorinator by dragging it to a new position or using your arrow keys to nudge it into place.
To add a chlorinator 
- On the Equipment tab, click the Chlorinator Tool.
- Use the Click Once to Place drawing method to place the chlorinator in your design.
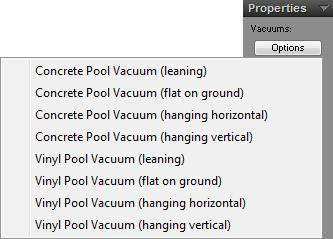
Liner Vacuums
The Liner Vacuum Tool offers a variety of options for adding a liner vacuum to your pool design. When the tool is active you can choose the type, you want from the Options button on the Properties tab.
To add a liner vacuum
- On the Equipment tab, click the Liner Vacuums Tool.
- On the Properties tab, click the Options button and choose the vacuum you want to add.
- Use the Click Once to Place drawing method to place the vacuum in your design.
Liner Brooms
The Liner Broom Tool offers a variety of options for adding a liner broom to your pool design. When the tool is active you can choose the type, you want from the Options button on the Properties tab.
To add a liner vacuum 
- On the Equipment tab, click the Liner Vacuums Tool.
- On the Properties tab, click the Options button and choose the vacuum you want to add.
- Use the Click Once to Place drawing method to place the vacuum in your design.
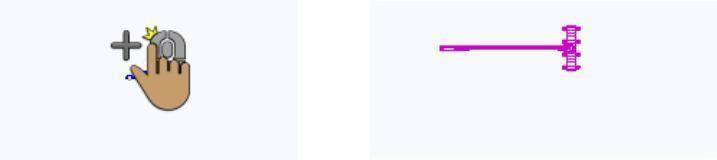
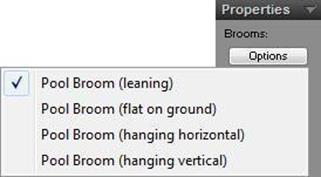
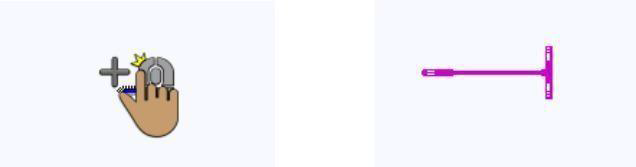
Liner Brooms
The Liner Broom Tool offers a variety of options for adding a liner broom to your pool design. When the tool is active you can choose the type, you want from the Options button on the Properties tab.
To add a liner broom 
- On the Equipment tab, click the Liner Brooms Tool.
- On the Properties tab, click the Options button and choose the broom you want to add.
- Use the Click Once to Place drawing method to place the broom in your design.
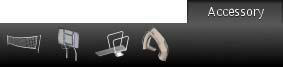
Adding Pool Accessories
Pool accessories is available on the Accessory tab. Using these tools, you can add the things that make your day at the pool jam-packed with activity.
Below are some references that may be helpful as you design:
-
Controlling Elevations
-
Rotating a Selection
Volleyball Net
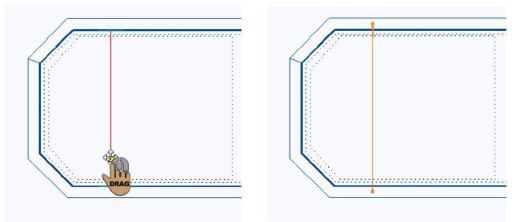
You can easily add a volleyball net that stretches from one side of your pool to the other. A rubber band line is displayed as you draw. The volleyball net is positioned at a default elevation, which you can change after it is placed.
To add a volleyball net 
1. On the Accessory tab, click the Volleyball Net Tool.
- Use the Click-and-Drag drawing to draw the volleyball net from one side of the pool to the other side.
Basketball Goal
Using the Basketball Goal Tool, you can add a basketball goal along any edge of your pool.
To add a basketball goal 
-
On the Accessory tab, click the Basketball Goal Tool.
-
Position your cursor on an edge of the pool where you want the basketball goal to be placed and then click-and-drag so the red arrows are pointing in the direction you want the component to face. Release your mouse to place the basketball goal.
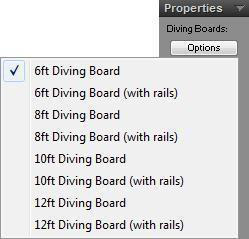
Diving Boards
The Diving Boards Tool offers a number of options for adding a diving board to your pool design. When the tool is active you can choose the type, you want from the Options button on the Properties tab.
To add a diving board 
-
On the Accessory tab, click the Diving Boards Tool.
-
On the Properties tab, click the Options button and choose the diving board you want to add.
-
Position your cursor on an edge of the pool where you want the diving board to be placed and then click-and-drag so the red arrows are pointing in the direction you want the component to face. Release your mouse to place the diving board.
Slides
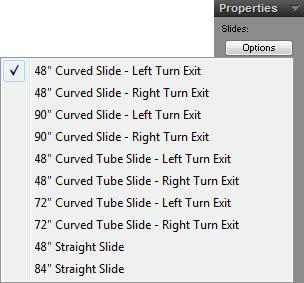
The Slides Tool offers a number of options for adding a slide to your pool design. When the tool is active you can choose the type, you want from the Options button on the Properties tab.
To add a slide 
-
On the Accessory tab, click the Slides Tool.
-
On the Properties tab, click the Options button and choose the slide you want to add.
-
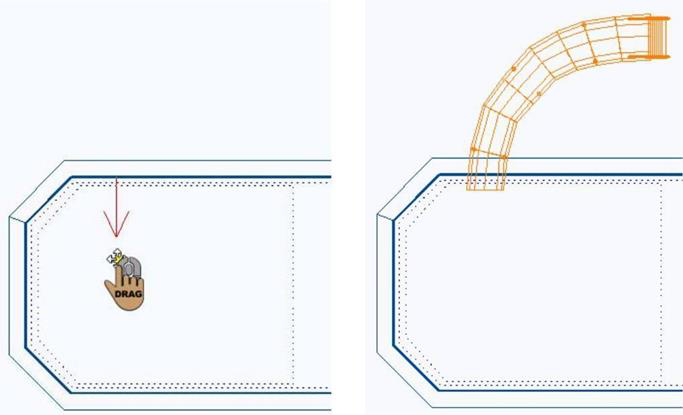
Position your cursor on an edge of the pool where you want the slide to be placed and then click-and-drag so the red arrows are pointing in the direction you want the component to face. Release your mouse to place the slide.
Controlling Your Working Plan Views
You can control which plans are visible while editing your design. Each tab has a drop-down box that allows you to view or hide the work you’ve done in each other plan. Additionally, you can control the default plan color, which is used to distinguish components that are added from each tab.
By default, if you have created a design from a tab, it is visible on the workspace and has a checkmark next to it in the drop-down menu. To hide a specific plan or plans, click the plan(s) you want to hide. The checkmark and plan(s) disappear.
Note: You cannot hide the active plan.
To display or hide your pool plans
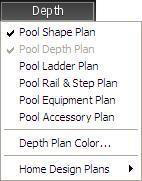
- Click a tab to display the drop-down menu and click to select the plan(s) you want to view. A checkmark is displayed next to the visible plans and they are displayed on the workspace. To hide a plan, click to deselect the checkmark and hide the plan and all of its contents.
To customize a plan’s color on the workspace
-
Click a tab to display the drop-down menu and choose Plan Color. The color palette is displayed.
-
Select the color you want to use to denote the selected plan and then click OK. The contents of that plan are displayed in the color you chose.
Controlling Elevations
The working elevation is the elevation at which all items are drawn. Once placed, you can adjust an item’s elevation manually or use one of the pre-defined elevations to position an item accurately.
To change the working elevation
- Click Design menu > Set Working Elevation. The Set Working Elevation dialog box is displayed. (alternatively) While nothing is selected in your design, right-click the Elevation Slider and
choose Set Working Elevation.
- Type the elevation you want in the text box and click OK.
To elevate a component
-
Click the Selection Tool and then click to select the component you want to elevate (hold down the SHIFT key as you click to select multiple components).
-
Click Edit menu > Set Object Elevation. The Set Elevation dialog box is displayed. (alternatively) Right-click the Elevation Slider and choose Set Elevation.

- Choose one of the pre-defined elevations or choose Custom and type the elevation you want it text box, then click OK.
To elevate a component using the Elevation Slider
-
Click the Selection Tool and then click to select the component you want to elevate (hold down the SHIFT key as you click to select multiple components).
-
Drag the Elevation Slider to the elevation you want.
Editing Your Pool Design
Rather than draw each geometric feature of your pool separately, use Pool Designer’s editing tools to reshape, reposition, or re-orient existing pool elements. You can manipulate shapes to match your custom design by inserting or removing points and rounding or chamfering corners.
The following options are available for editing your door design:
 Selection Tool (For more information, see “Moving a Selection” and “Reshaping and Resizing 2D Objects”).
 Rotate Tool (For more information, see “Rotating a Selection”.)
 Resize Segment Tool (For more information, see “Changing Segment Length”.)
 Add Point Tool (For more information, see “Editing Detail Shapes”.)
 Remove Point Tool (For more information, see “Editing Detail Shapes”.)
 Fillet Tool (For more information, see “Editing Detail Shapes”.)
 Inverted Fillet Tool (For more information, see “Editing Detail Shapes”.)
 Chamfer Tool (For more information, see “Editing Detail Shapes”.)
Calculating Pool Volume
You can quickly view the volume of your pool design, the perimeter length, and the surface area.
To calculate pool volume
- Click Design > Calculate Pool Volume. The volume, length, and area of the pool are displayed.
Using Snaps to Draw Elements
Punch! Home Design Software includes the power of snaps. With snaps, you can define exactly what distance pool elements are placed from other pool elements. You can TAB through the Snaps Toolbar. Each time you press TAB, the next Snap Tool is activated, SHIFT+TAB reverses the process.
Note: Each Snap Tool defaults back to “No Snap” after it is used; double-clicking the Snap Tool will lock it in active mode.
For more information on using the snap tools, see “Using Snaps to Draw Components”.
Adding Lighting and Shadows
As in Punch! Home Design Software, you can customize the lighting and shadows in Pool Designer.
To adjust the lighting intensity in a 3D View
- Click LiveView menu > 3D Lighting. The 3D Lighting dialog box is displayed.
- Adjust the sliders to control Intensity and Brightness and then click OK.
Using Templates
Punch! Pool Designer provides prefabricated templates for you to quickly place an original pool style. You can also create and manage your own templates independent of specific drawings you have saved. The Template Organizer is particularly useful when you’re working with multiple pool designs because you can organize your Template by category.
To use templates
-
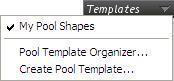
Click the Templates tab. The Templates drop-down is displayed in the Properties Bar.
-
Click the Templates drop-down box and the Template categories and options are displayed.
To organize templates
- Click the Templates drop-down menu and select Pool Template Organizer. The Pool Organizer is displayed.
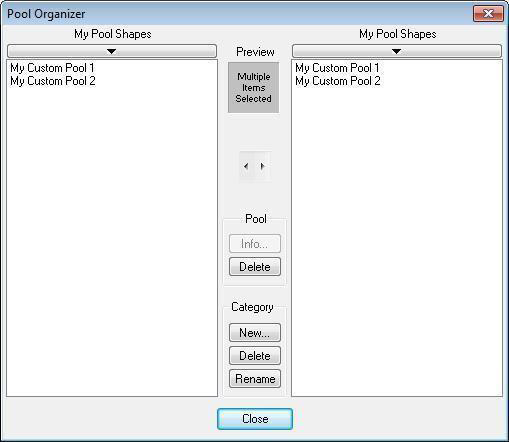
- To move templates from one category to another, open both categories using the category drop-down menu in Pool Organizer.
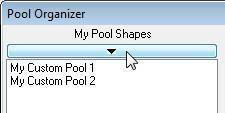
- Use the navigation arrows to move templates from one category to the other.
The templates are displayed under the category where you move them.
To review information on a particular template 
-
Select the pool from the library and click the Info button. The Pool Info dialog box is displayed.
-
To customize the Pool Name, type the name you want in the Pool Name text box.
-
To customize the Pool Description, type the description you want in the Pool Description text box.
-
Once you have updated all the Pool Info you want to, click OK and the information is updated.
To create a new category
- Click the New button under Category. The Browse for Folder dialog box is displayed.
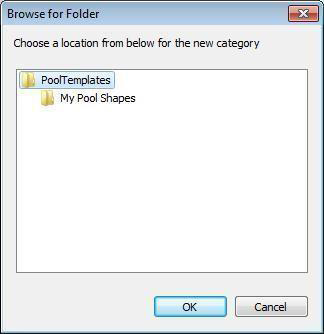
- Select the folder you want your new category to appear in and click OK. The Category Name dialog box is displayed.
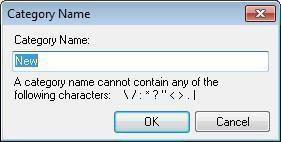
-
Type the name of your new category in the Category Name text box and click OK. Your new category is displayed on the right side of the Pool Organizer.
-
To delete a category from Pool Organizer, click the Delete button under Category. The Browse for Folder dialog box is displayed.
-
Select the category you want to delete and click OK. The delete confirmation box is displayed.
- Click Yes to permanently delete the category from Pool Designer.
To rename a category
- Click the Rename button under Category. The Browse for Folder dialog box is displayed.

-
Select the category you want to rename and click OK. The Category Name dialog box is displayed.
-
Type the new name in the Category Name text box and click OK. The new category name is displayed in Pool Organizer.
To delete a template from the library
- Click the Delete button. The delete confirmation box is displayed.
-
Click Yes to permanently delete the pool template from the library.
-
Once you’ve finished organizing your pool templates, click the Close button to close Pool Organizer and return to the Templates tab.
To create a pool template
-
Create a pool design you want to save as a template and click the Templates Tab. Templates are displayed on the Properties Bar.
-
Click the Templates drop-down menu and select Create Pool Template. The Save Pool To Category dialog box is displayed.
-
Click the Pool Category drop-down menu to select the category you want to save your pool template to.
-
Type the name of your pool in the Pool Name text box.
-
Type a description of your pool in the Pool Description text box.
-
Once you’ve finished entering the information on your new pool, click OK. Your design is displayed in the Templates Properties Bar.
Tip: Use the Templates drop-down menu to navigate through your categories quickly.