Before You Draw
To get the most benefit from Punch! Home Design Software, you should take a minute to become familiar with some of its basic concepts. With Home Design Studio you can set a precise drawing scale, define units of measurement, and set the reference grid. There are also many performance settings you can apply to optimize drawing speed and 3D viewing.
Starting a New File
Starting a new file displays QuickStart, an easy way to start your design process. For more information, see “QuickStart”. The first time Punch! Home Design Software is launched, you will be asked to register your software. For more information, see “Technical Support”.
To save a new, unnamed file
1 Choose File > Save As (or press Shift-Command-S). A dialog appears.
2 Enter a file name in the Save As field. Punch! Home Design Software automatically adds the PRO extension.
3 Choose where you want to save the file and click Save.
Opening a File
Opening a file copy the data it contains into memory, making it available for you to edit or print the plan drawing. You can open it.PRO files from previous versions, including 17.6, 17.7, and 18.0.
To open an existing file
1 Choose File > Open (or press Command-O). The Open dialog appears.
2 Find the file you want to open.
3 Select the file you want to open and click Open.
To see a list of recently opened files
■ Choose File > Open Recent then choose the file you want to open from the pop-up menu. The file opens.
To clear the recently opened files listing
■ Choose File > Open Recent > Clear Menu. The list of files is cleared.
Accessing the Sample Plans
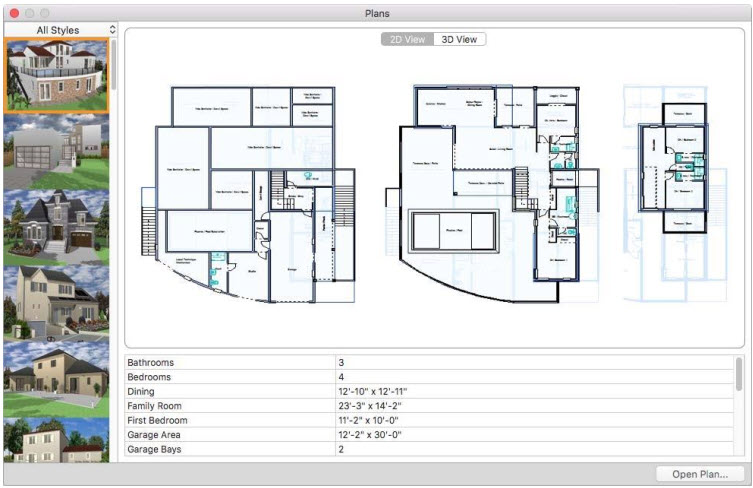
Sample plans are another set of predesigned home plans, not created by an architect that can be used as-is or can be edited to your liking. There are a number of different sample plans available, each with 2D and 3D previews, and room dimensions.
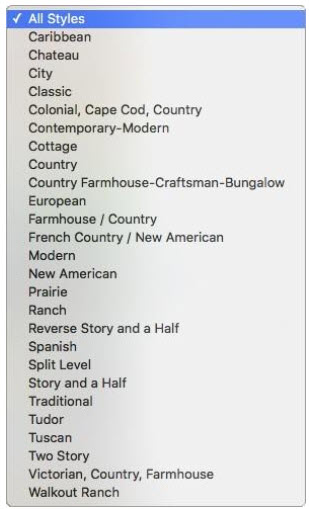
By default, all home styles are displayed. You can narrow the options by choosing the home style you want from the Style drop-down menu.
To open a sample plan
1 Choose File > Open Sample Plan (or press Shift-Command - O). The Sample Plans are displayed.
2 By default, all home styles are displayed. You can narrow the options by choosing the home style you want from the pop-up menu.
3 Scroll through the style options and choose the one you want. A 2D preview is displayed, as well as the plan’s dimensions. (optional) Click the 3D View tab to see the home in 3D.
4 When you find the plan you want, click Open Plan. The plan is opened in a new design window
Closing a File
When you finish working with a file, close it to remove the window from the screen and to free up your computer’s memory. When you are done working in Home Design Studio, close all your files and exit the program.
To close a file
■ Choose File > Close (or press Command-W). If you have unsaved changes in your plan drawing, Home Design Studio prompts you to save them before it closes the file To close all open files and exit
■ Choose Home Design Studio > Quit Home Design Architectural Series 21 (or press Command-Q). If any open drawings have unsaved changes, Home Design Studio prompts you to save them before it closes their files.
Saving a File
When you open a file, Home Design Studio copies the file to your computer’s memory. As you work, you modify the copy stored in memory. Any system failure or loss of power destroys that copy. To save your work permanently, you must save it to a file on a disc. A good rule of thumb is to save every 15 minutes or after you’ve completed any work you wouldn’t want to redo. When you click the Save command, Home Design Studio saves the active drawing, using the name and location you last gave it. You can create more than one version of a drawing or save copies on another disk for safekeeping. You can save each version under a different name or you can save them under the same name in different folders or on different disks.
To save an existing file
■ Choose File > Save (or press Command-S).
To save a file to a different name, drive, or folder
1 Choose File > Save As (or press Shift-Command-S). A dialog appears.
2 Enter a file name in the Save As field. Home Design Studio automatically adds the PRO extension.
3 Choose where you want to save the file and then click Save.
Importing Files
You can import a variety of file types into Home Design Studio from other popular software, allowing you to design and customize your dream home faster and easier than ever before.
■ 3D Object (described below)
■ SketchUp Object (described below)
■ DXF/DWG Design (described below)
■ Image to 3D Material Library (see “Applying Building Materials”)
■ Plant To Library (see “Plants Libraries”)
■ 3D Background (see “Applying Building Materials”)
To import a 3D object
1 Choose File > Import > Punch! 3D Object.
2 In the dialog that appears, choose the file you want to import and then click Open. The object appears in the design window.
(optional) Click the Select Objects  button then click the object you just placed to drag it to another location in the design window.
To import a SketchUp file
1 Choose File > Import > SketchUp Object.
2 In the dialog that appears, choose the file you want to import and then click Open. The object appears in the design window.
(optional) Click the Select Objects  button then click the object you just placed to drag it to another location in the design window.
To import a DXF/DWG file (2D only)
-
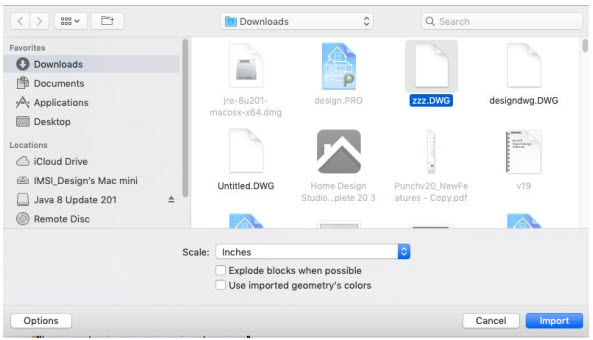
Click File menu > Import > DXF/DWG Design. The Import DXF/DWG Design dialog box is displayed.
-
Find the file you want to import and then click to select it.
3 Click Open. The Import Scale dialog box is displayed.
4 Choose a Scale from the drop-down menu
Note: The import scale must match the scale units in the original plan. If you don’t know the scale, use the last option “Use Design’s Units”
5 (Optional) Explode blocks when possible: If it is possible, any solid component will be converted to lines or other basic elements.
6 (Optional) Use imported geometry’s colors: imports the original colors of the DWG/DXF file. If this option is not selected, the file will be imported in a monochromatic color scheme for all of the components.
Exporting Files
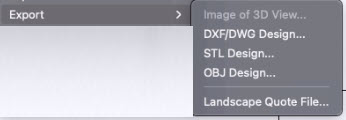
You can export a rendering of your 3D View window to BMP, GIF, JPG, PNG, or TIFF format. Files can be exported in Textured, Wireframe, and Clear View modes. The exported file will appear just as your 3D View window does. Be sure to render your drawing in high-resolution, before exporting. Size is also controlled by how your 3D View window appears; the larger the 3D View window, the larger the file will be. For more information on controlling the 3D View environment, see “Viewing in 2D & 3D”. You can also export a landscaping quote if your drawing includes landscaping. For more information, see “Exporting a Landscape Quote”.
Exporting a plan to a DXF/DWG File
You can export 2D floor plan files using a DXF or DWG file format so they are compatible with another CAD system.
■ Format drop-down menu allows you to choose either a DXF or DWG file format.
■ Version drop-down menu allows you to choose which version of the file format you want to export.
■ Color checkbox allows you to maintain the plan colors that are associated with the components on different plan tabs. When deselected, the entire drawing is exported in a monochromatic color scheme for all of the components.
■ Export object colors will export DWG/DXF the colors that you used in your original Punch drawing.
■ Export fills and patterns will export to DWG/DXF the fills and patterns that you used in your original Punch drawing.
To export a plan to a DXF/DWG file
-
Click File menu > Export > DXF/DWG Design. The Export Options dialog box is displayed.
-
Choose the Format and Version you want.
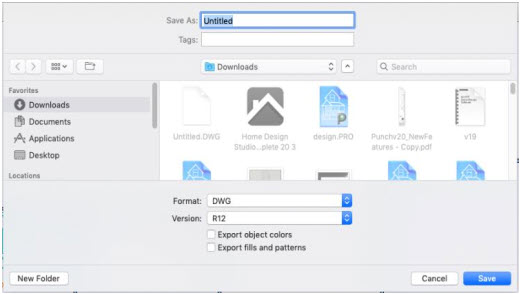
Additional Options:
Color: Select the “Export object color” field to include this feature in the exported file.
Fill and patterns: Select the Export fills and patterns fields to include these features in the exported file.
-
Choose a destination for the file then type a file name in the File Name text box.
-
Click Save. Punch! Home Design Software automatically adds the DXF or DWG extension.
Exporting a 3D Image
You can export your rendered 3D view as an image file. There are many options available for exporting a 3D image.
Format specifies the file format for the 3D image.
Render Quality specifies the render quality for the 3D image.
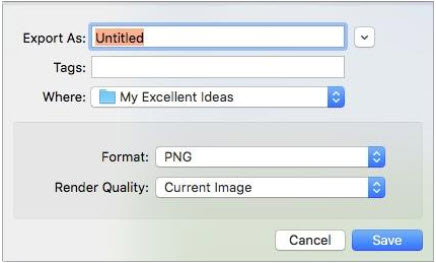
To export a 3D Image
1 Open a 3D View window and set the position and render style you want.
2 Choose File > Export > 3D Image. A dialog appears.
3 Enter a name for the file in the Export As field.
(optional) Enter a tag to categorize the image.
4 Choose where you want to save the file.
5 Choose the Format and Render Quality from the corresponding pop-up menus.
6 Click Save. Your 3D view is saved.
Exporting a STL File
You can export a 3D model to a STL file. This format is used to create a solid object from the Punch! 3D model.
To export an STL file
1. Click File menu > Export > STL Design. The Export STL dialog box is displayed.
2. Choose a destination for the file then type a file name in the File Name text box.
3. Click Save. The STL file is exported to the location you’ve specified. Punch! Home Design Software automatically adds the STL extension.
4. Note that the files are exported without textures.
Exporting an OBJ File
You can export a 3D model to an OBJ file mainly for use in 3D modeling with other programs as well as 3D printing.
To export an OBJ file
1. Click File menu > Export > OBJ. The Export OBJ dialog box is displayed.
2. Choose a destination for the file then type a file name in the File Name text box.
3. Click Save. The OBJ file is exported to the location you’ve specified. Punch! Home Design Software automatically adds the OBJ extension.
Note Export to the OBJ format includes Textures used in the Punch! drawing
Printing Floor Plans
Home Design Studio prints, using the current printer drivers. You can, however, print using any installed printer. Using the Print dialog, you can specify a printer from those currently installed. You can print your drawing in color or in black and white; it can be printed to scale or you can print it all on one page, whatever you require. Follow these steps to print your 2D drawing. See Mac Help for information on printer settings.
Note: Gridlines print if they are visible when the drawing is printed.
To print to fit page
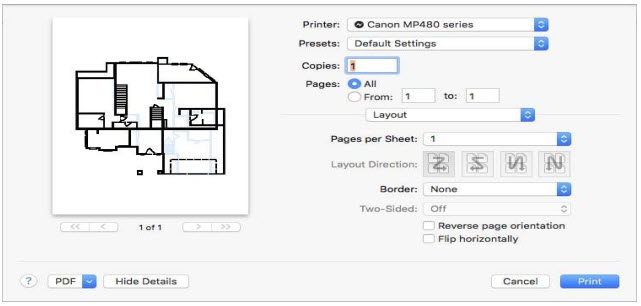
1 Choose File > Print to Fit (or press Command-P). A dialog appears. Click the disclosure triangle to expand the sheet.
2 Choose the printer you want from the Printer pop-up menu.
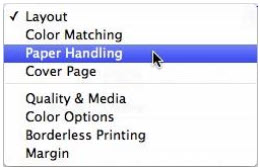
3 From the pop-up, choose Paper Handling
 .
.
4 Select the “Scale to fit paper size” checkbox. The Destination Paper Size pop-up menu becomes active.
5 Choose the paper size from the Destination Paper Size pop-up menu.
6 Click Print.
To print to scale
Before printing to scale, you can adjust your Plan Scale setting on the Design menu. For more information on the scale, see “Setting the Scale”.
1 Choose File > Print to Scale (or press Option-Command-P). A dialog appears.
2 Choose the printer you want from the Printer pop-up menu.
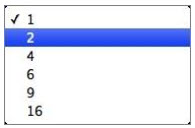
3 By default, the design prints one page per sheet of paper. To adjust the number of pages that are printed on each sheet of paper, choose Layout from the pop-up menu, and then choose the number of sheets you want from the Pages per Sheet pop-up menu.
4 When you choose more than 1 page per sheet, you can choose the layout direction to specify the direction that the pages are printed.

5 When all of the print options are set, click Print.
To set up your page for printing
1 Choose File > Page Setup (or press Shift-Command-P). A dialog appears.
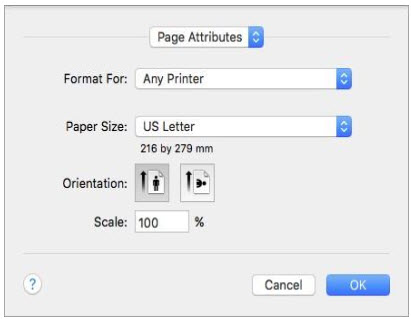
2 Choose the printer or fax machine you want to format from the Format For pop-up menu.
Note: To edit system preferences, choose Printers & Scanners Preferences and use Mac Help to configure system preferences.
3 Choose the Paper Size from the pop-up menu. To enter a custom paper size, choose Manage Custom Sizes. Enter the custom paper size information, in the corresponding fields, and click OK.
4 Select the Orientation you want.
5 Enter the scale to which you want your page to print in the Scale field.
6 Click OK to apply your page setup. The settings are applied to the printer(s) you chose.
Printing a 3D View Rendering
Home Design Studio streamlines the process used to print the 3D View images. With just a couple of clicks, you can print beautiful, full-color renderings of your design.
To print a 3D View rendering
1 Open a 3D View window or Elevation Editor view and position the view you want to print.
2 Choose File > Print 3D View (or press Option-Shift-Command-P).
3 Choose the Render Quality you want from the pop-up menu and then click OK. A dialog appears.
4 Choose the printer you want to use and set the print options you want, then click Print.
Working with Floors
Floors are designated levels upon which your structure is built. Your design may use only one floor or up to 20 (depending on your software version). Floors are not necessarily placed one on top of another; floors may also exist at the same elevation but independent of each other.
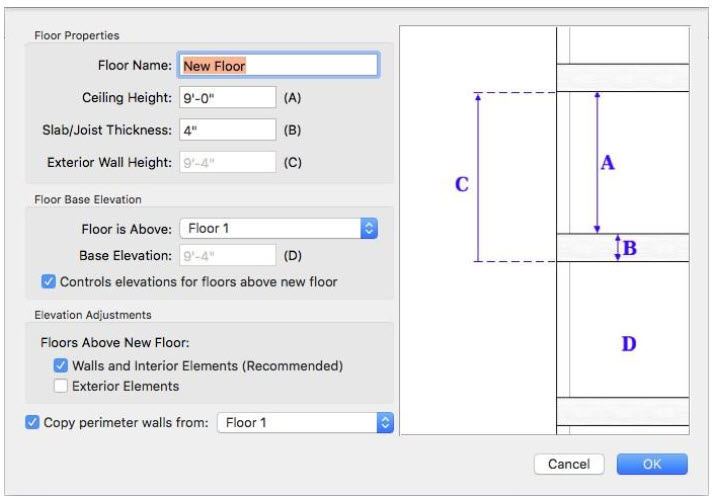
When a floor is positioned above another floor, an association is established so changes to the underlying floor are reflected in the floors above. For example, if Floor 2 is above Floor 1, and the ceiling height of Floor 1 is changed from 9'-0" to 12'-0", the base elevation of Floor 2 is also updated to include the additional three feet. Additionally, walls and interior elements that exist on the current floor and above floors can be updated to reflect changes to the floor properties. As you design, you can edit your floor properties. For information, see “Editing Floor Properties”. You can also add or delete floors as needed. For more information, see “Adding and Deleting Floors”.