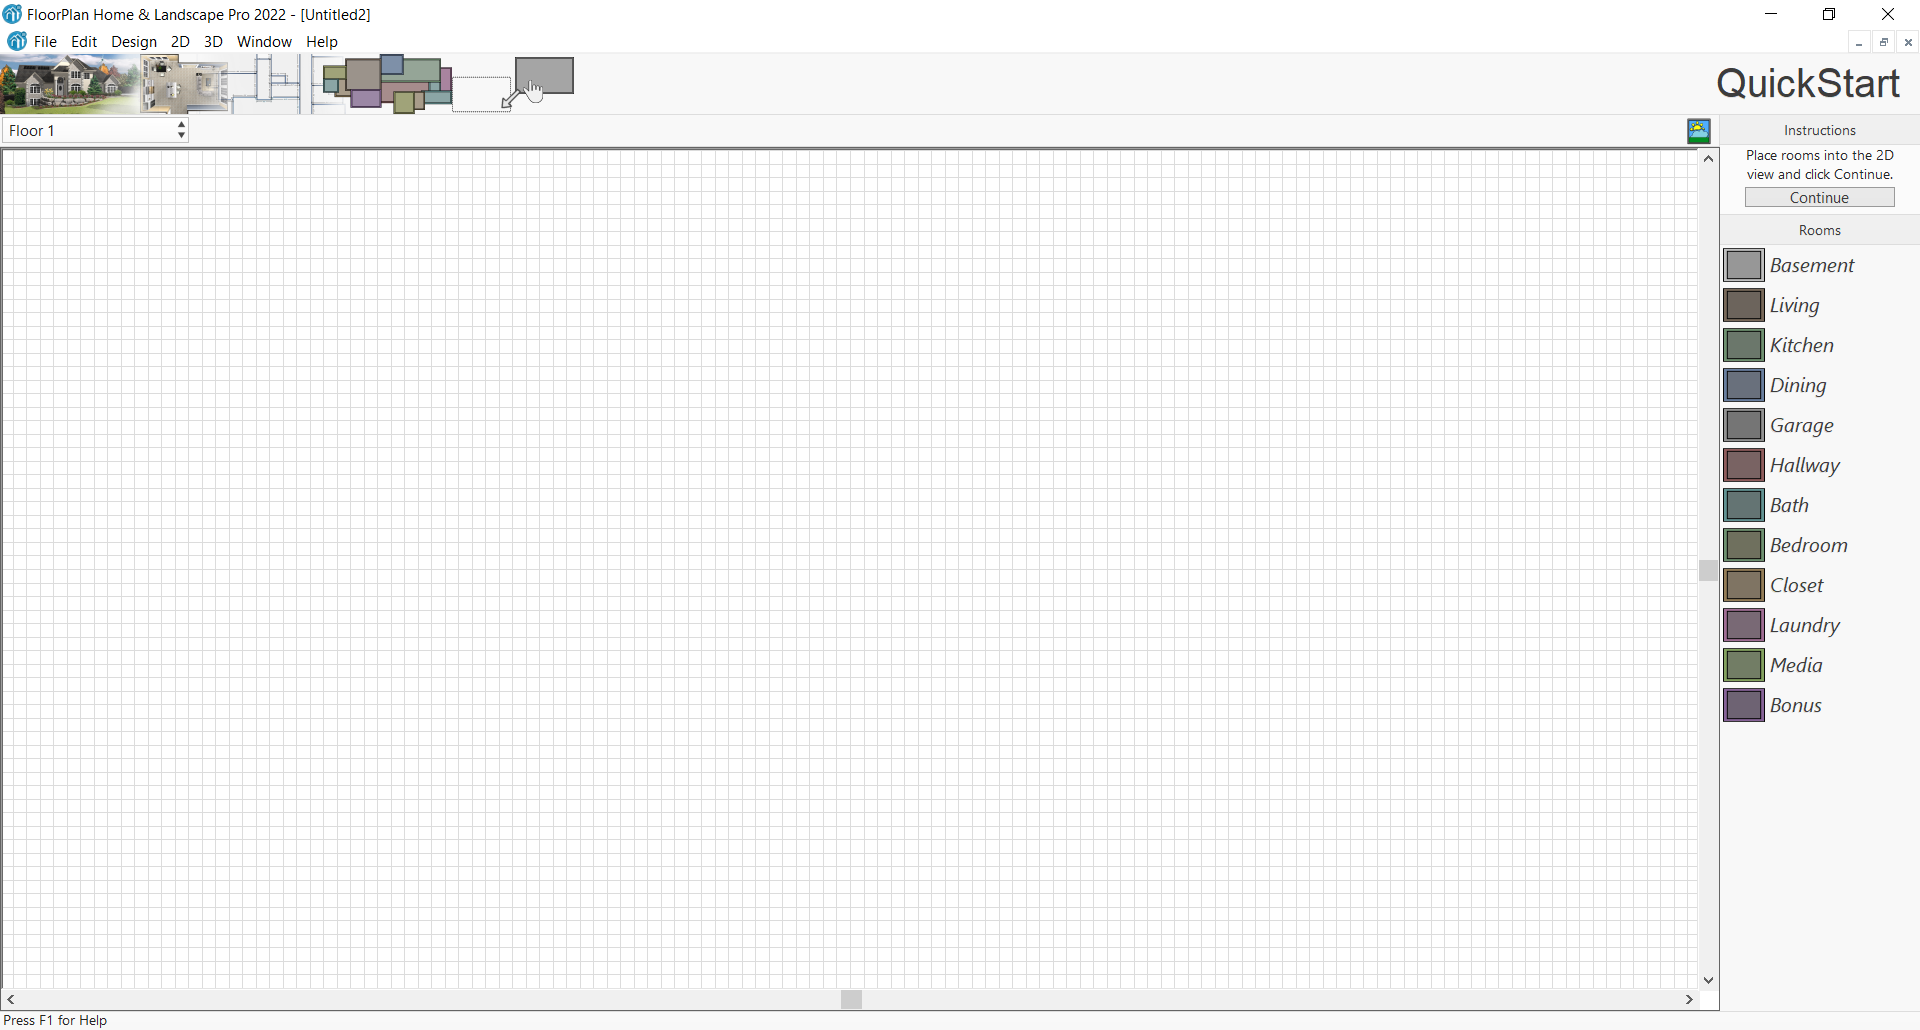
QuickStart
For many people, visualizing their dream home does not start with the outside shape of the building, but with a wish list of individual rooms. Now you can create complex floor plans from the inside out, by laying out your home design room by room. Create entire rooms with one click of the mouse! Build an entire floor plan in just seconds with FloorPlan QuickStart.
Launching QuickStart
By default, QuickStart launches automatically upon starting the application. You change the interface preferences so that the application opens directly to the design window instead of QuickStart, if you prefer.
To control QuickStart display
-
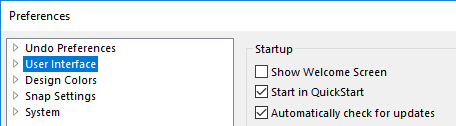
Click Edit menu > Preferences > User Interface.
-
Under Startup, select the Start in QuickStart checkbox to start in QuickStart. To bypass QuickStart and open in the design window, deselect the Start in QuickStart checkbox.
-
Click OK to close the Preferences window.
Show Welcome Screen at Startup
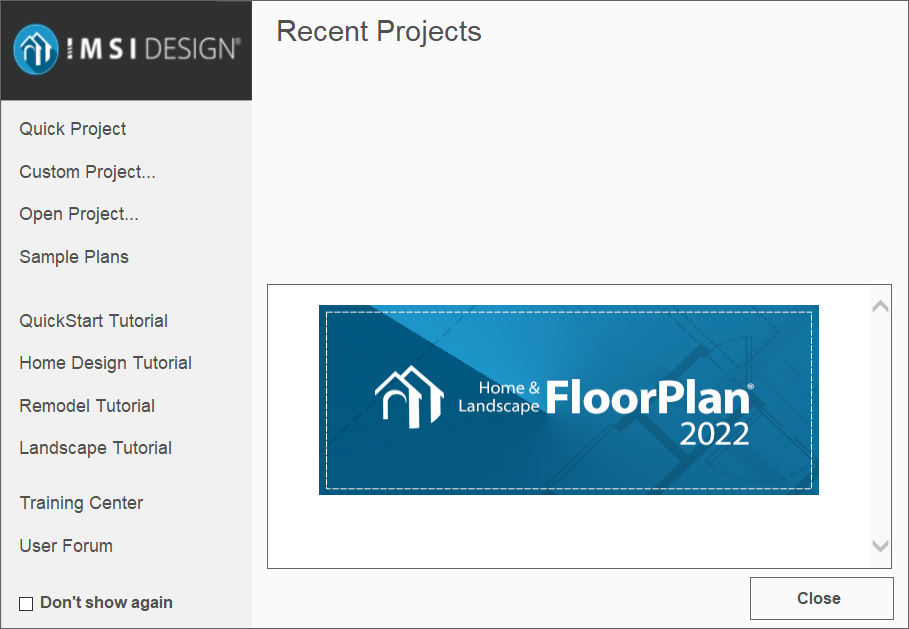
You can toggle the initial QuickStart Help Window on and off, to suit your needs. The Welcome screen offers options for starting a new project or opening an existing project. You can also quickly access recent projects you’ve worked on with one simple click. Additionally, the Welcome screen provides access to training material, sample plans, and special offers for FloorPlan users.
For more information on project settings, see “Project Settings”.
To hide the Welcome screen at Startup
- To hide the Welcome window when you launch FloorPlan Home & Landscape Software, click to select the Don’t show again checkbox box on the Welcome window.
(alternatively) Click Edit menu > Preferences > User Interface and deselect Show Welcome Screen under the Startup section, and then click OK.
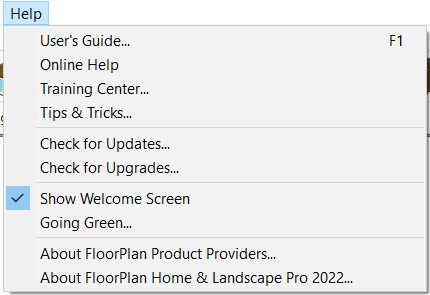
(alternatively) On the Help menu click to uncheck Show Welcome Screen.
To show Welcome screen at Startup
- Click Help menu > Show Welcome Screen. When enabled, a checkmark is visible.
(alternatively) Click Edit menu > Preferences > User Interface and select Show Welcome Screen under the Startup section, and then click OK.
Project Settings
When beginning a project, you can start designing immediately using the default project settings or specify particular settings to be used throughout your design, such as the number of floors or ceiling heights.
If the Welcome screen is configured to display upon startup (which is the default setting), then you have access to the New Project Setup dialog box from there (choose New Project (Custom)). If the Welcome screen is not displayed at startup, you can access the New Project Setup dialog box by clicking File menu > New (or press CTRL+N).
The New Project Setup dialog box includes configured properties as well as a diagram to provide a visual representation of these properties.
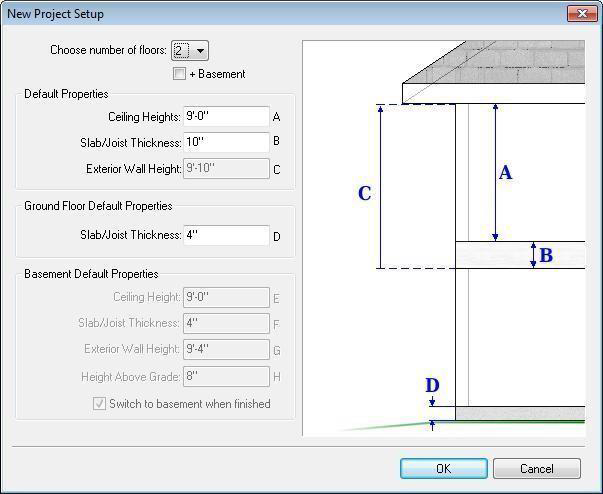
You have the option to specify the bottom floor as a basement. When this option is selected, the Basement Default Properties become available, and the diagram is updated to include a basement level.
To setup a project without a basement
- From the drop-down menu, click to select the total number of floors you want in your project.
- In the Default Properties section, type the ceiling heights and slab/joist thickness in the corresponding text boxes.
- In the Ground Floor Default Properties section, type the slab/joist thickness.
- Click OK.
The exterior wall height is the sum of the ceiling heights and slab/joist thickness, so it is not editable.

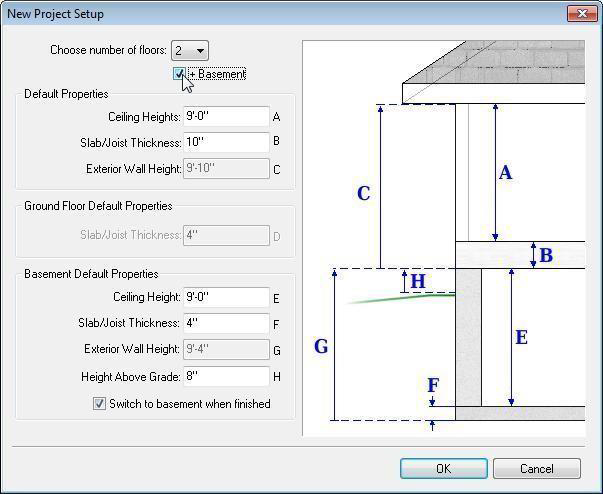
To setup a project with a basement
- From the drop-down menu, click to select the total number of floors you want in your project.
- Select the Basement checkbox. The Basement Default Properties become available.
- In the Default Properties section, type the ceiling heights and slab/joist thickness in the corresponding text boxes.
- In the Basement Default Properties section, type the ceiling height and slab/joist thickness in the corresponding text boxes.
- In the Height Above Grade text field, type a value to specify how much of the basement you want to appear above grade.
- Click OK.
The exterior wall height is the sum of the ceiling heights and slab/joist thickness, so it is not editable.
The exterior wall height is the sum of the ceiling height and joist thickness, so it is not editable.
Note: The Height Above Grade value does not affect the overall wall height, it only specifies how much of the exterior wall height is above grade.
(optional) By default, your project will open to the basement floor. If you want to open to the first floor above the basement, deselect the Switch to basement when finished checkbox.
Adding Rooms
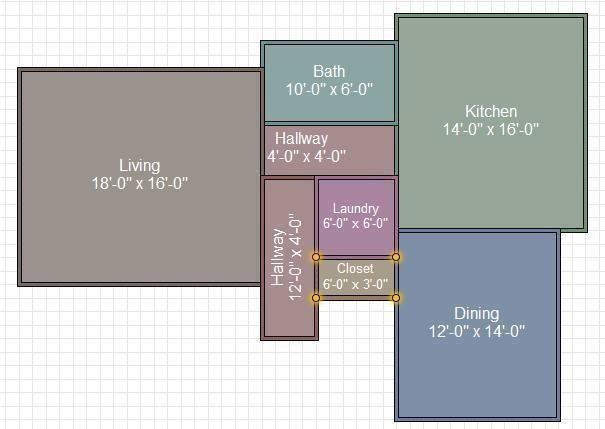
You can create rooms with a few simple clicks of the mouse. FloorPlan allows you to use pre-designed room dimensions, customize these dimensions, or create your room from scratch.
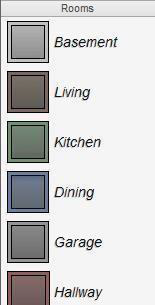
The QuickStart Rooms toolbar features a variety of color-coded room types that can be customized to your wishes.
Simply select your room type, place your room on the workspace, and change your room’s dimensions as needed. When you’re finished placing rooms, simply click the Continue button to update your design!
To control which floor you are working on, see “Work on Floor “
To add pre-configured rooms
- In the Rooms Bar, click the room type that you want to create and then click on the workspace to place the room.
- Click the Continue button to edit your design on the design window.
Continue to place rooms until you’ve created the desired design.
To control the visibility of overlapping rooms
-
Right-click the room you want to place in back.
-
Double-click the room you want to place in front.
To resize rooms
-
Click to select the room you want to resize.
-
Drag a corner point to resize the room.
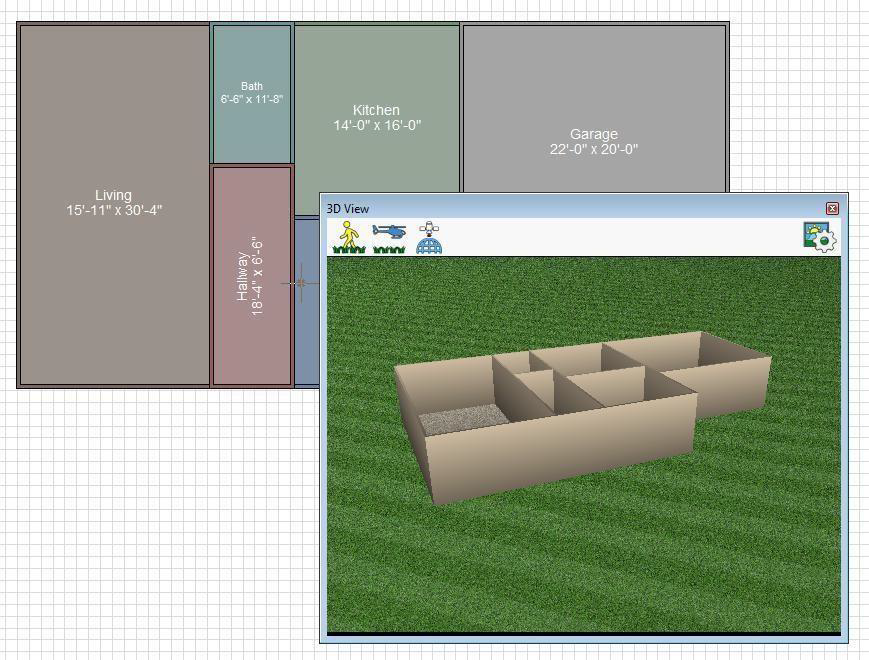
Viewing a QuickStart Design in 3D
As you design in QuickStart, you can see a 3D view of your design before you begin continue with your drawing in the design window.
Note: For more information, see “Moving Around in 3D”
To see a 3D view in QuickStart 
-
Click the 3D Preview button in the top-right corner of the design window. A 3D View is displayed.
-
Use the navigations tools, available in the 3D View toolbar, to navigate around the drawing.
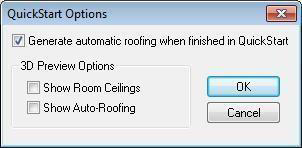
Setting QuickStart Render Options
With the QuickStart rendering options, you can control the auto-roofing behavior to determine whether or not a roof is generated with your design. Additionally, you can show or hide both the roof and room ceilings while viewing a 3D preview.
For information on editing an auto-roof, see “Auto-Roof Properties “
- Generate automatic roofing when finished in QuickStart controls whether or not a roof is automatically generated for your design. When selected, a hip roof is automatically generated when you click the Continue button to open the design in the design window. When deselected, your design is created without a roof.
- Room Ceilings is selected controls the display of ceilings over rooms in your design. When selected, the room ceilings are displayed in the 3D view. When deselected, ceilings are not displayed in the 3D view.
- Show Auto Roofing becomes available when Generate automatic roof... is selected. When selected, the auto- roof is displayed in the 3D view. When deselected, the auto roof is not displayed.
To configure render options 
- Open the 3D view and click the Navigation and Rendering Options button. The QuickStart Options dialog box is displayed.
- Configure the settings you want and then click OK.
Accessing the Sample Plans
Sample plans are a set of pre-designed home plans, not created by an architect. They can be used as-is or can be edited to your liking. Each of the available sample plans include 2D and 3D previews, as well as room dimensions.
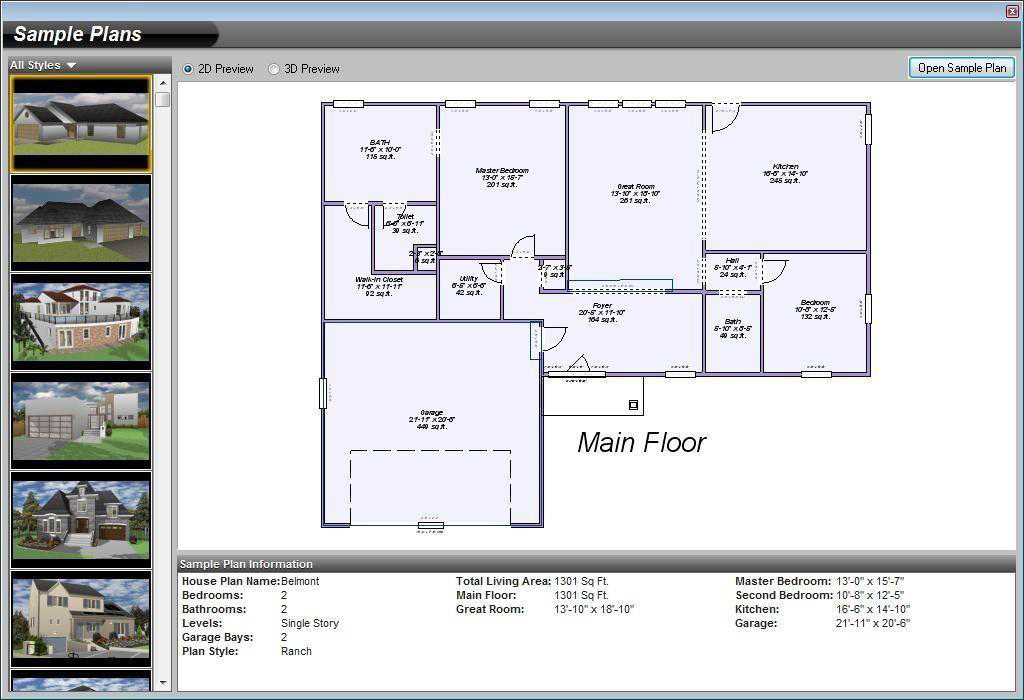
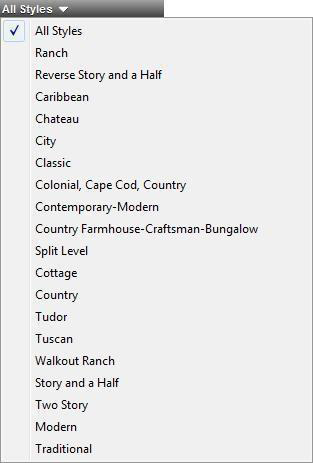
By default, all home styles are displayed. You can narrow the options by choosing the home style you want from the Style drop-down menu.
To open a sample plan
- Click File > Open Sample Plan.
- Click through the style options and choose the one you want. A 2D preview is displayed, as well as the plan’s dimensions.
- When you find the plan you want, click Open Sample Plan. The plan is displayed in the design window.
(optional) Click the 3D Preview radio button to see the home in 3D.
(alternatively) Click Sample Plans on the Welcome window.