Trim Tools
The Trim tool palette contains commands for trimming, extending, re limiting, connecting, and offsetting curves.

Trim
The Trim tool shortens a line to the specified boundary. If you hold down the Option key (or Alt key) while using this tool, it becomes the Re limit tool.
Using the Trim tool
- Select the object that limits the trim.
- Select the Trim tool. If necessary, use Shift--Click to select more boundary objects.
- Click the section of the object to be discarded.
There are no Data Entry Fields entries for the Simple Trim command.
Corner Trim
This tool creates a corner from the two objects you specify. Lines are extended or shortened to create the corner.
Using the Corner Trim tool
- Click the Corner Trim tool.
- Click each object. You can also press and hold the Shift key and click inside the about--to--be-- created corner.
There are no Data Entry Fields entries for the Corner Trim tool.
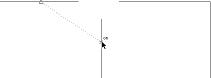
Extend
This tool extends the boundaries of an existing curve a designated distance. There are three methods by which a curve can be extended and three styles to choose from. These settings are available on the Prompt window.
Extension Method
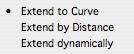
- Extend to Curve - select a boundary to which you want to extend and then select the point you want extended.
- Extend by Distance - enter the distance by which you want an end extended, then select the end you want to extend.
- Extend Dynamically - select the end you want to extend, then drag to the desired length.
Extension Style
There are three extension styles available, depending on the resulting geometry you want
Extending to an existing curve
- From the Method drop--down, choose Extend to Curve.
- (optional) Choose the extension style you want.
- Select the existing curve to which you want to extend.
- Click the end you want to extend.
Extending a specified distance
- From the Method drop--down, choose Extend by Distance.
- (optional) Choose the extension style you want.
Enter the distance you want to extend. Press the Enter key to accept the value.
- Click the end you want to extend.
Extending dynamically
- From the Method drop--down, choose Extend Dynamically.
- (optional) Choose the extension style you want.
Click the end you want to extend.
- Drag to the point where you want and click.
Segment to Curve
This tool divides a line or curve at intersections with other lines or curves.
Using the Segment to Curve tool
- Select the objects that limit the segmentation.
- Select the Segment to Curve tool. If necessary, use Shift--Click to select more boundary objects.
- Click the object to be segmented.
The selected object is segmented at the boundary objects. Even though you cannot see the segmentation on the screen, you can select parts of the segmented line by clicking. If you hold down the Option key while selecting the line to be segmented, the new segment appears in the characteristics of the current pen style.
There are no Data Entry Field entries for the Segment to Curve tool.
Segment at Interval
The Segment at Interval Tool subdivides a curve into a specified number of equal length segments. Using the Segment at Interval tool
- Set the #Segments value in the Data Entry Window.
- Select the object to be divided.

The Data Entry Field sets the number of segments the curve is to be divided.

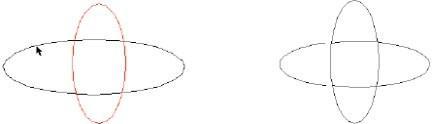
Connect Curve
The Connect Curve tool is used to merge endpoints between two curves. The tool will move the endpoint of the second selected curve to the end of the first selected curve.
Using the Connect Curve tool (Example 1)
- Click the Connect Curve tool.
- Click each object near the ends that are to be connected.
Using the Connect Curve tool (Example 2)
- Click the Connect Curve tool.
- Set the search tolerance in the Data Entry Window.
Box select a collection of curves to merge endpoints.
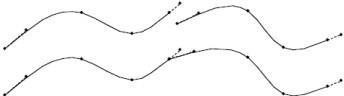
Join Curve
The Join Curve tool is used to smoothly join two curves. Joining of the curves will create a single curvature continuous curve from the original two curves. If the curves are not tangent, the shape at the merge location will not precisely match.
Using the Join Curve tool
- Click the Join Curve tool.
- Set the join tolerance in the Data Entry Window. The smaller the tolerance, the closer the joined curve will be to the originals.
- Click each object near the ends that are to be joined.

The two curves are joined as one continuous G2 curve. If the original curves were not tangent, there may be some deviation from the resulting curve to the original near the join point.
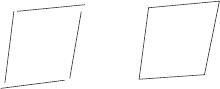
Offset to Value
There are three tools available for placing offset curves. To access the sub-tools, click the Offset Curve tool on the Trim tool palette and drag the sub-toolset from the Prompt window.

Offset to Value
This tool creates a curve that is offset from an existing curve by specifying a distance and direction. Using the Offset to Value tool
- Click the Offset to Value tool.
- Select the curve to offset.
- Click to indicate the offset direction for the curve.

The offset distance can be changed by entering a new value in the Data Entry Window.

Offset by Point
This tool creates a curve that is offset from an existing curve by specifying the point where you want the curve to appear.
Using the Offset by Point tool
- From the Offset Curve tool sub--toolset, click the Offset by Point tool.
- Select the curve to offset.
- Position your cursor where you want the curve to appear and click.

Offset Face Edges
This tool offsets an edge along a face or surface, a specified distance. The resulting offset curve lies precisely on the surface.
Using the Offset Face Edges tool
- From the Offset Curve sub--toolset, click the Offset Face Edges tool.
- Select the surface or solid face to offset edge.
- Click the edge to offset.

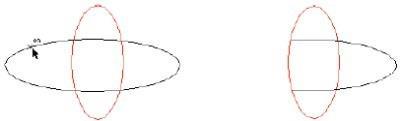
Region Trim
The Region Trim tool supports rapid trimming of closed regions. Click inside or outside to control which side is trimmed. Hold down the Option key (Control key on PC) to create a copy of the trim results. Pressing the Shift key will allow the user to select which curves are to be used in the trimming operation.
Using the Region Trim tool
- Click the Region Trim tool.
- Click inside or outside the region to trim.
The three images below show the original trim region and the impact on clicking outside and inside the region.
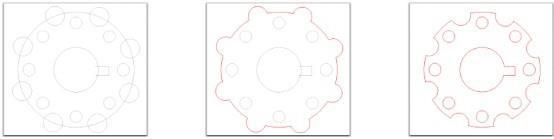
Trim RegionClick OutsideClick Inside
Repair Curves
The Repair Curves tool corrects gaps in curve profiles used for 2D CNC as well as profiles used to sweep, extrude, or lathe curves into a solid. Gaps below the specified tolerance in the data entry window will be merged. Gaps above the specified tolerance are displayed as gaps but ignored.
Using the Repair Curves tool
- Click the Repair Curves tool.
- Select the curves you wish to repair.
- Specify maximum gap tolerance.
- Select Yes to repair the highlighted gaps.
- The number of gaps found and repaired are displayed in the dialog box.

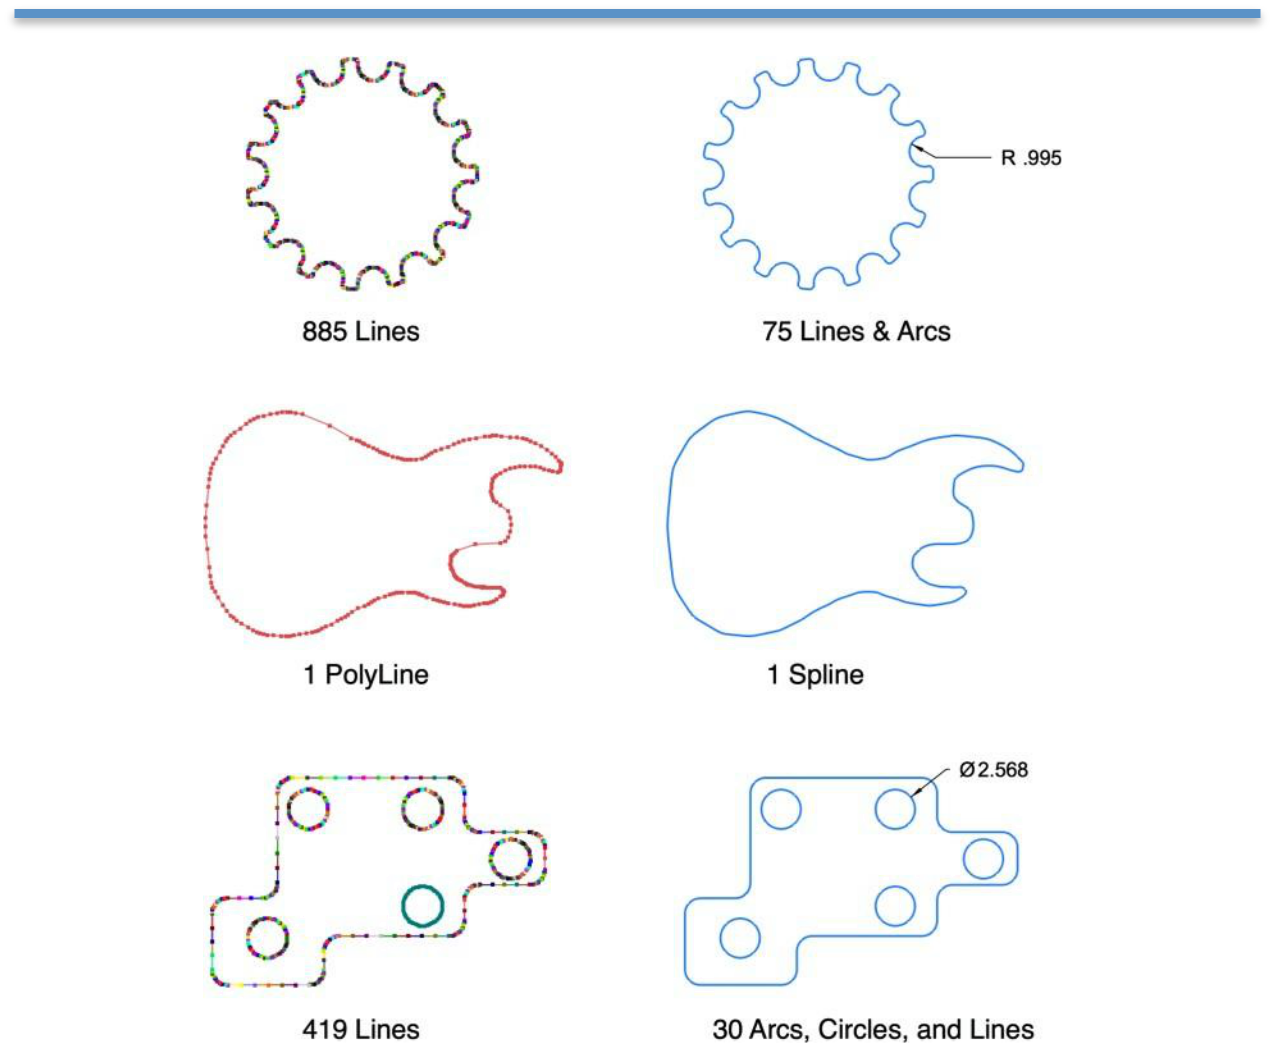
Simplify Curves
Some design tasks prefer higher order curves such as arcs, circles, and/or ellipses over lines. For example, sharing data with a plasma or water jet cutting CNC system or extruding a profile into a solid and later adding edge treatments. v12 introduces the Simplify Curve tool to assist in this task.

—Arcs
—Circles
—Ellipses
—Splines