Trim Designer
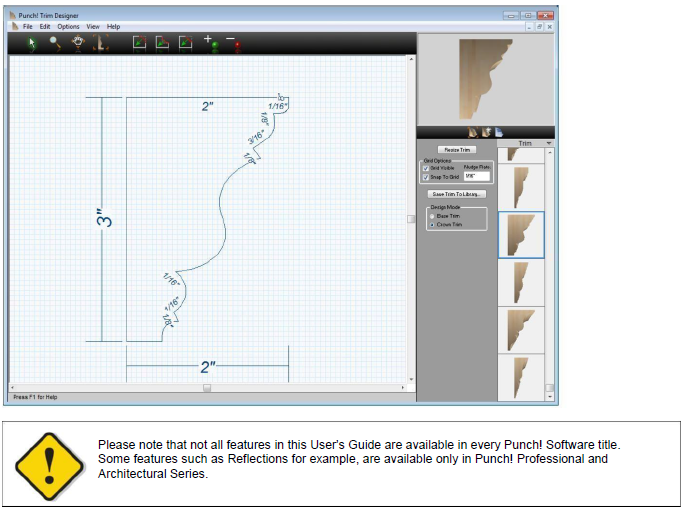
In much the same way that ornate trim pieces are milled from basic lumber, Punch! Trim Designer lets you fashion trims by editing a basic shape. Modify one of the trims in Punch! Home & Landscape Design Software’s libraries, or create one of your own, using Trim Designer’s powerful image editing and management tools.
Launching Trim Designer
-
Click Design menu > Launch PowerTool. The PowerTool Launcher is displayed.
-
Click to select Trim Designer and click the Launch button. The Trim Designer is launched.
Managing Trim Designs
Trim Designer not only allows you to save new trims for use in your Punch! drawings, it also has easy-to-use tools for organizing and managing trim libraries.
To open a new trim design
-
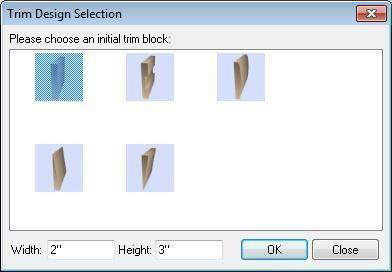
Click File menu > New Trim. The Trim Design Selection dialog bog is displayed.
-
Click to select one of the basic trim templates. (optional) Type new values in the Width and Height text boxes.
- Click OK.
To import an existing trim design
-
On the Properties Bar, click the down arrow next to Trims then select a Trim category from one of the libraries. The Preview Bar changes to display trims in this library.
-
Double-click a trim design on the Preview Bar, to place it in the design window.
To save a new trim design
-
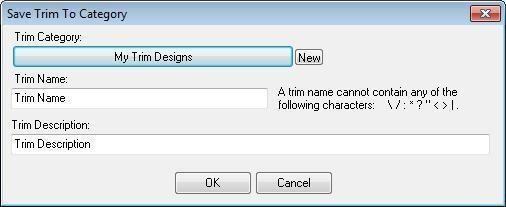
While nothing is selected in your design, click the Save Trim To Library button on the Properties Bar. The Save Trim to Category dialog box is displayed. (alternatively) Click File menu > Save Trim to Library.
-
Trim Category specifies the category where the trim is saved.
Click New to create a new trim category. Select a folder in which to create the new category, then type a name for the new category and click OK. For more information on using content libraries, see “Organizing Library Content”
3- Trim Name is the unique name for the trim. New trim names can contain up to 44 characters.
4- Trim Description is the description of the trim. New trim descriptions can contain up to 78 characters.
5- Click OK to save the trim.
To export trim to 3D Custom Workshop
-
Click File menu > Export to Custom Workshop. The Custom Workshop Export dialog box is displayed.
-
Type a name in the File name text box.
-
Specify the folder where you want the trim saved and then click Save.
Trim Properties
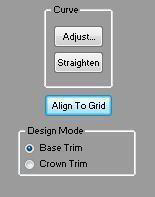
When a segment is selected the trim properties are displayed on the Properties Bar. You can control curvature, alignment, and switch between base and crown trim designs.
- Curve options control curvature. For more information, see “Changing Curve Tension”.
- Align To Grid button aligns the selected point to the grid.
- Design Mode options allow you to specify the trim as either Base Trim or Crown Trim.
Designing Custom Trims
Rather than drawing your custom base and crown trims, Trim Designer lets you create custom trims for your home plan by reshaping a rectangular base shape—in much the same way that trims are milled from boards. You can also modify existing trims, from the Trim Library. Using standard editing tools to change the location, shape, or angle of individual segments of the trim face, you can add graceful curves or carve precision angles into the face of your custom trims.
To nudge a trim segment 
-
Click the Selection Tool and then click to select the element.
-
Use the arrow keys on your keyboard, to nudge the selection.
(alternatively) Click Edit menu > Nudge and then click the direction (up, down, left, right).
Note: For more information on adjusting the Nudge Rate, see “Controlling Drawing Settings”.
To resize trim segments
-
Click the Selection Tool and then click to select a trim segment.
-
Click a trim segment to select it.
-
Press the mouse button, drag the segment to a new location, then release the mouse button.
To resize the entire trim object
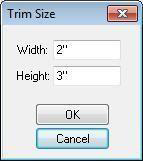
-
While nothing is selected in your design, click the Resize Trim button on the Properties Bar. The Trim Size dialog box is displayed.
-
Type new values in the Width and Height text boxes and click OK. To reshape corners
-
Use the fillet and chamfer tools to reshape corner points.
 ■ Fillet Corner Tool (For more information, see “Editing Detail Shapes”)
 ■ Inverted Fillet Corner Tool (For more information, see “Editing Detail Shapes”)
 ■ Chamfer Corner Tool (For more information, see “Editing Detail Shapes”)
To add or remove points
- Use the Add and Remove points tools to reshape segments.
 ■ Add Point Tool (For more information, see “Editing Detail Shapes”)
 ■ Remove Point Tool For more information, see “Editing Detail Shapes”)
Flipping Objects
The Flip function takes the original trim object and reverses it vertically.
To flip an object vertically
Click Edit menu > Flip Vertically.
Controlling Drawing Settings
There are a variety of tools that allow you to control how you draw, select, or modify trim segments in Trim Designer.
To adjust the nudge rate
On the Properties Bar, type a new value in the Nudge Rate text box, then press ENTER.
To control automatic dimensioning
Click Options menu > Automatic Dimensioning to insert a dimension for any trim segment you draw. Automatic Dimensioning is enabled when a checkmark is displayed next to the menu option.
To reset the view
Click the Reset View button (or press CTRL+E). Your plan is reset to the original,
Viewing your Trim Design in 3D
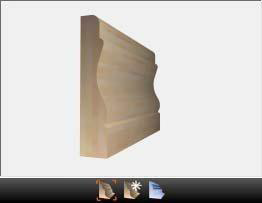
Trim Designer displays your trim design in 3D in the upper right corner of the Trim Designer window. You control the 3D view in the same way you control a 3D View rendering, using Fly-Around mode.
To view your trim in 3D
Drag the Fly-Around pointer around inside the 3D Trim Designer window and watch the view move dynamically.
To zoom in and out in 3D, press and hold the right mouse button to change the viewpoint.
To increase or decrease the helicopter speed
Click View menu > Helicopter Speed, then select a speed setting from the submenu that is displayed.
Note: The faster the viewing speed, the lower the quality of the rendered 3D image.
To reset the 3D view 
Click the Reset 3D View Tool. (alternatively) Click View menu > Reset 3D View.
To view a trim design using ClearView 
Click the Toggle ClearView Tool in the 3D view window. (alternatively) Click View menu > Render ClearView. When a checkmark is visible, ClearView is enabled.
To render a trim design in 3D final quality 
Click the Render Final Quality Tool in the 3D view window.
To set 3D render quality
Click View menu > 3D Final Quality and choose one of the options.
Low results in a fast rendering speed, but lower quality output.
High results in a moderate rendering speed and average quality output.
Ultra High results in a slower rendering speed and a high-quality output.
Excellent results in a very slow rendering speed, but a very high quality, sharp output.
Placing Custom Trims in Your Punch! Drawing
Once you’ve created your own custom trims in the Trim Designer, you can easily apply them back to your Punch! Home & Landscape Design Software project. Simply navigate to the library where you stored the new trim and drag the image to a surface in your 3D View window.
To apply custom trims
-
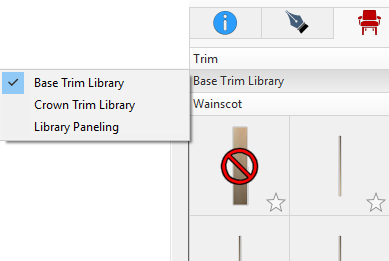
Click the Libraries tab and choose Trim from the Libraries drop-down menu. The Trim Type libraries become available.
-
Click the Trim Type library drop-down menu, then choose the trim library you want. The trim style categories are displayed.
-
Click the Categories drop-down menu and choose the Trim category you want. Its contents appear in the Preview Bar.
-
On the Preview Bar, click the custom trim you want to apply; hold down the mouse button and drag it onto a surface of your home in the 3D View window. The custom trim you selected is applied.