Fireplace Wizard
Adding a fireplace is now #10 on the “Things that Add Value to Your Home” list! With Punch! Fireplace Wizard, it’s a snap to do.
Once you have stepped through the Wizard you are able to customize every feature of your Fireplace. You can add materials and colors to create a truly individual home feature!
Designing a Custom Fireplace
Punch! Fireplace Wizard walks you through the initial design process, then allows total customization of each feature.
Launching Fireplace Wizard
-
Click Design menu > Launch PowerTool. The PowerTool Launcher is displayed.
-
Click to select Fireplace Wizard and click the Launch button. The Fireplace Wizard is launched.
To design a full fireplace
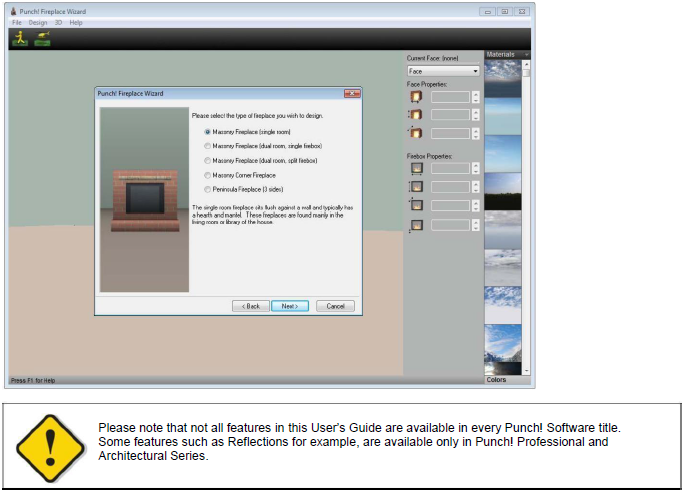
- If the Fireplace Wizard is not open, click File > New. The fireplace types are displayed. Here you can choose the style fireplace you want to start with.
Remember, this style is just a base, you can customize the properties to make the fireplace your own.

- Select the type of fireplace you want to design, then click Next. The fireplace dimensions are displayed.
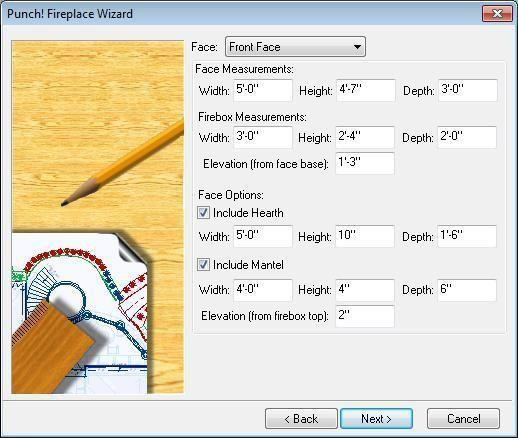
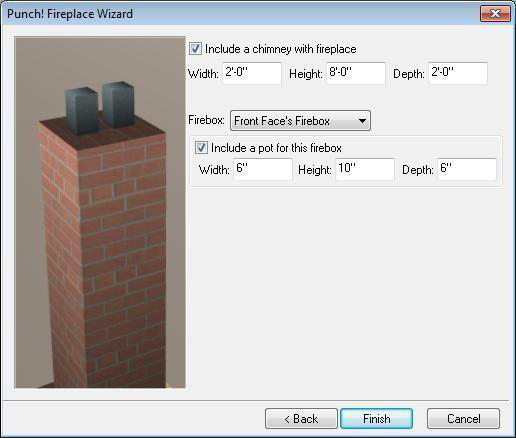
- (optional) Type new dimensions in the appropriate text box(es), then click Next. The chimney options are displayed.
Note: You can always change these dimensions later.
(optional) Check the feature(s) you want and type new dimensions in the appropriate text box(es).
- Click Finish to display your fireplace.
Defining Dimension Increments
You can gain great control over changes in the dimensions of each area of fireplace design by specifying a dimension increment. This increment is the measurement amount used when you click the arrows to alter each dimension.
To change the dimension increment
- Click Design menu > Set Dimensions Increment. The Increment Value dialog box is displayed.
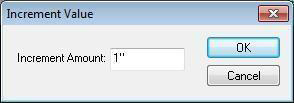
- Type the dimension in the text box, then click OK.
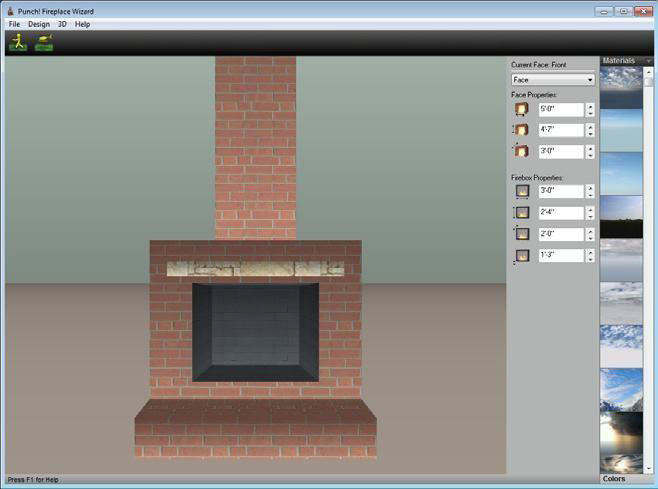
Customizing the Fireplace Properties
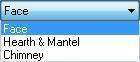
A fireplace is made up of three components: face, hearth & mantle, and chimney. Each of these components’ properties are individually customizable.
As you work, you can quickly move between the fireplace components to display and edit their properties. Simply choose the fireplace component you want from the drop- down menu.
Note: The Hearth & Mantel and Chimney can be removed.
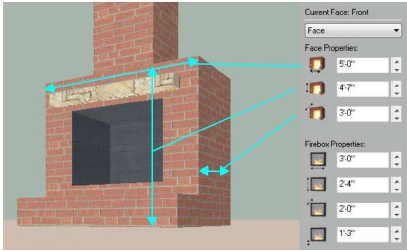
Customizing the Face Dimensions
The Face includes the actual height, width, and depth of the actual face as well as the firebox. These two components make up the face. The Face properties allow you to control the dimensions of these components. As you make changes, the preview window displays them.
Note: All faces may not be available at all times. Some fireplaces may have three faces, while others may have only one face.
To change the face dimensions
-
Choose Face from the Components drop-down menu.
-
If your fireplace includes more than one face, click Design menu > Face and click the face you want to edit from the submenu menu.
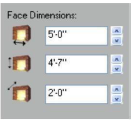
3. Under Face Dimensions, type the dimensions you want in the Width, Height and Depth text boxes, or click the arrows. Each click increases (or decreases) the dimnesion based on the increment you've set. As you change the dimensions, the fireplace will be updated in the preview window.
To change the firebox dimensions
- Click Design menu > Face and click the face you want from the submenu menu.
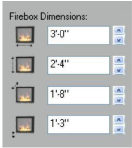
- Under Firebox Dimensions, type the dimensions you want in the Width, Height, Depth, and Elevation text boxes, or click the arrows. Each click increases (or decreases) the dimension based on the increment you’ve set.
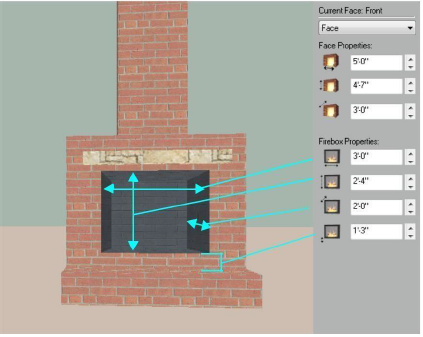
As you change the dimensions, the fireplace will be updated in the preview window.
Customizing Hearth & Mantel Dimensions
The Hearth & Mantel properties affect the appearance of these components, the dimensions as well as their overall inclusion on your fireplace. As you make changes, the preview window displays them.
To include a hearth
-
Choose Hearth & Mantel from the Components drop-down menu.
-
Select the Include Hearth checkbox to display the hearth and enable its properties.
(alternatively) Click Design menu > Face Components > Include Hearth. A checkmark is displayed when the hearth is included.
To change the hearth dimensions
- From the Component drop-down menu, click Hearth & Mantel. The Hearth Properties and Mantel Properties are displayed.
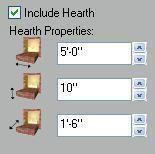
- Under Hearth Properties, type the dimensions you want in the Width, Height, and Depth text boxes, or click the arrows. Each click increases (or decreases) the dimension based on the increment you’ve set.
As you change the dimensions, the fireplace will be updated in the preview window.
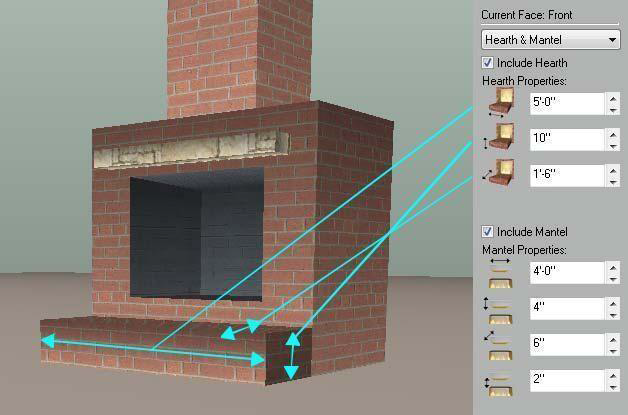
To include a mantel
-
Choose Hearth & Mantel from the Components drop-down menu.
-
Select the Include Mantel checkbox to display the mantel and enable its properties.
(alternatively) Click Design menu > Face Components > Include Mantel. A checkmark is displayed when the mantel is included.
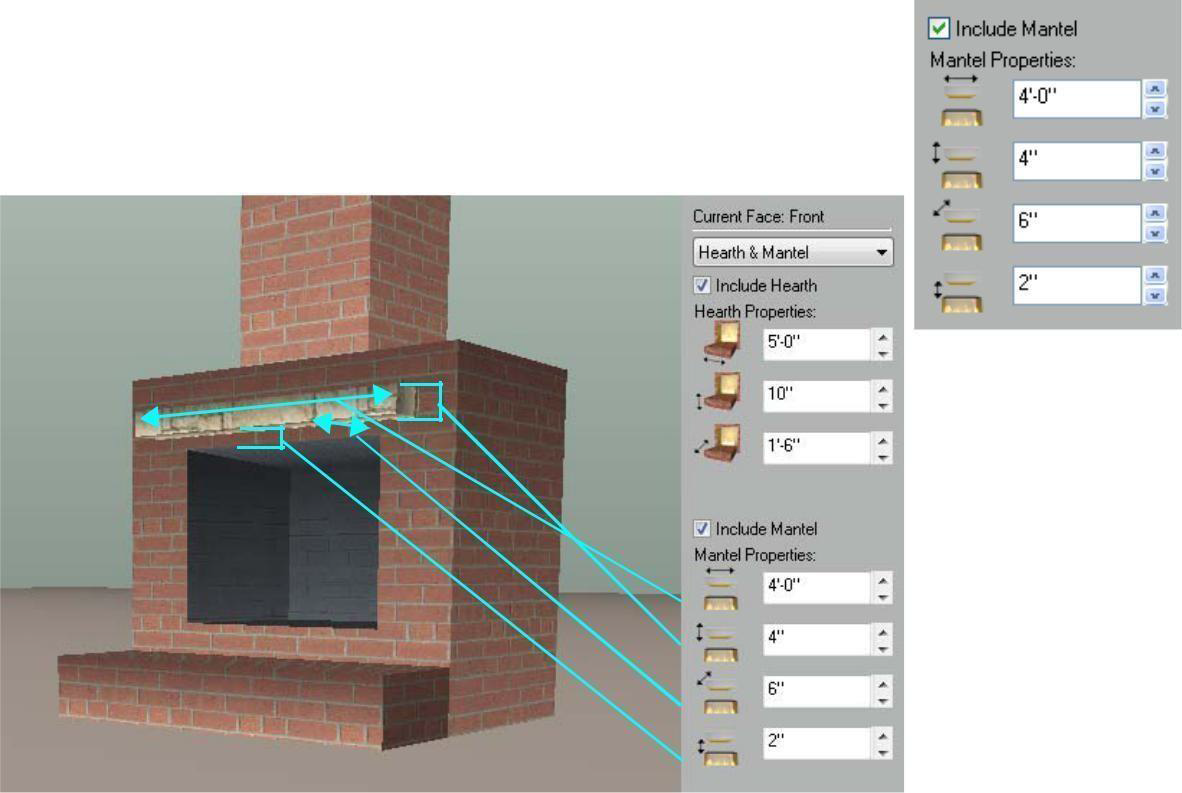
To change the mantel dimensions
-
From the Component drop-down menu, click Hearth & Mantel. The Hearth Properties and Mantel Properties are displayed.
-
Under Mantel Properties, type the dimensions you want in the Width, Height, Depth, and Elevation text boxes, or click the arrows. Each click increases (or decreases) the dimension based on the increment you’ve set.
As you change the dimensions, the fireplace will be updated in the preview window.
Customizing the Chimney Dimensions
The Chimney properties in Punch! Fireplace Wizard allow you to update whether or not you want a chimney and let you specify its dimensions. As you make changes, the preview window displays them.
To include a chimney
-
Choose Chimney from the Components drop-down menu.
-
Select the Include Chimney checkbox to display the chimney and enable its properties.
(alternatively) Click Design menu > Chimney Components > Include Body. A checkmark is displayed when the chimney is included.
To change the chimney dimensions
-
From the Component drop-down menu, click Chimney. The Chimney Properties are displayed.
-
Under Chimney Properties, type the dimensions you want in the Width, Height, and Depth text boxes, or click the arrows. Each click increases (or decreases) the dimension based on the increment you’ve set.
As you change the dimensions, the fireplace will be updated in the preview window.
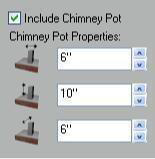
To include a chimney pot
-
Choose Chimney from the Components drop-down menu.
-
Select the Include Chimney Pot checkbox to display the chimney pot and enable its properties.
(alternatively) Click Design menu > Chimney Components > Include Pot. A checkmark is displayed when the chimney pot is included.
To change the chimney pot dimensions
-
From the Component drop-down menu, click Chimney. The Chimney Pot Properties are displayed.
-
Under Chimney Pot Properties, type the dimensions you want in the Width, Height, and Depth text boxes, or click the arrows. Each click increases (or decreases) the dimension based on the increment you’ve set.
As you change the dimensions, the fireplace will be updated in the preview window.
Moving around in Fireplace Wizard
Fireplace Wizard provides the same two interactive 3D viewing options available in the 3D view, the Animated Walk- Through and Fly-Around tools. Using these tools, you can vary the viewing level, by adjusting the angle, to provide the best viewing capabilities available.
For more information, see “Moving Around in 3D”.
Applying Material or Color to Fireplaces
You can customize your fireplace’s appearance by applying different materials or colors. Just as in Punch! Home Design Software, customizing your fireplace is a simple drag-and-drop procedure.
For more information on using the available libraries, see “Organizing Library Content”,
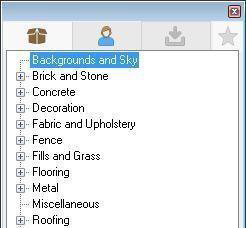
At the top of the Preview Bar, click the down arrow next to “Materials”, to display the Materials libraries menu, then click to select the material library you want. The library’s content is displayed.
-
Scroll to view the available materials.
-
Click the material you want to apply; hold down the mouse button and drag the material onto the fireplace in the Fireplace Wizard window. The material you selected is applied.
To apply color from a customizable palette
-
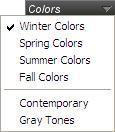
In the Fireplace Wizard window, click the Colors tab. By default, the Winter Colors library is displayed.
-
At the top of the Preview Bar, click the arrow next to “Colors”, to display the Colors style menu, then click to check Spring or whichever category you prefer. The color palette is displayed on the Preview Bar.
-
Scroll to view the available spring colors.
-
Click the color you want to apply; hold down the mouse button and drag the color onto a side of your fireplace in the Fireplace Wizard window. The color you selected is applied.
To apply a series of the same color or material
-
Find the color or material you want to apply to multiple surfaces.
-
Right-click the color or material you want to apply.
-
Right-click each component where you want the color or material applied. For example, right- click the mantel or chimney.
Click the left mouse button to end. The color or material you selected is applied
Adding Lighting and Shadows
With Fireplace Wizard you can customize how lighting and shadows are rendered. Lighting settings are controlled in the 3D Lighting dialog box.

To adjust the lighting intensity
-
Click 3D menu > 3D Lighting. The 3D Lighting dialog box is displayed.
-
Click the direction from which you want the light to originate, in the Direction section of the 3D Lighting dialog box.
-
Increase or decrease the light intensity by clicking and dragging the Intensity slider.
-
Increase or decrease the overall brightness by clicking and dragging the Brightness slider.
-
Click OK.
Default Views
There are pre-defined views, to which you can default in Fireplace Wizard: Active Face View, Chimney Pot View, and 3D View.
Face View and Chimney Pot View set your view close to either the face or the chimney pot, if available.
Note: You must be in Animated Walk-Around mode to default to these views.
The 3D View, sets your view back away from the chimney with the entire design in full view.
To reset the active face view
-
Click Design menu > Reset Active Face View. To reset the chimney pot view.
-
Click the Design menu > Reset Chimney Pot View. To reset the 3D view
-
Click the 3D menu > Reset 3D View.
Saving a Fireplace
When you open a file, Fireplace Wizard copies the file to your computer’s memory. As you work, you modify the copy stored in memory. Any system failure or loss of power destroys that copy. To save your work permanently, you must save it to a file on a disk. A good rule of thumb is to save every 15 minutes, or after you’ve completed any work you wouldn’t want to redo.
When you click the Save As command, Fireplace Wizard saves the active drawing, using the name and location you specify. You can create more than one version of a drawing or save copies on another disk for safekeeping. You can save each version under a different name or you can save them under the same name, in different folders or on different disks.
Note: When you save a custom fireplace, the Fireplace Wizard automatically adds the PFW extension.
Exporting to 3D Custom Workshop
By exporting a Fireplace Wizard design to 3D Custom Workshop, the smallest details can be added or altered. For more information, see “3D Custom Workshop”.
To export a fireplace to 3D Custom Workshop
-
Click File menu > Export to Custom Workshop. The Save As dialog box is displayed.
-
In the File Name text box, type a name. Fireplace Wizard automatically adds the POB extension. Click OK.
Note: You may then open the file in 3D Custom Workshop.