Render Library
(Available in TurboCAD Pro)
The Render Library window is used to apply materials to objects, and to select the scene’s background and foreground properties. The Render Library window is accessed through the Window: Render Library menu option. The window displays preview images that indicate the render properties of a particular item. The library type and category drop-down controls the items displayed in the window.
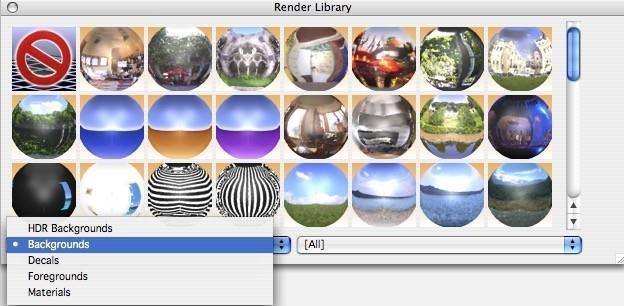
The Library Type drop-down list controls which library is displayed on the palette. Depending on the layout, this is the left-most or top-most drop-down. The library types supported include HDR Backgrounds, Backgrounds, Foregrounds, and Materials.
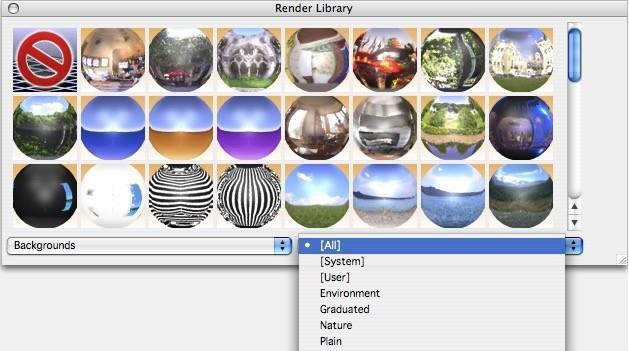
Each of the material and color libraries is divided into categories, which appear on the pop-up menu on the right. Choosing a category controls what appears on the Preview Bar. In addition to viewing categories, you can view based on where the material or color came from. [All] displays all materials and colors. [System] displays materials and colors that are included with TurboCAD Pro. [User] displays colors and materials imported or created by the user.
One more general note regarding the Render Library window. By clicking in the lower right corner, you can resize the window. Resizing the window, a provides a means to customize the size for your particular user environment.
Accessing the Render Library
On the Window menu, choose Render Library. The Render Library window is displayed.
Note: You can reshape and resize the Render Library, as well as move it around the workspace, as youdesign.
There are three methods for applying materials.
Apply Normal
The Apply Normal option applies materials to a single face.
Applying colors or materials to an individual face
- Select Apply Normal, at the top of the Render Library.
- From the Library Type drop--down, choose the library you want. All of the library’s contents appear on the Preview Bar. Notice, as you move your pointer over each thumbnail, its name appears at the top of the Render Library.
- (optional) From the Categories drop--down, choose a category to specify what appears on the Preview Bar.
- Drag a selection onto a surface.
Apply Body
The Apply Body option applies materials to an entire object.
Applying colors or materials to an entire object
- Select Apply body, at the top of the Render Library.
- From the Library Type drop--down, choose the library you want. All of the library’s contents appear on the Preview Bar. Notice, as you move your pointer over each thumbnail, its name appears at the top of the Render Library.
- (optional) From the Categories drop--down, choose a category to specify what appears on the Preview Bar.
- Drag a selection onto an object.
Apply Similar
The Apply Similar option applies materials to objects with the same color or material as the object to which you are applying.
Applying colors or materials to all similar surfaces
- Select Apply Similar, at the top of the Render Library.
- From the Library drop--down, choose the library you want. All of the library’s contents appear on the Preview Bar. Notice, as you move your pointer over each thumbnail, its name appears at the top of the Render Library.
- (optional) From the Categories drop--down, choose a category to specify what appears on thePreview Bar.
- Drag a selection onto an object.
Materials Library
The materials library is a collection of predefined material property settings that can be applied to render able objects within a model. A material defines the surface color, transparency, reflectivity, and displacement properties of an object. A wide variety of visual appearances can be produced with the proper combination of these attributes.
Each material has a potentially large set of attributes that is determined by the internal material definition. These attributes have been mapped to a smaller, basic set of common attributes. The common attributes are edited using the Materials page in the Inspector. A Material tab will be displayed in the Inspector when the object is selected. The simultaneous editing of common material attributes for multiple selected objects is supported in the Material edit page. The ability to edit the full set of material attributes is supported through the advanced button located in the lower right corner of the Inspector.
Note: All objects that do not have a material, will have a default material applied to them the first time thescene is rendered. The DefaultCSMFile entry in the [Render Options] section of the Render.ini file controls the default material. If the DefaultCSMFile entry is not found, the material specified by the MiscPlain.csm material file is used.
Applying a material
- From the Library Type drop--down, choose Materials. Materials are displayed on the Preview Bar.
- (optional) From the Categories drop--down, choose a category to specify what appears on the Preview Bar.
- Drag the material onto the surface where you want it to appear.
Applying materials for multiple objects
- Press and hold the Shift key, then select the objects.
- Position the cursor over a preview image and Ctrl--click.
- From the shortcut menu, choose Apply Material to Select Object(s). The material is applied to the selections.
Transparent Textures
The Render Library includes textures with transparent settings. Textures shown with a black background indicate a transparent texture.
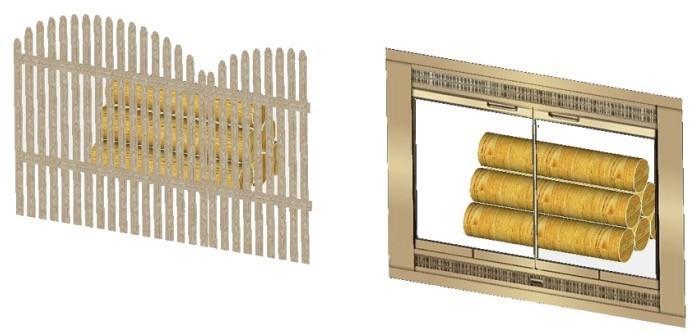
Transparent Materials
Texture Folder Locations
Textures are loaded into the Render Library with the program’s initial launch. These textures are loaded from two directories: Textures and Custom Textures.
Mac Location
Textures /Content/Resources/Photo Render/Textures
Custom Textures
TurboCAD Deluxe: Users///Library/Application Support/com.encore.TurboCAD/Textures
TurboCAD Pro: Users///Library/Application Support/com.encore.TurboCAD/PhotoRender/Materials
PC Location
Textures Install folder
Custom Textures Install Folder
You can add user-defined textures in BMP or JPEG format to these folders. Textures must be divisible by 8 for OpenGL.
Foreground Library
Applying a foreground
- Position the cursor over a preview image.
- Press and hold down the left mouse button then drag the foreground over to the model.
- Release the mouse button to place.
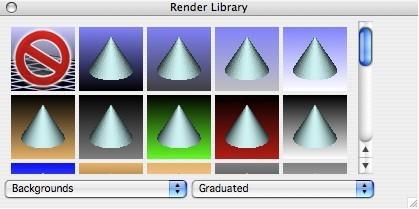
Backgrounds Library
The Backgrounds library is a collection of predefined background effects that can be applied to a model. Backgrounds control the appearance of those regions of a scene that do not contain objects. Common background effects include 2 color gradients, solid colors, and backdrop images. See the section on Render: Background Edit for more detail on the available background shader types.
Background Library
Applying a background
- Position the cursor over a preview image.
- Press and hold down the left mouse button, then drag the background over to the model.
- Release the mouse button to place.