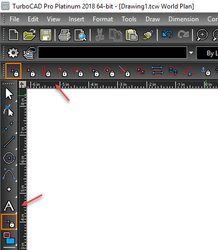
Toolbars are groups of related icons. They can be located on top and below the screen, and to either side of the screen.
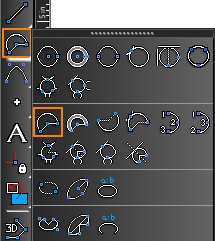
 By default, the Standard toolbar appears at the top of the screen, and the Property toolbar appears just below it. Drawing tools appear along the left side. Icons that have a small yellow or black triangle in the corner are fly-outs. If you click one and hold the mouse button...

... the entire toolbar will "fly out," and you can select the desired icon. The color of the triangle is dependant upon UI settings.

You can also create tabbed toolbars and popup toolbars that appear when you open the local menu. You can modify a toolbar's icons and create your own toolbars. In addition to the default toolbars you see when you first start TurboCAD, there are numerous other toolbars you can display. There are two ways to access additional toolbars: Open the Toolbars and Menus page of Program Setup. This opens the Toolbars tab of the Customize window, which contains a list of all available toolbars; check the ones you want to see. Right-click in any toolbar area. The local menu that appears contains the list of all available toolbars; select a toolbar to add or remove from the screen.
Moving, Docking, and Rolling Toolbars
By default, certain toolbars are docked along the sides of the screen, and when you display another toolbar it appears "floating" on the screen. You can dock and undock all toolbars, and the same applies for palettes as well.
You can drag a toolbar by picking it on its top or bottom edge (for vertical toolbars) or either side edge (for horizontal toolbars).
 For palettes, pick and drag it by its title bar.
Moving a toolbar to any edge of the screen will dock it to that edge. Docking to either side creates a vertical toolbar, docking to the top or bottom of the screen creates a horizontal toolbar. You can also move a toolbar onto the drawing area, where it will "float" on the screen.
Tip: You can also undock or dock a toolbar by double-clicking any icon on the toolbar.