Program Options
Program Options
Menu: Options / Options
Keyboard Shortcut: Q
The DesignCAD options enable you to set certain characteristics of the User Interface. The items you set in the Options remain valid for future drawings, until changed.
Cursor Options
Menu: Options / Cursor
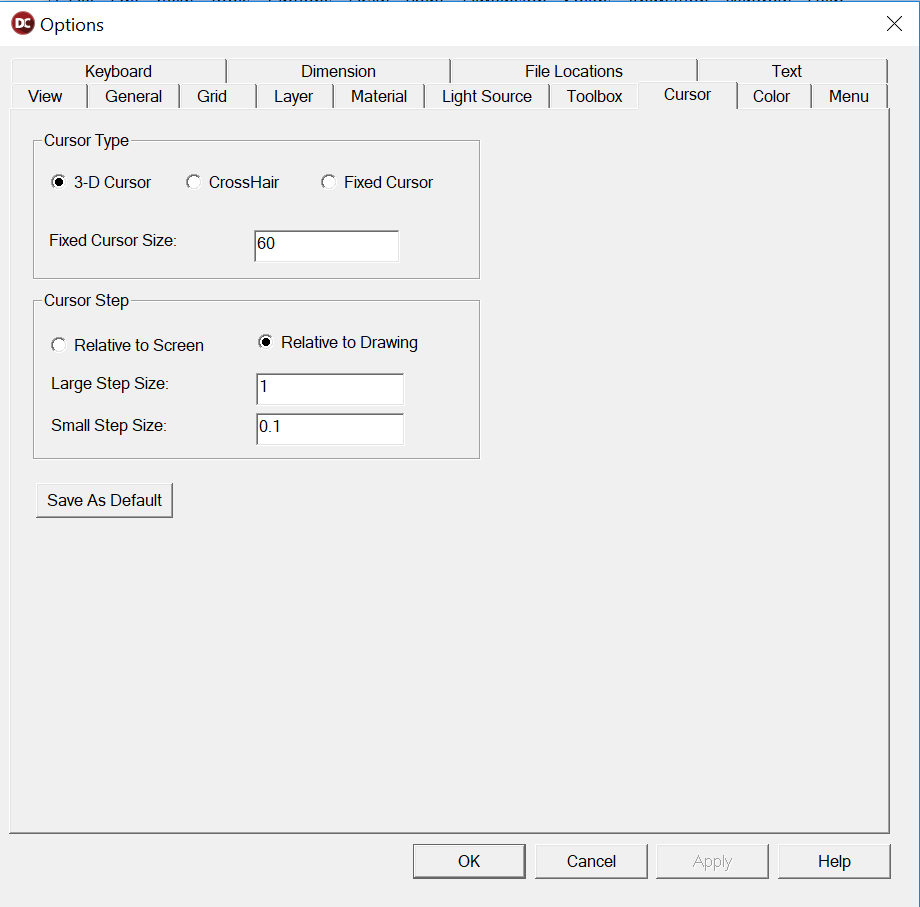
Set the size of the cursor and the small and large step sizes for it.
Cursor Type
- 3D Cursor: Causes the cursor to appear closer or further away according to its loca- tion on the Z axis.
-
Crosshair: Turns the cursor into a pair of cross hairs that extend to the ends of the screen.
-
Fixed Cursor: Causes the cursor to remain one size during the drawing session.
-
Fixed Cursor Size: Sets the size of the cur- sor in Drawing Units.
Cursor Step:
- Relative to Screen: The cursor will always move the same number of pixels across the screen, regardless of the zoom factor.
-
Relative to Drawing: Makes the cursor always move the same number of Drawing Units, regardless of the zoom factor.
-
Large Step Size: Sets the number of Draw- ing Units that the cursor moves when you press the Arrow keys or Ctrl+Home or Ctrl+End.
- Small Step Size: Sets the number of Drawing Units the cursor moves when you press Shift while using the Arrow keys or Ctrl+Home or Ctrl+End.
Save As Default: Saves the changes to the next session.
Color Options
Set the color of the background, cursors, grid, points and various selection and rubber-band entities on the drawing screen.
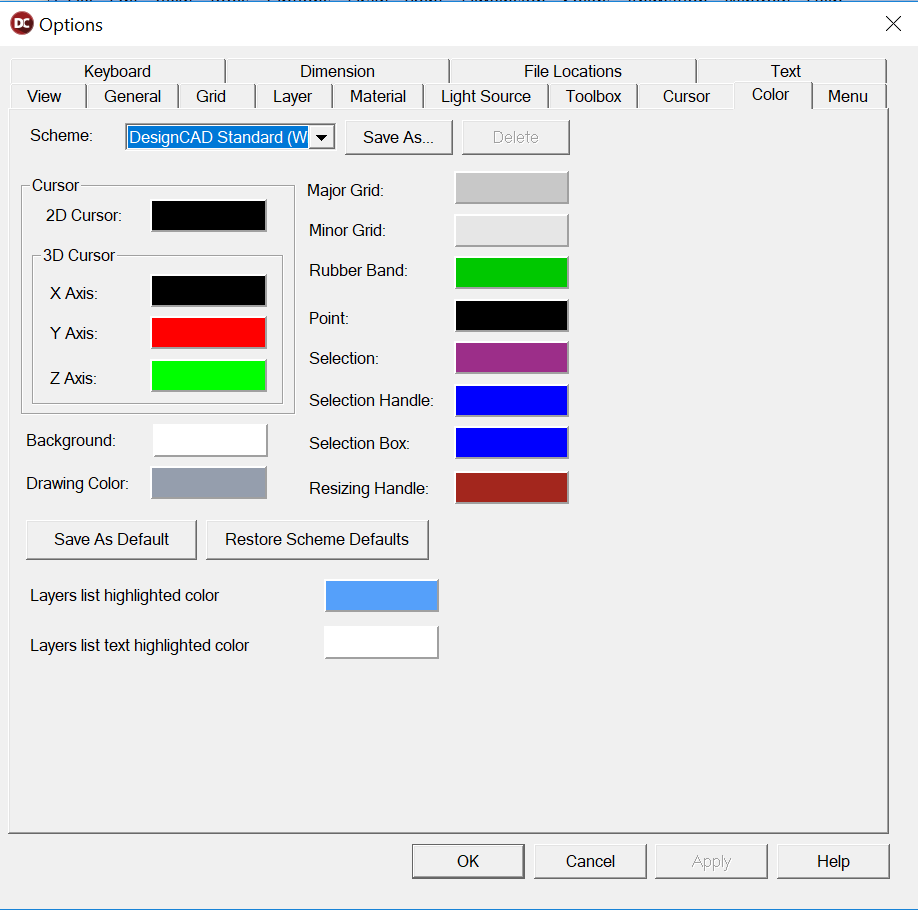
Scheme: Select any of the provided color schemes. If you make changes to colors, you can save a new custom scheme by clicking Save As and assigning a name. Custom schemes can be deleted.
Click the Color box next to any screen entity to select a new color for it.
Cursor: Sets the color of the 2D cursor, and for the three axes of the 3D cursor.
Drawing Color: The default drawing color.
Background: The color used as the background of the DesignCAD drawing windows.
Grid: The color of the drawing grid. This can also be set in the Grid options, see “Grid Options” on page 37.
Rubber Band: The color of rubber-band entities.
Point: The color of point indicators used during drawing commands.
Selection: The color of entities when selected.
Selection Handle: The color of a selection handle when a point or drawing entity is selected.
Selection Box: The color of the selection box that appears when the cursor is used to drag an area around objects to be selected.
Resizing Handle: The color of resizing handles that appear around selections when the Option/Use Resizing Handles enabled.
Restore Scheme Defaults: Return to the original color settings.
Custom Colors
Menu: Options / Custom Color

Used to edit the currently selected drawing color, the Basic Color Table, and the Custom Color Table.
Move the Color Selector to change the color in the Color box. Moving left or right will change the hue of the color and moving up or down will change the saturation of the color. The brightness of the color can be adjusted by moving the arrow beside the brightness bar. A custom color can also be set by entering new values in the Red, Green, and Blue boxes.
Add to Custom Table: Adds the color in the selected cell to the Custom Color Table.
Load Colors From File: Loads a custom color file.
Save Colors to File: Saves the current Basic Color Table and Custom Color Table to a file that can be loaded.
Save as Default: Saves the Basic Color Table and Custom Color Table in new drawings and subsequent DesignCAD drawing sessions.
Reset: Restores the original Basic Color Table and Custom Color Table.
Reset/Copy on Selected Item Only: Only the selected color cells will be reset or copied when a function is performed. When the selected color is the one you want to assign as the current drawing color, click OK or press Enter. That color appears in the Main Toolbox as the current color, and new objects will be drawn in that color.
- Use the Lock icon to make either the Basic Color Table or the Custom Color table edit- able.
- To move colors in the Basic Color Table to the Custom Color table, make sure that the Basic Color Table is locked, the Custom Color Table is unlocked, and click the Swap button .
- To move colors in the Custom Color Table to the Basic Color table, make sure that the Basic Color Table is unlocked, the Custom Color Table is locked, and click the Swap button .
- To move colors in the Basic Color Table to the Custom Color table and colors in the Custom Color Table to the Basic Color Table, make sure that both tables are unlocked and click the Swap button .
NOTE: Any time the Basic Color Table is changed, the corresponding drawers in the Color Toolbox will also change.
NOTE: Colors of objects can be changed in the Info Box.