Gradient Hatching
A gradient hatch is a solid fill that transitions from one color to the next.
Example:
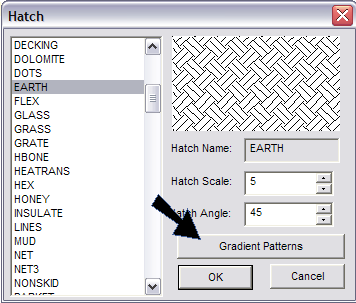
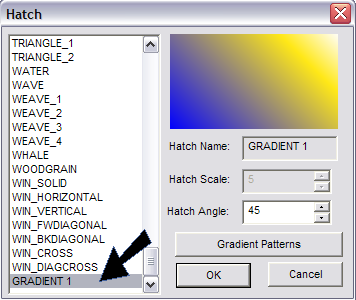
With hatch pattern selected (and not image), click the hatch thumbnail to open the Hatch window.
Click Gradient Patterns.
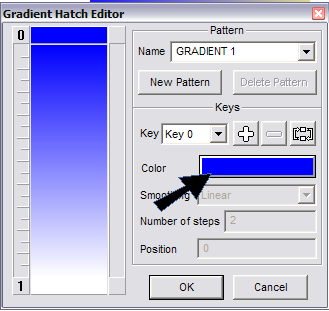
This opens the Gradient Hatch Editor. Enter a Name for the pattern.By default, the gradient proceeds evenly from black to white (Key 0 to Key 1).
To change the color, click the black color square and select a new color.
If you want to change the white at the bottom, click the bottom of the preview window, at Key
- The color square changes to white, and you can click it to select a new color.
To add a new color break point, click the “plus” icon. This adds a break point halfway between the two end colors.
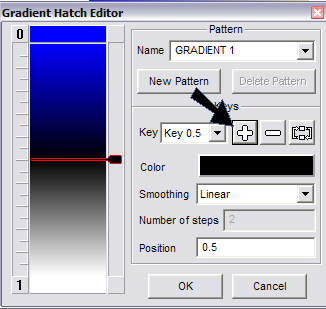
You can drag this break point to a new location. This location is indicated in the Position field, which you can edit manually.
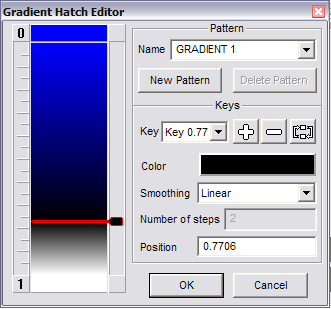
You can also click “plus” again to add more break points. To delete a break point, highlight it in the Key field and click the “minus” icon. The icon next to “minus” reverses the gradient order.
To change the new key’s color, click the preview window at this point and use the color square to select a new color.
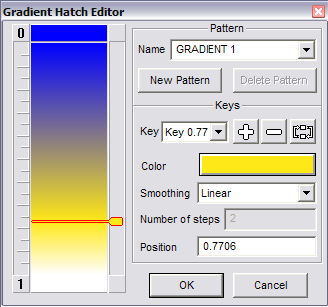
Below the color square are Smoothing options for how the color proceeds from key to key:
Linear: The color transitions evenly.
Spline: The color is more weighted around the selected key.
Step: The color transitions in solid steps. The higher the Number of Steps, the more linear the transition will appear.
When the gradient is defined, click OK to close the Gradient Hatch Editor. In the Hatch window, browse to the gradient pattern you just defined.
Click points to define the hatch boundary. This works similarly to the Line command.
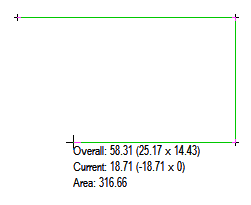
When you double-click or press Enter to complete the boundary definition, the area is filled. The boundary does not have to be closed; DesignCAD will close it with the shortest segment.

Hatch patterns can be modified in the Info Box.