Arc
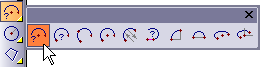
Menu: Draw / Arcs / Arc Shortcut Key: A Toolbox Icon:
Draws an arc which spans a given angle.
Point 1: Center of the arc
Point 2: Start of the arc
Point 3: Orientation of the arc (optional) Enter the Angle in the Arc window.
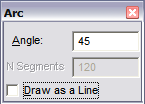
If you select Draw as a Line, the arc will be drawn as line segments that follow the shape of an arc. Otherwise the arc will be stored as an actual arc. You should normally use the arc format because it is more efficient and precise. You can use the line format if you need to distort the arc by scaling or stretching.
Example 1: Draw an arc in the XY plane with a radius of 10 and an angle of 60 degrees.Change the view setting to the Front view. Choose the Arc command and enter 60 degrees in the Angle field. Set a point anywhere on the screen for the arc’s center. Choose the Point Relative command from the Point menu or press the ‘ (single quote) key, and enter 10 for DX. Set a third point anywhere on the screen with the mouse or arrow keys. Your arc should look like the one in the illustration below.
Example 2: Create a 120-degree arc similar to the one in the figure.
Set the angle as described above, and place the points as shown in the illustration below.

Example 3: Create a third arc at an angle of 60 degrees which is parallel to the XZ plane.
Set the angle as above. Set the center point, then a point for the radius. For the third point press ‘ (single quote) key for the Point Relative command, and set DZ to 10. In the Front view this arc appears to be a straight line. You will have to look a different view to see it as an arc. In the Top view, this arc should look like the 60-degree arc in the illustration above.
N Segments: When saved as a line, this is the number of segments, into which the object will be divided.